Retro computing with a touch of modern and the home for all things, retroCombs (aka Steven Combs).
Disclosure Statement: When you click on links to various merchants on this site and make a purchase, this can result in this site earning a commission. Affiliate programs and affiliations include, but are not limited to Amazon, the eBay Partner Network, and/or others.

BUILD & CODE: Arduino Hello World! (build-code-operate)
by Steven B. Combs, Ph.D.
A project that brand-new Arduino users often complete is to connect an LED to the board and create a program to turn on the LED. This is the Arduino’s equivilent of the programmer’s “Hello World!”” I wanted the first student project, for a course I am teaching, to be similar but with a “logic programming” spin that intergrates more hardware and programming fundamentals.
I developed a simple project and one that has been replicated many times; however, this post and associated video will explain each step along the way to allows students to accelerate their understanding of physical computing.
This post includes the components, files, images, video, resources, and steps necessary to recreate the project.
Objective
Using an Elegoo branded Arduino MEGA 2560 (MEGA) (#ad) and various electronic components, create a hardware and software solution that will turn on an LED when a momentary button is pressed and then turn off the LED when the button is pressed again (see video below).
Video
Below is a step-by-step video I produced for this project.
CORRECTION: In the video I state that the
intcommand is initialize. It is not. This command initializes an integer variable.
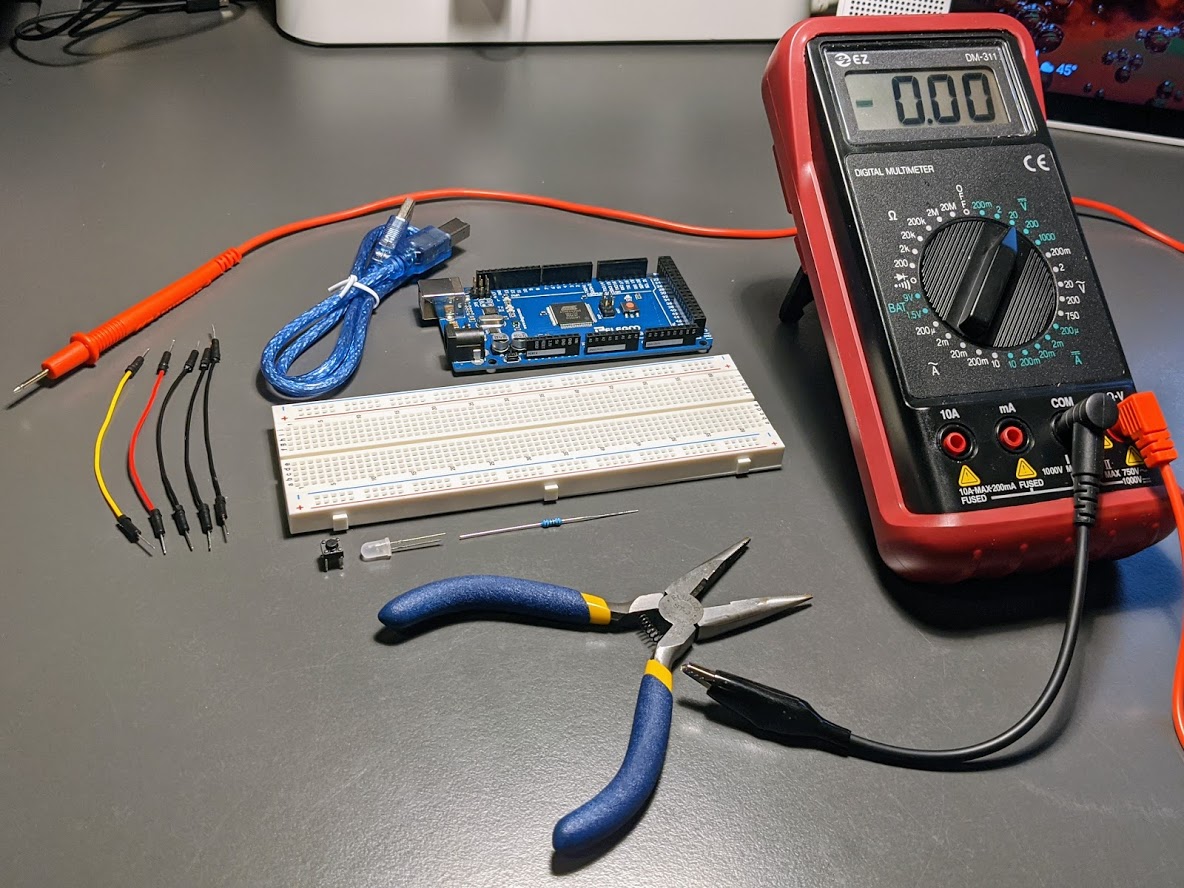
Bill of Materials (BOM)
All equipment for this project, with Amazon links (#ad), is listed below:
1 - Elegoo MEGA 2560: The MEGA is overkill but is the device I recommend for students. The additional digital I/O ports provide the option to create more complex projects.
1 - USB Cable: Use to upload code from the Arduino IDE and to provide power to the MEGA.
1 - Arduino IDE: Use the link to the left and follow the instructions to download and install the IDE on your computer.
NOTE: If you use Ubuntu or Ubuntu Mate might I recommend my install instructions.
1 - Elegoo Breadboard: Use the breadboard to prototype the project.
1 - Momentary push-button switch: This tiny push-button switch makes a click when pressed and is perfect for the breadboard. The MEGA has a push-button switch. It serves as a device reset. https://www.youtube.com/embed/FcK–sJlcJI 1 - Diffused White LED: A standard white LED with a frost cover to diffuse the light.
1 - 1K Ω (ohm) resistor: Connect this resistor between the power source and the LED. This resistor is larger than necessary but will ensure we protect our LED when we apply power. The color code for a 1K Ω resistor is Brown, Black, Red, and Gold. https://www.youtube.com/embed/FcK–sJlcJI
NOTE: The red band is often hard to discern, especially if your resistor is blue. If you are unsure, use a Volt/Ohm meter to verify the value. Set the meter to 2k and connect the black lead to the COM port on the meter and the red lead to ΩV port.
5 - Male to male breadboard jumper wires: Prototyping on the breadboard a snap with these wires!
1 - Small 5” needle nose pliers (optional): Use to insert resistor legs into the breadboard. More tips in the video.
1 - Volt/Ohm multimeter (optional): Optional but you should own one!
NOTE: If you don’t want to source the electronic parts individually, purchase the $59 Elegoo MEGA 2560 Most Complete Starter Kit. It contains everything you need for this exercise and much, much, more! It’s a great value and is often on sale. You can even view a video I produced that shows and explains the contents of this kit.
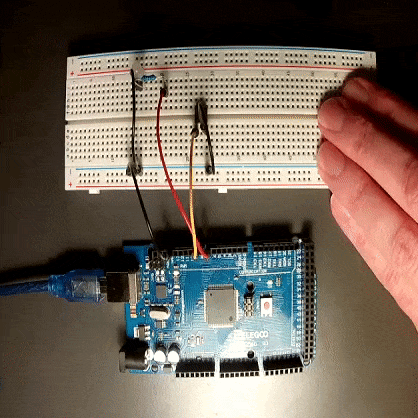
Circuit
Below is a Fritzing image that serves as instructions for project assembly. Watch the video if you don’t understand a step or two in the process.

Programming
Once the components are placed and wired, code the project in the Arduino IDE. Below is the code for this project. Do not copy and paste. Type the code and include your own comments (//) to explain each line. These comments will remind you later what each line accomplishes.
View code as GIST that includes comprehensive comments.
Upload to Mega
Uploading the code is easy; if the Arduino IDE is installed and setup properly.
- Select Tools / Board from the Arduino IDE.
- Select the Arduino/Geninuino MEGA or MEGA 2560 from the Arduino boards available.
- Select the serial port used to connect the Arduino to the computer. This will vary based on computer and operating system.
- Select the upload button in the Arduino IDE toolbar menu.
If the program contains no errors, the IDE will compile the code and send it to the MEGA.
Operation
Press the button to verify the LED turns on. Press the button again to verify the LED turns off. If you do not see the desired results, verify the code, make necessary changes, and upload the program again. Troubleshooting is a part of the learning process.
Summing Up
Hopefully this project was a great way to learn more about the MEGA, the Elegoo kit components, and the Arduino IDE. I would love to read your comments. If you have any, drop them in the comments section below.
References
Below are the references for this project: