Retro computing with a touch of modern and the home for all things, retroCombs (aka Steven Combs).
Disclosure Statement: When you click on links to various merchants on this site and make a purchase, this can result in this site earning a commission. Affiliate programs and affiliations include, but are not limited to Amazon, the eBay Partner Network, and/or others.

Install Arduino IDE on Chrome OS - now with device support!
by Steven B. Combs, Ph.D.
After my previous Arduino IDE post, I wondered if I could now install the latest version of the Arduino IDE on Chrome OS using the Crostini Linux VM. In the past, you could use the apt package manager to install the Arduino IDE but the version was woefully outdated.
I was confident I could get the latest version of the IDE installed, but then pushed my challenge further to see if I could even connect the Chrome OS device to the Arduino and upload a program. In theory, this should be possible since the latest version of Chrome OS on the beta channel (version 80) provides the option to give the Linux VM access and permission to “non-supported” USB devices.

I was dubious about hardware connectivity; however, with the IDE installed I could at least do some development on my Pixel Slate. Much to my surprise, and after much trial and error, I was able to install the Arduino IDE and upload code to an Elegoo MEGA 2560! I was so excited, I just had to share my process.
NOTE 1: This post was updated on 2020-05-16 with refinements and updates from my readers. Many thanks to those who are making this post even more valuable! Join us by leaving your comments below.
NOTE 2: These steps were tested on both a Pixelbook and Pixel Slate using Chrome OS version 80 on the beta channel.
NOTE 3: I used the Linux guide available at https://www.arduino.cc/en/guide/linux as a basis for these instructions.
NOTE 4: This post assumes you have the Crostini VM enabled on your device. If not, visit Settings / Enable Linux beta.
Before I share the process, here’s a video showing the Arduino IDE uploading code from my Pixel Slate to an Arduino Uno.
Download Chrome OS
-
Chrome OS’s Crostini virtual machine (VM) uses Debian (version 9 on Chrome OS v80 and now 10 on Chrome OS v82), a Linux distribution. Because of this, we can use the software found on the Arduino download page at:
-
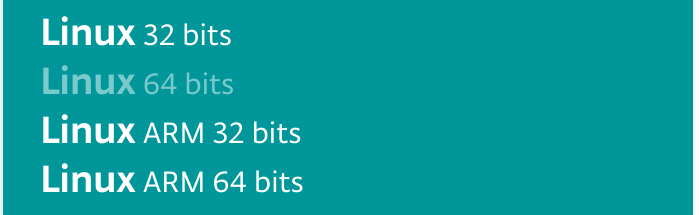
Scroll down the page and click the Linux 64 bits download link as shown below; unless your Chrome OS device uses an ARM processor and in that case choose the Linux ARM 64 bits download link.
-
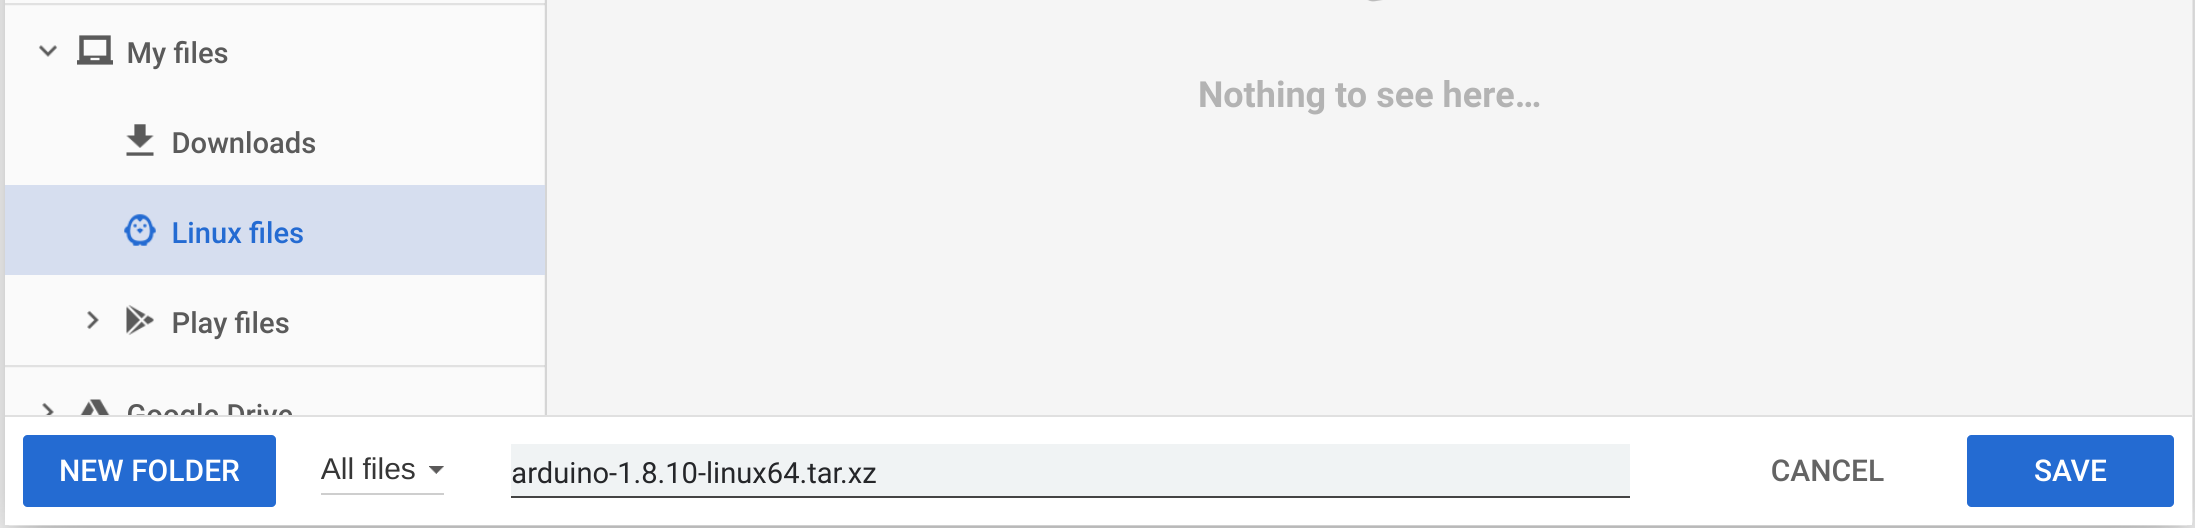
Download the file directly to the Chrome OS Linux folder as shown in the image below:
Extract the compressed file
The Arduino IDE comes inside a compressed .tar.xz file format. Use the Terminal to extract the file.
- Activate the Terminal from the Launcher
-
Because the file is in the Linux folder, the compressed file is in your Linux home directory. Verify with the
lscommand and you should see a file name similar to the following:arduino-1.8.10-linux64.tar.xz -
By default, Debian does not provide the option you need to decompress a
.tar.xzfile. You can install the required package using the commands below:sudo apt update sudo apt install xz-utils -
Extract the application files into the
/optfolder. This is a good Debian practice and will keep the home folder clean of excess files. Type the following in the terminal:sudo tar -C /opt -xf arduino-1.8.10-linux64.tar.xzTIP: you do not need to type the entire name of the file in the command above. Type
arduinofollowed by the tab key to autocomplete the filename.
Install the Arduino IDE package
Inside the extracted folder is an install script. Use the script to complete the installation using the instructions below:
-
Move into the new folder created with the following command:
cd /opt/arduino-1.8.10 -
Install the Arduino IDE using the command below:
sudo ./install.sh -
The Terminal is going to throw a lot of scary messages at you, similar to the following, but don’t worry about them:
 Adding desktop shortcut, menu item and file associations for Arduino IDE...xdg-desktop-menu: No writable system menu directory found.

 xdg-desktop-menu: No writable system menu directory found.
 touch: cannot touch '/root/.local/share/applications/mimeapps.list': No such file or directory
 /usr/bin/xdg-mime: 803: /usr/bin/xdg-mime: cannot create /root/.local/share/applications/mimeapps.list.new: Directory nonexistent

 done!
Install Desktop Launcher
This is where it gets strange. You will execute the install file one more time but without sudo.
`./install.sh`
More errors will appear but again, ignore them. When complete, a Desktop folder is created in your home directory (cd ~) with an arduino-arduinoide.desktop file inside. This .desktop file makes the Arduino IDE accessible via the Launcher. Below are the contents of the file:
[Desktop Entry]
Type=Application
Name=Arduino IDE
GenericName=Arduino IDE
Comment=Open-source electronics prototyping platform
Exec=/opt/arduino-1.8.10/arduino
Icon=arduino-arduinoide
Terminal=false
Categories=Development;IDE;Electronics;
MimeType=text/x-arduino;
Keywords=embedded electronics;electronics;avr;microcontroller;
StartupWMClass=processing-app-Base
Do nothing with the contents of the file but ensure it is not deleted. A review of the contents helps us learn more about how Linux applications are accessible by various desktop environments.
Start the Arduino IDE
Activate the Launcher to view the new icon named Arduino IDE as shown in the image below.
![]() lin
lin
TIP: Right-click on the Arduino icon and select Pin to Shelf for quick access.
Clean up your Linux home directory
Delete the original compressed file. This is as easy as selecting the file in the Chrome OS Files app and clicking the delete icon in the upper-right hand corner. Make sure you do not delete the Desktop folder.
Enable USB devices in the VM
USB device support is not activated by default. As mentioned, I assume you are on the Chrome OS beta channel with at least version 80 (see note below). We will enable a Chrome OS flag to give us access to unsupported USB devices in the VM:
-
In the Chrome Address Bar, type the following:
chrome://flags -
In the Search Flags area, type the following:
Crostini USB - Select the Enabled option in the drop-down menu next to the # Crostini Usb Allow Unsupported flag.
- Reboot the Chrome OS device.
As of Chrome OS v83, you no longer need to activate this flag.
Connect the Arduino to the Chrome OS device
If you have a Pixelbook or Pixel Slate, you will need a USB-C (3.1) to USB-B (2.0 or 3.0) hub. There are many good options. I recommend this one (#ad). Plug the hub into the device and then plug the Arduino into the hub. The Arduino’s power light will turn on.
If you have a Chrome OS device with an older USB 3.0 or USB 2.0, plug the Arduino to the port. The Arduino’s power light will turn on.
So far so good!
As noted by reader, Nathan Morse, “Let the record show that you must connect the Arduino[-esque] device to the USB before trying to change the Linux USB setting in Chrome OS. Totally works, now! You are a hero, @Steven Combs!” - Well thanks so much Nathan for the shout-out and the solution to a longstanding Arduino clone connection problem. This solutions is reported as working on Chrome OS v81.
Give Linux access to the USB device
Chrome OS now has access to the Arduino but now we want to pass that permission to the Linux VM using the steps below:
- Open the Settings application.
- Select Linux(Beta) / USB Preferences.
- In the USB Preferences flip the toggle to the right to allow the “USB device from Arduino (www.arduino.com)” USB device.
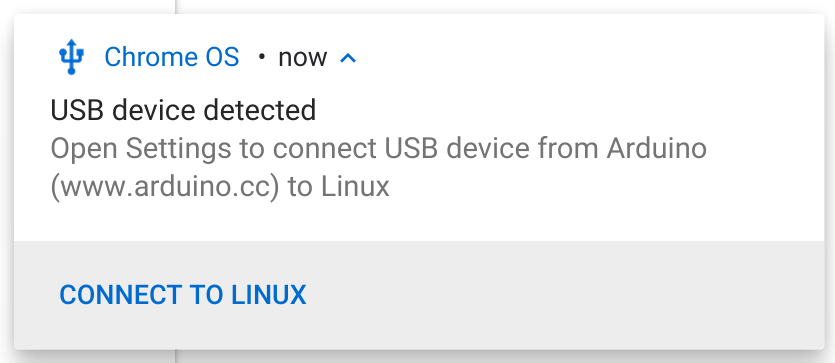
NOTE: The page states that, “Linux won’t remember a USB device after it’s removed.” And it won’t! When you shutdown your Chrome OS device or disconnect the Arduino or the USB Hub, you will need to allow permissions when you reconnect. Luckily, Chrome OS will display the notification below to remind you when a device is connected:
Select the device in the Arduino IDE
Let’s see if the Arduino IDE has access to the USB device using the following steps:
- Open the Arduino application.
-
Select the Tools / Board: menu item.You will see an image similar to the one shown below:
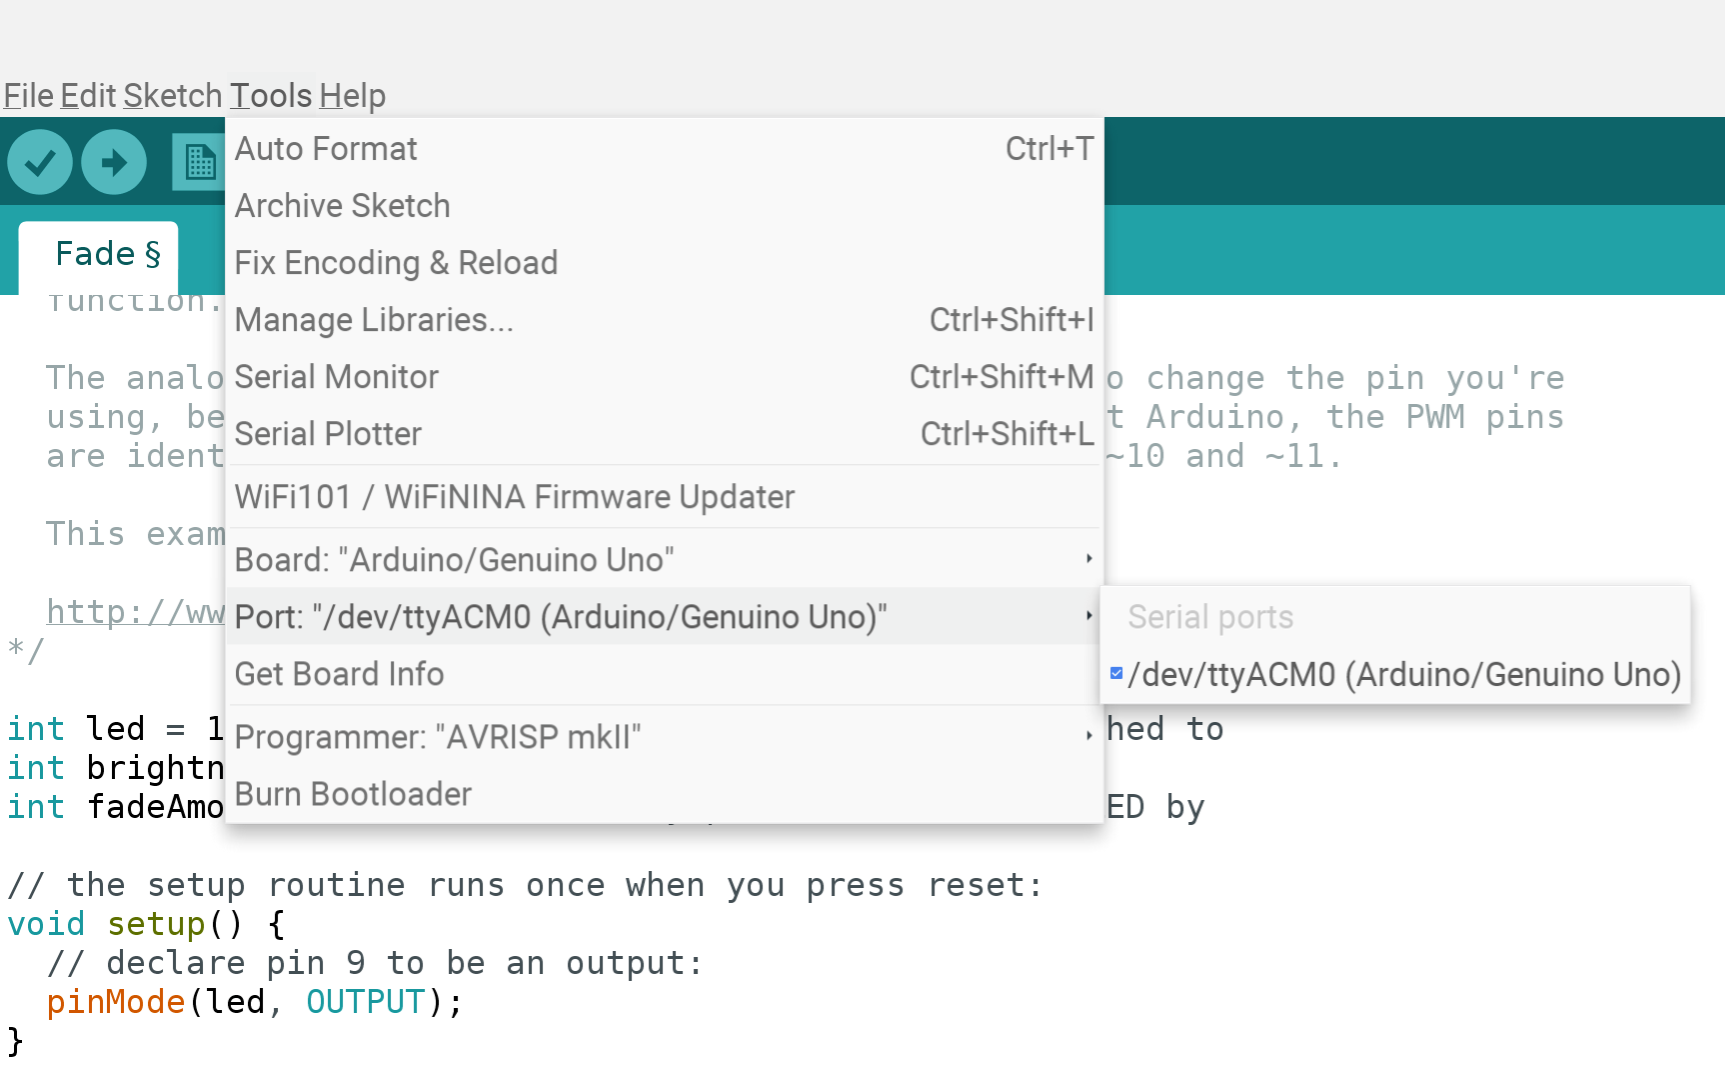
- The first step before uploading a program is to select the type of Arduino board. Make that selection in the Board: menu.
-
Below the Board: menu is the Port: menu. If you followed all the steps above, you should see something similar to the one shown in the image and in the line below:
"/dev/ttyACM0 (Arduino/Genuino Uno)" - Select the Port: menu and you will see one available device.
Load or code a program, upload the program to the Arduino, and test!
What this means
Google continues to refine Linux support on Chrome OS devices. Just months ago, it was not possible to install the Arduino IDE and use it to code and control an Arduino device. While this is still in beta and you have to activate a flag, it’s just a matter of time before this functionality becomes baked into Chrome OS for the masses.
Installation of the Arduino IDE on a Chromebook is an educator’s dream. If you are a high school teacher, you likely use a Chromebook as your “daily driver.” In order to teach Arduino and physical computing concepts, you likely had to pull out a leftover Windows machine from the IT closet for demonstrations. You no longer need to do this! You can now use a Chromebook.
I am very excited about that capability this brings to my Pixelbook and Pixel Slate. As you can tell from the multiple exclamation marks in this post, I am very excited that I can use Chrome OS for one of my favorite hobbies and as part of my job. I hope others find this post helpful. Happy programming!