Retro computing with a touch of modern and the home for all things, retroCombs (aka Steven Combs).
Disclosure Statement: When you click on links to various merchants on this site and make a purchase, this can result in this site earning a commission. Affiliate programs and affiliations include, but are not limited to Amazon, the eBay Partner Network, and/or others.

BUILD & CODE: Elegoo Arduino starter kit servo, LED, and encoder project
by Steven B. Combs, Ph.D.
Expanding on my previous OPEN THE BOX and LED and pushbutton Arduino projects, this post provides instructions to control a servo motor with and encoder on an ELEGOO Arduino Mega 2560; with a twist (pun intended)!
This project will not only introduce the student, or new Arduino user, to micro servo control using a rotary encoder but also how to assemble a complete hardware and coding system using custom programming functions (subroutines).
This post includes the components, files, images, video, resources, and steps necessary to recreate the project.
Objective
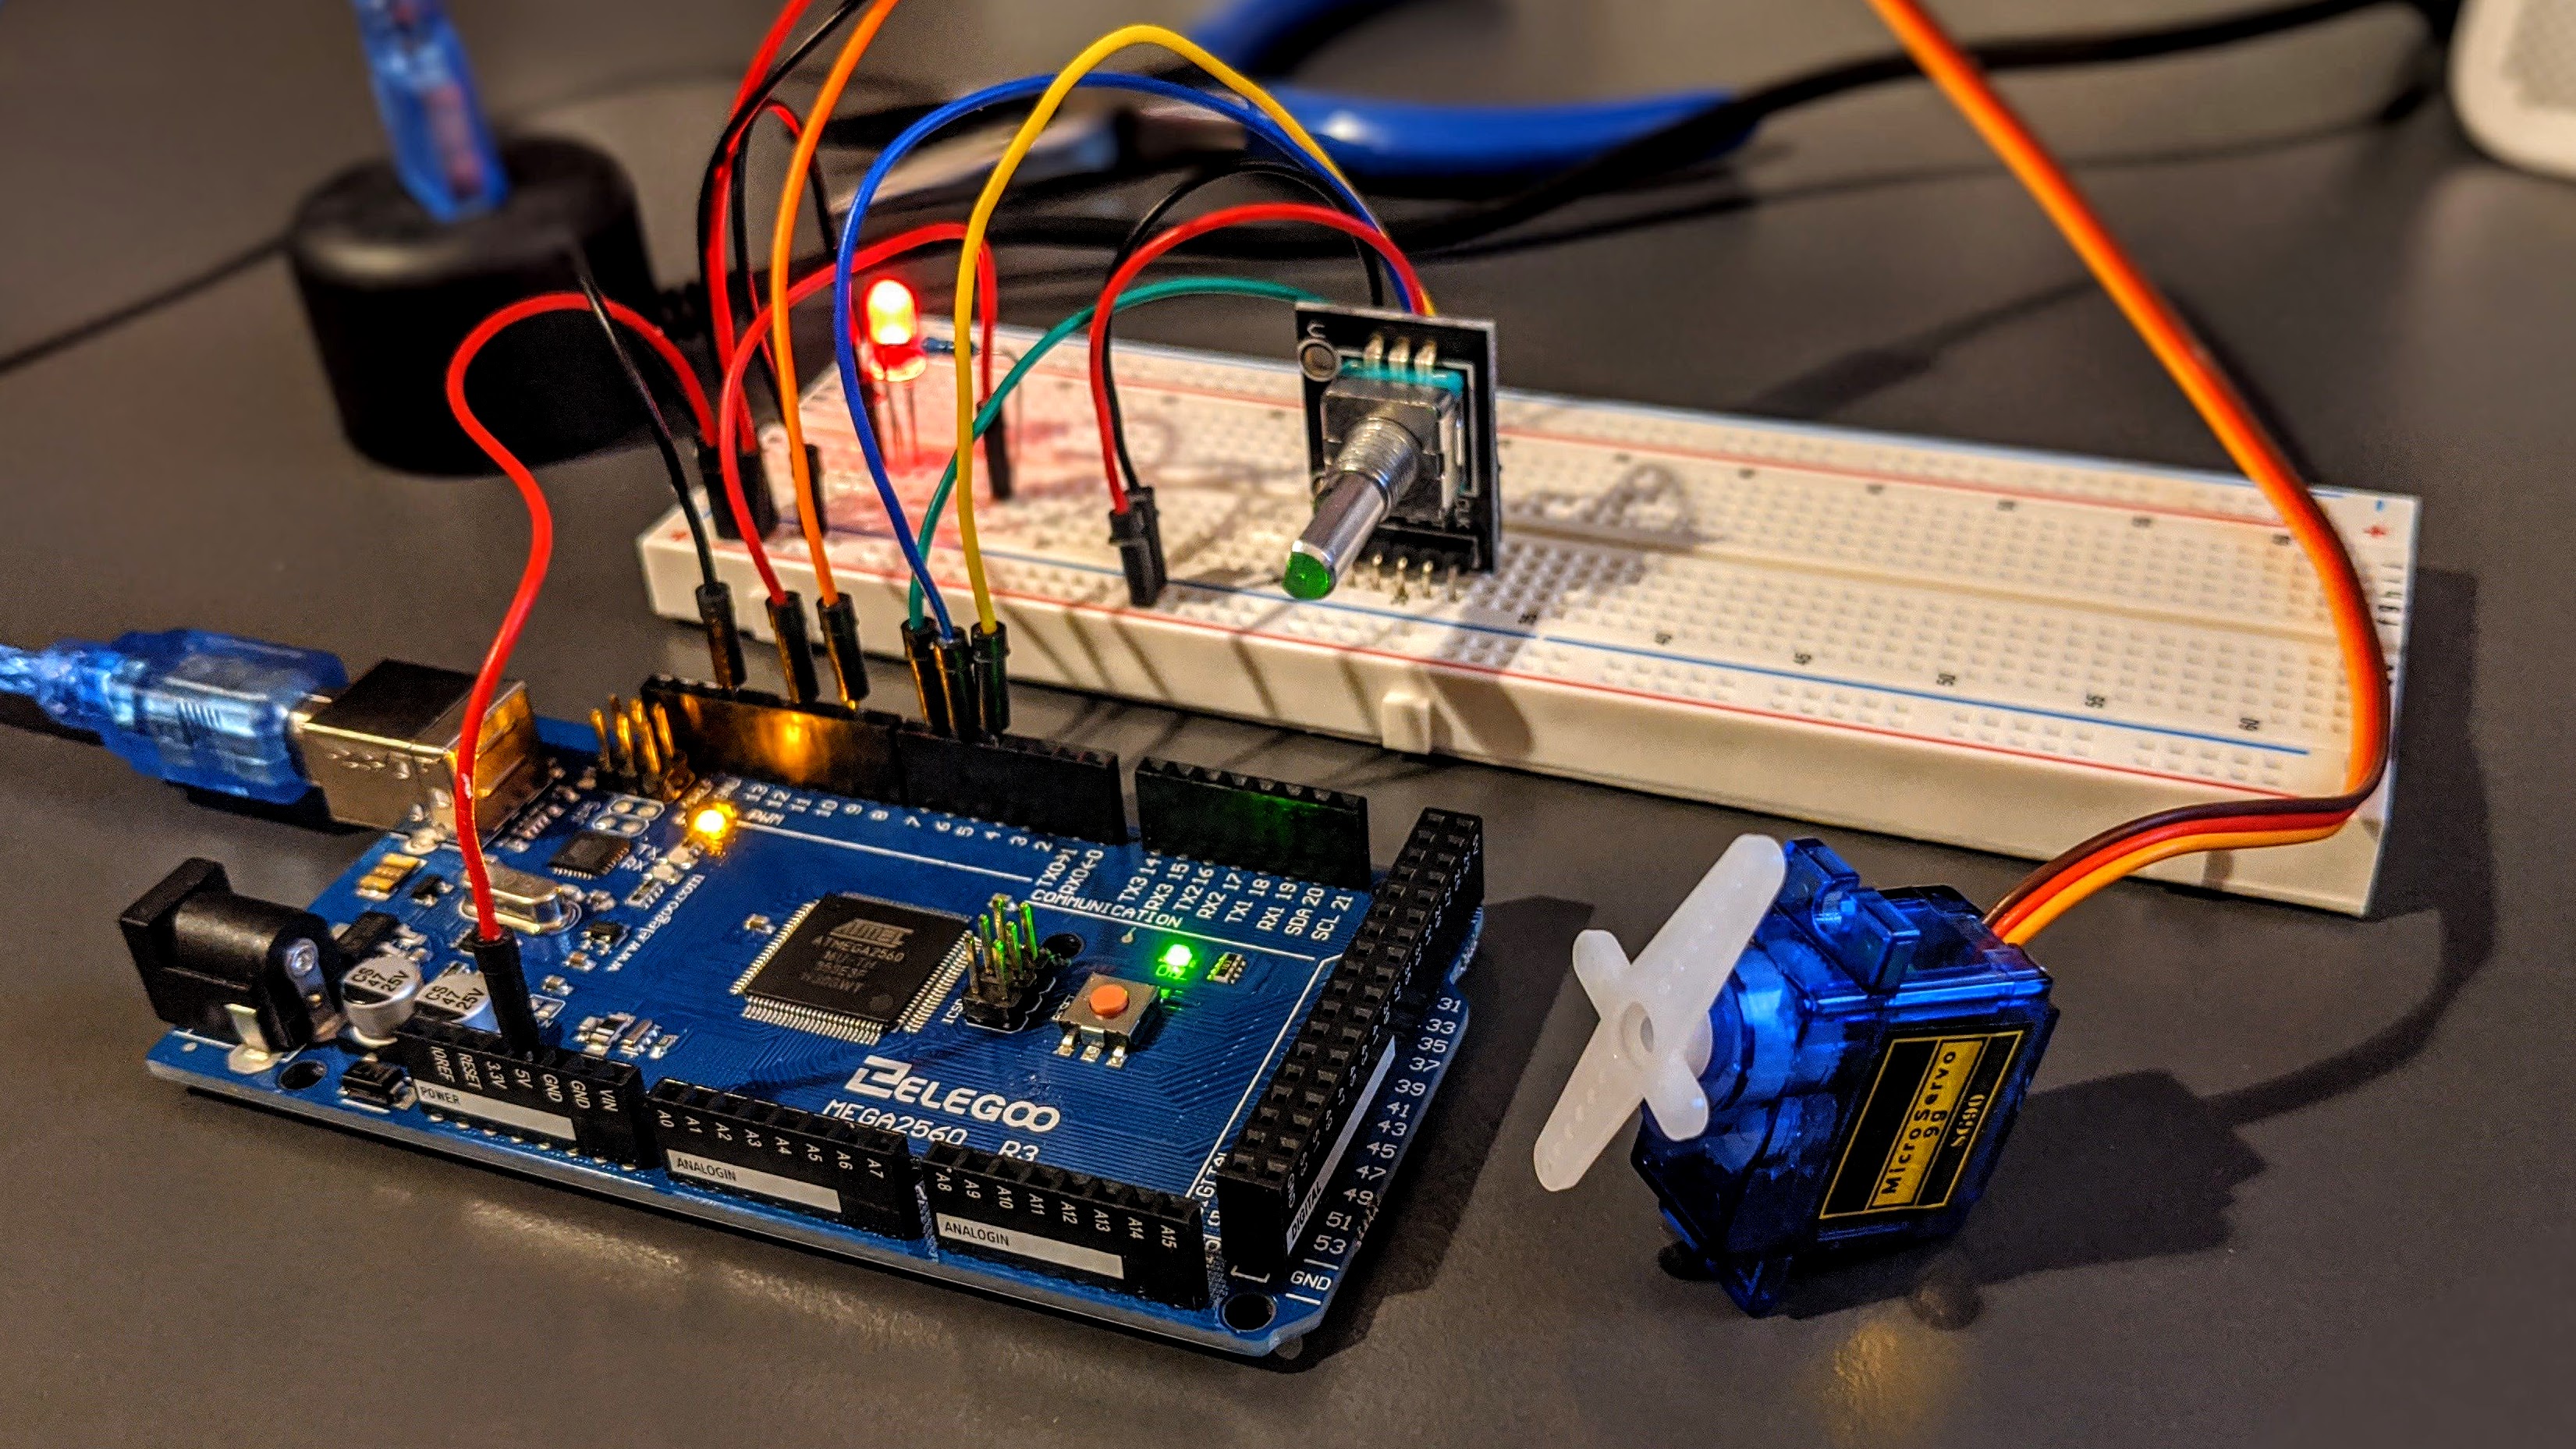
Using an Elegoo branded Arduino MEGA 2560 (MEGA) (#ad), or common Arduino variants, and various electronic components, create a hardware and software solution that will use a rotary encoder to control a micro servo. Before the micro servo can be controlled, the user must press a momentary switch. When this switch is pressed, a red LED will illuminate indicating the encoder control is now active. When the momentary switch is pressed again, the encoder control is deactivated.
Video
Below is a step-by-step video I produced for this project.
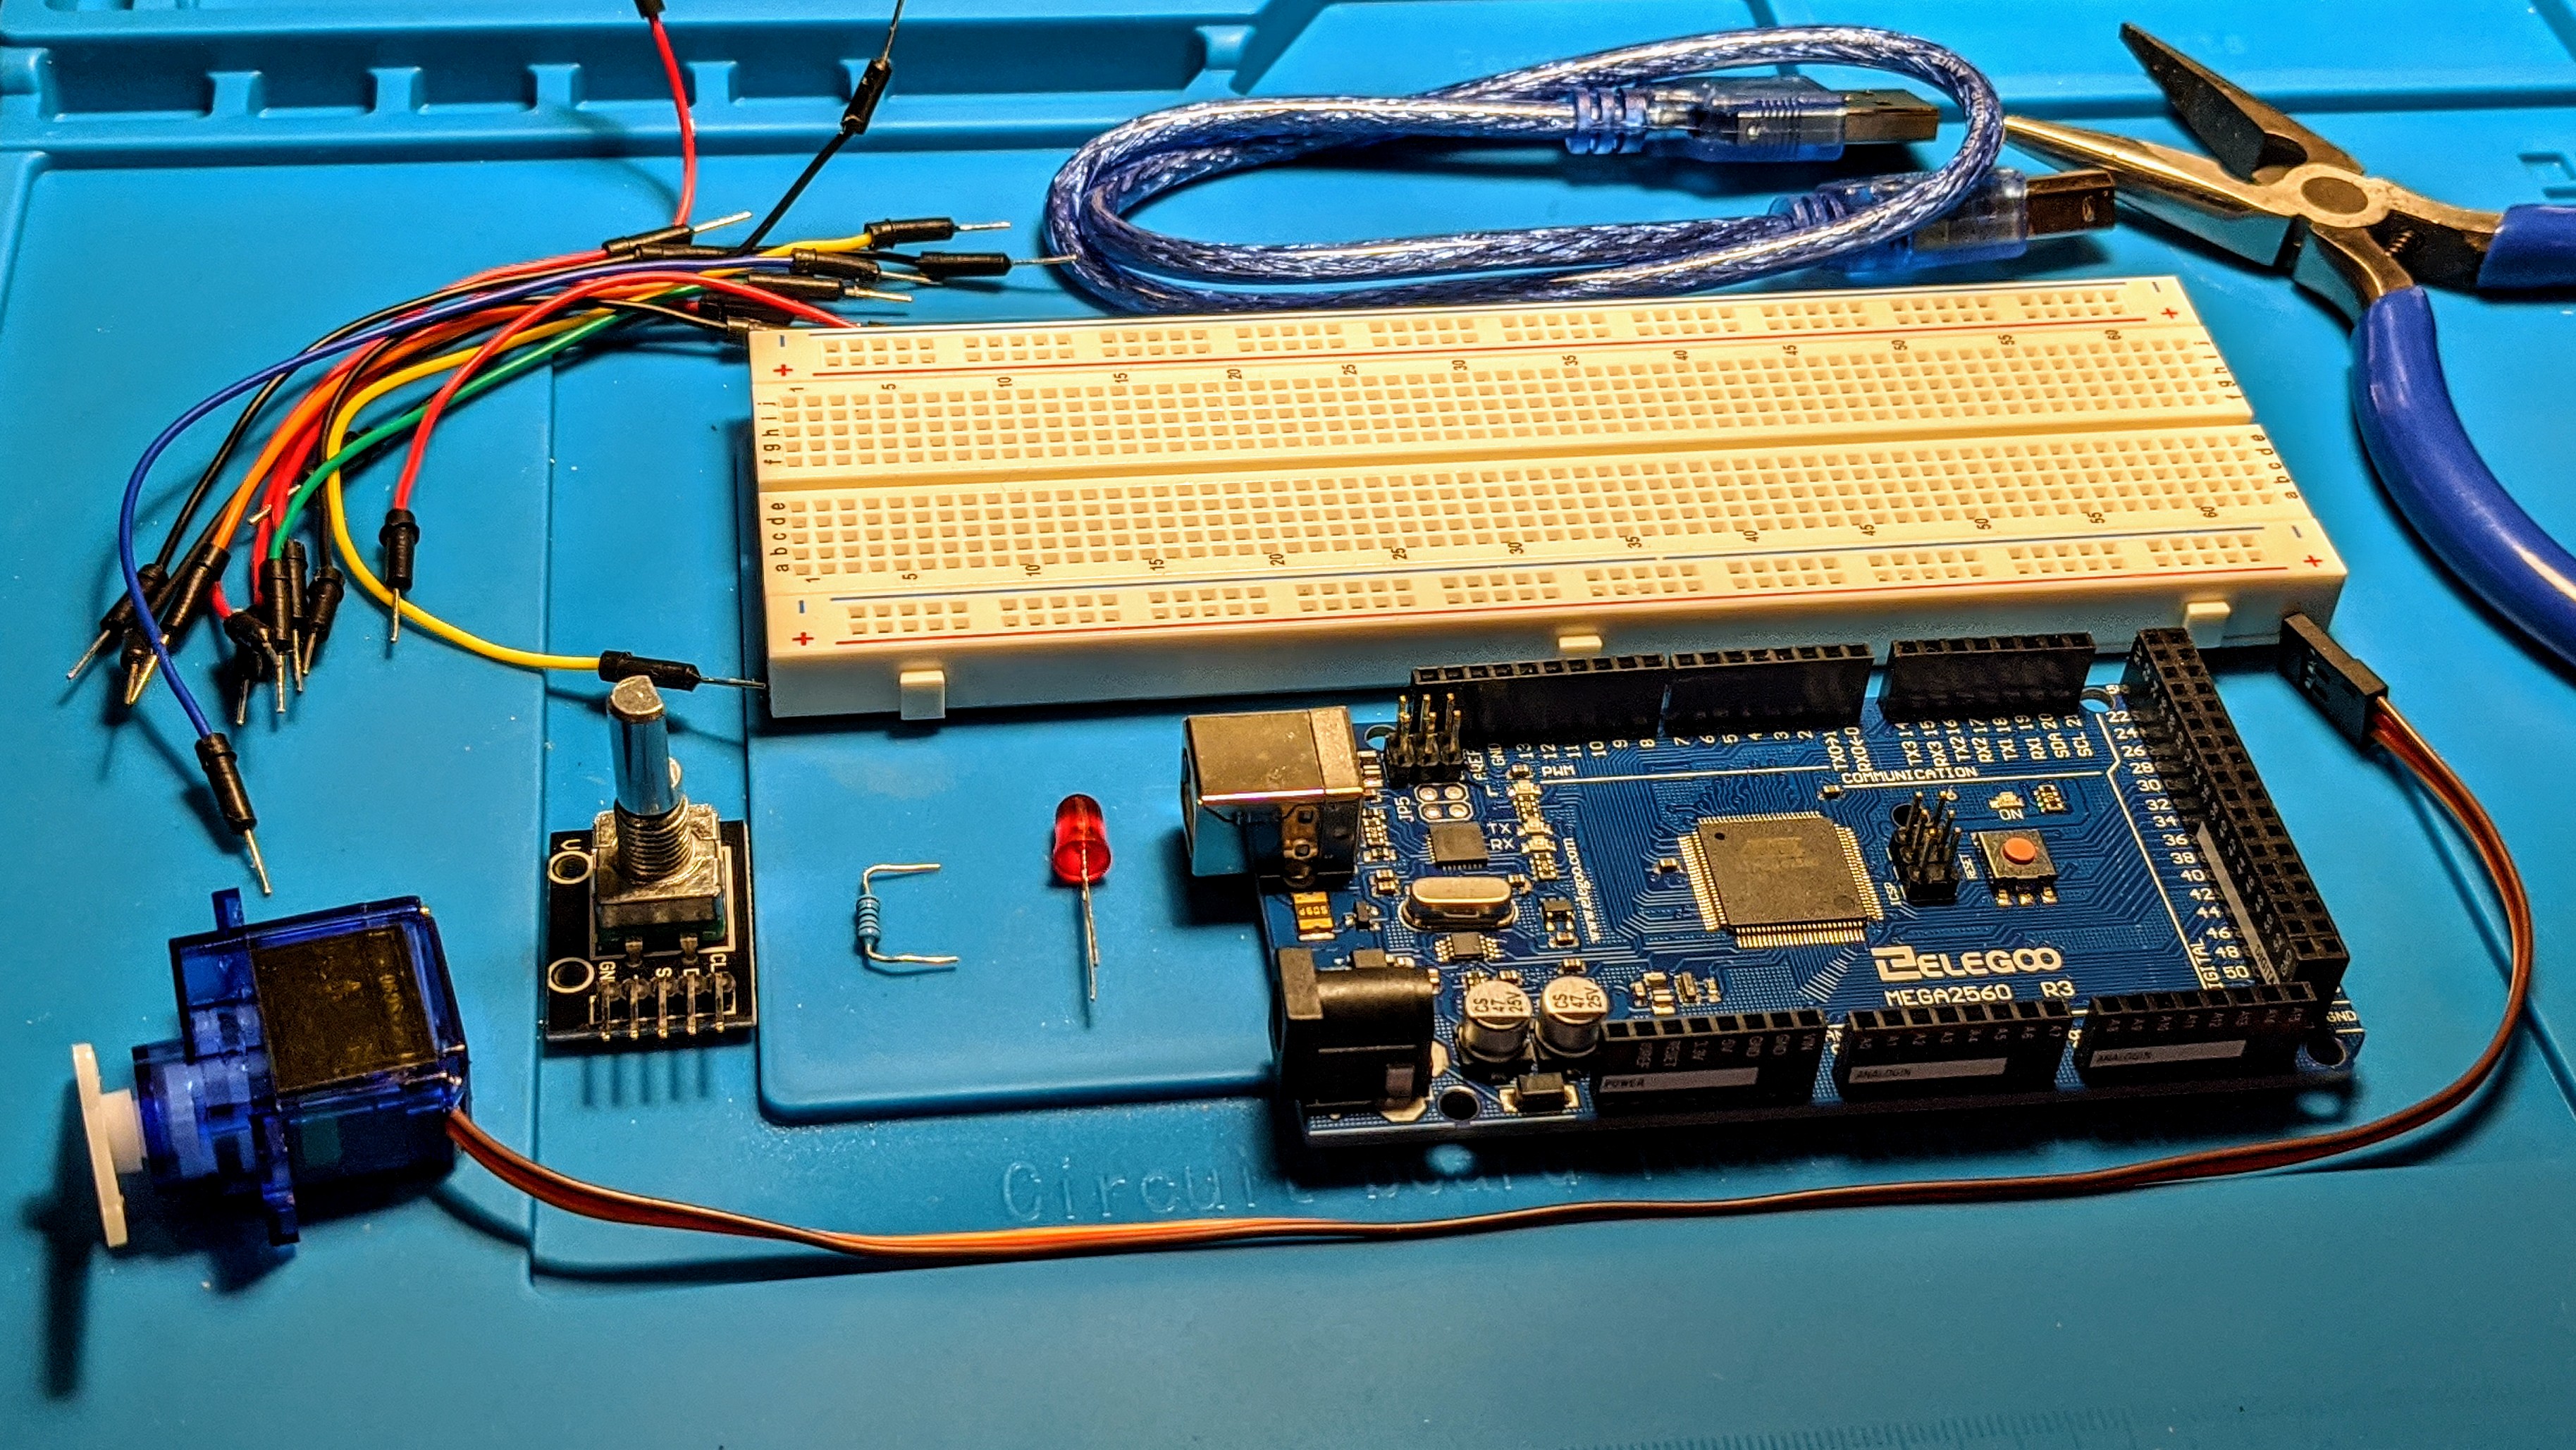
Bill of Materials (BOM)
All equipment for this project, with Amazon links (#ad), is listed below:
NOTE: If you don’t want to source the electronic parts individually, purchase the $59 Elegoo MEGA 2560 Most Complete Starter Kit (#ad). It contains everything you need for this exercise and much, much, more! It’s a great value and is often on sale. You can even view a video I produced that shows and explains the contents of this kit.
1 - Elegoo MEGA 2560: The MEGA is overkill, but is the device I recommend for students. The additional digital I/O ports provide the option to create more complex projects.
1 - USB Cable: Used to upload code from the Arduino IDE and to provide power to the MEGA. /arduino/2020/01/11/elegoo-mega-starter-kit.html
1 - Arduino IDE: Use the link to the left and follow the instructions to download and install the IDE on your computer.
1 - Elegoo Breadboard: Use the breadboard to prototype the project.
12 - Male to male breadboard jumper wires: Prototyping on the breadboard a snap with these wires and you need various sizes and colors!
1 - 1K Ω (ohm) resistor: Connect this resistor between the power source and the LED. This resistor is larger than necessary but will ensure we protect our LED when we apply power. The color code for a 1K Ω resistor is Brown, Black, Red, and Gold.
1 - Red LED: I use a standard red LED as a power indicator.
1 - Rotary Encoder: This device will provide rotational control of the servo motor.
1 - Micro Servo SG90: A micro servo that is easily powered by an Arduino and controlled by the encoder above.
1 - Small 5” needle nose pliers (optional): Used to insert resistor legs into the breadboard. More tips in the video.
1 - Volt/Ohm multimeter (optional): Optional but you should own one!
Below is an image of all the materials required for this build and code project.
Circuit
Below is a Fritzing image that serves as instructions for project assembly. Watch the video if you don’t understand a step or two in the process.
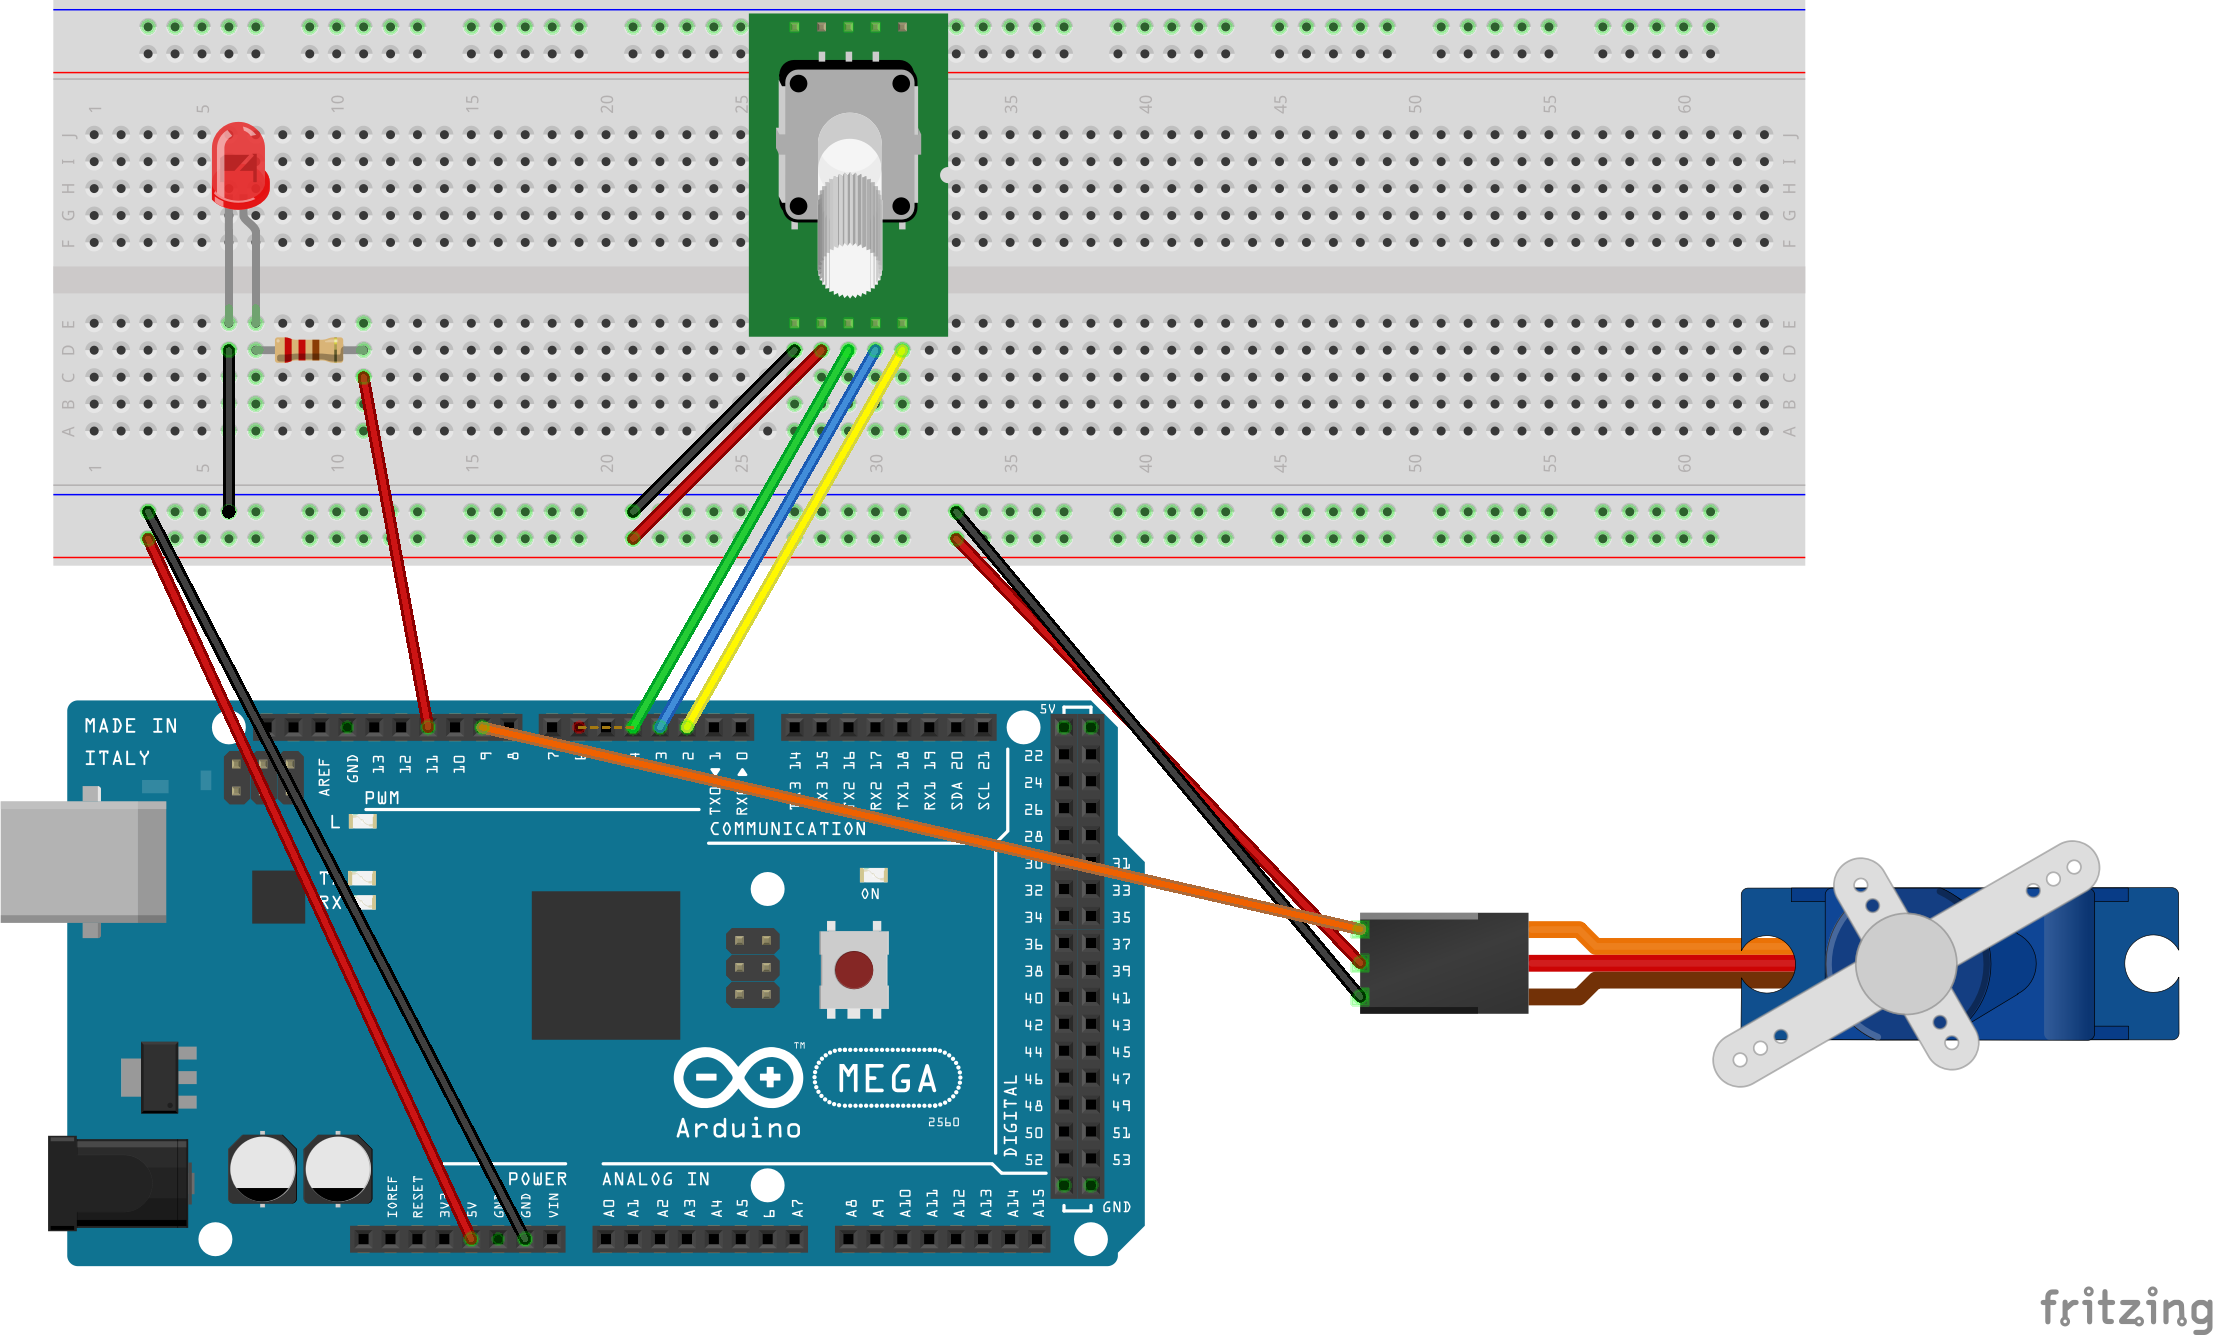
View/Print a Google Doc that contains a Fritzing construction image and code on a 2 page document. Print and use the document to construct and code your own project.
Programming
Once the components are placed and wired, code the project in the Arduino IDE. Below is the code for this project. Do not copy and paste. Type the code and include your own comments (//) to explain each line. These comments will remind you later what each line accomplishes.
View code as GIST on GITHUB and fork your own copy.
Upload to Arduino Mega 2560
Uploading the code is easy; if the Arduino IDE is installed and setup properly.
- Select Tools / Board from the Arduino IDE.
- Select the Arduino/Geninuino MEGA or MEGA 2560 from the Arduino boards available.
- Select the serial port used to connect the Arduino to the computer. This will vary based on computer and operating system.
- Select the upload button in the Arduino IDE toolbar menu.
If the program contains no errors, the IDE will compile the code and send it to the MEGA.
Operation
Rotate the encoder, nothing will happen. Press the encoder button and the LED will glow. Rotating the encoder clockwise will cause the servo to move clockwise and vice versa. Press the encoder button again to disable servo controls.
Summing Up
This project took me much longer than I expected. For some reason, the logic to toggle encoder control on and off required much trail, error, and code refining. When I first started, the code was twice as long! This project introduces users to the power of functions and updates older programmers on the use of these modern subroutines. I don’t see Arduino programmers using this feature often and believe their use is key to bug squashing and troubleshooting. I’m not sure I would have overcome my programming challenges had I not split this program into loop(), servo(), and button() functions.
Hopefully this project was a great way to learn more about the MEGA, the Elegoo kit components, servo motors, encoder, functions, and the Arduino IDE. I would love to read your comments. If you have any, drop them in the comments section below.
Reference
Below is the primary reference for this project:
In-Depth: How Rotary Encoder Works and Interface It with Arduino