Retro computing with a touch of modern and the home for all things, retroCombs (aka Steven Combs).
Disclosure Statement: When you click on links to various merchants on this site and make a purchase, this can result in this site earning a commission. Affiliate programs and affiliations include, but are not limited to Amazon, the eBay Partner Network, and/or others.

LINUX TIP: Turn the Caps Lock key into a launcher key
by Steven B. Combs, Ph.D.
As a guy who uses multiple platforms (Mac OS, ChromeOS, and Elementary OS), I like to ensure that my typing muscle memory remains the same across platforms. On each of these platforms I use the following launchers:
Chrome OS is my daily driver. I use both a Pixelbook and a Pixel Slate. Chrome OS devices lack a dedicated Caps Lock key in favor of using that key to activate the default Chrome OS launcher; Search. Over time, I’ve come to really like the use of the Caps Lock key as a launcher and have found ways to map both my Mac and Linux computers to use the Caps Lock key for their respective launchers.
This post covers the process for my Linux computer; using the wonderful and beautiful Elementary OS. My steps should work on most Linux distributions, especially those that are Debian based; however, one part of the puzzle, launching the script at startup, will differ on other Linux distributions.
The process may look daunting to a new Linux user, but trust me, it’s not that hard an along the way you will learn a few things about how Linux operates. Let’s get started.
Create a Bash script
This solution requires the use of a script (unlike my Mac OS solution). Follow these simple steps:
- Open the Terminal.
-
You will be in your account’s home directory but you can always use the command below to verify:
cd ~ -
To create the script, type the following at the command prompt to load the nano editor with a new file:
nano xmodmap.sh -
In the nano editor (or other editor of your choice such as vim or vi), enter the following:
#!/bin/bash setxkbmap -option caps:none xmodmap -e "keycode 66 = Scroll_Lock" xmodmap -e "keycode 78 = Caps_Lock" - Save the file by typing
CTRL+Xand follow the prompts to save the file.
The script is now in your home directory. Below is a table that describes each of the script’s commands:
| Command | Description |
|---|---|
#!/bin/bash |
Specifies that the script will run in bash, not another shell (such as fish) |
setxkbmap -option caps:none |
Turns on off the cap lock feature of the caps lock key |
xmodmap -e "keycode 66 = Scroll_Lock" |
Sets the Cap Lock key to be the Scroll Lock key |
xmodmap -e "keycode 78 = Caps_Lock" |
Sets the Scroll Lock key to be the Caps Lock key |
The command xmodmap is the magic that makes all of this happen. This command lets you to remap keys with simple scripting. But how did I know which keycodes and description text to use? It’s another simple command; xev.
When you type xev in the Terminal, an Event Tester window displays in the windows manager along with textual information in the Terminal as shown in the image below:
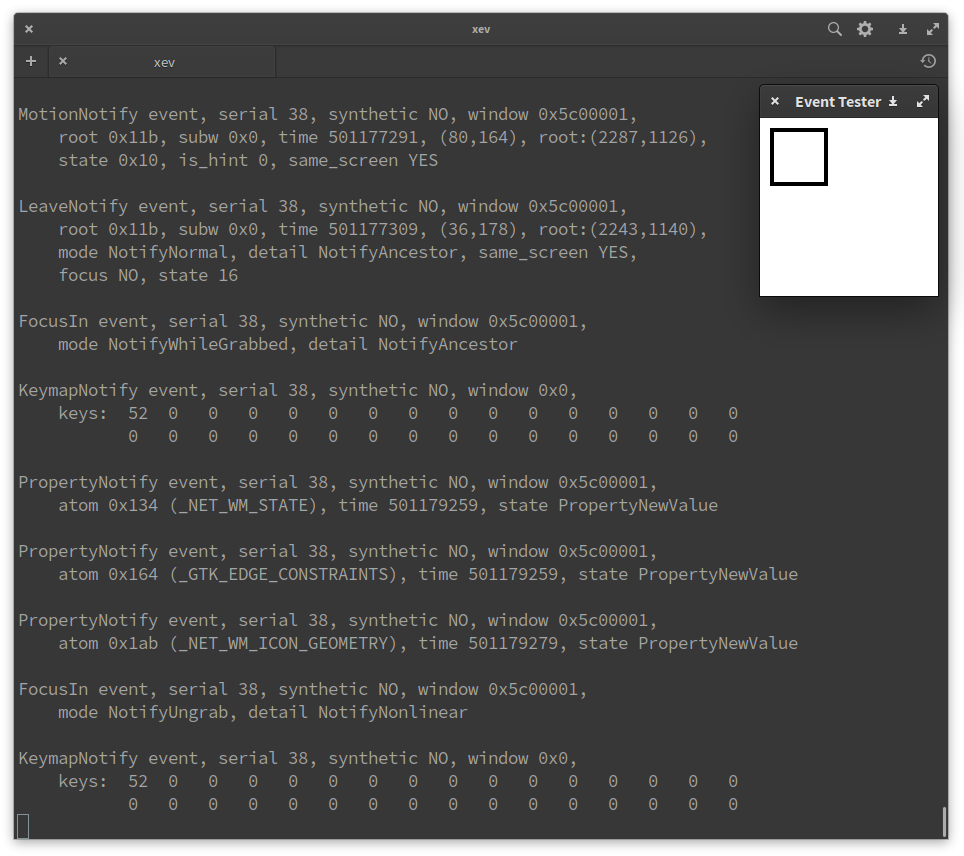
Whenever you press a key, information you need for the xmodmap command will appear. There’s more to xev so be sure to explore this command in detail. For now, you understand how I located the codes for the script.
The next question you may ask is, “Why did you choose to switch the Caps Lock key and the Scroll Lock keys?” I never use Scroll Lock, but on occasion, I might want to use Caps Lock functionality. Instead of removing this feature completely, I just reassigned it to another key that had the word “lock” on it. I thought it was also kind of clever. Some keyboard may no longer have the Scroll Lock key, but thankfully my trusty Unicomp Model M keyboard does.
NOTE: If you are interested in the Unicomp Model M, check out my review of this 80s classic keyboard that you can still purchase today!
Testing the script
Before we assign the Caps Lock key as our Albert hotkey, you have to run the script and test functionality. We will need to use the Terminal again:
-
Type the following to make the script executable:
chmod a+x xmodmap.sh -
To run the script, type the following:
./xmodmap.sh
If all went well, your Cap Lock key should no longer trigger the caps lock light and your Scroll Lock key should now trigger the caps lock light and toggle the caps lock feature. If it didn’t work, check the code to make sure you have everything correct and try again.
Setting the Albert hotkey
The last step is to set the Albert hotkey using the following steps:
- Launch Albert.
- Click the Albert notification icon.
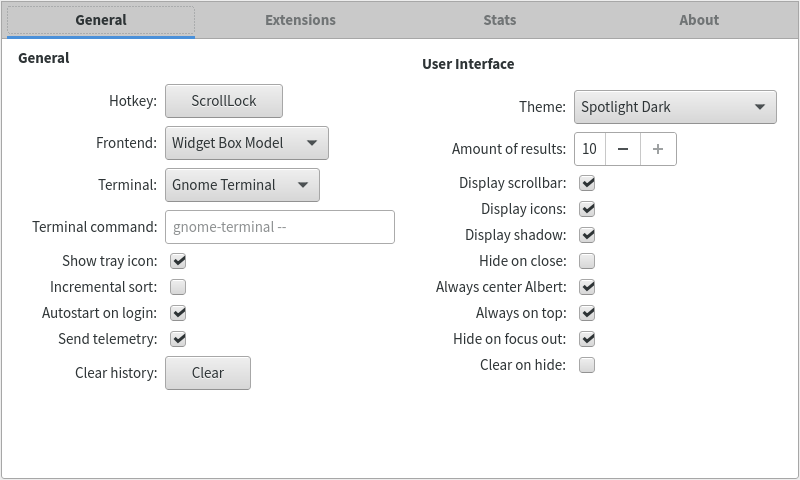
- Select Settings and the settings window will appear as shown below:
- Click the button next to the Hotkey: text.
- Press the Caps Lock key and it you should now see ScrollLock appear (as shown in the image above) because we have remapped the Caps Lock key to be the Scroll Lock key.
- Close the Setting window.
You will now be able to press the Caps Lock key to activate Albert!
Making the script run on startup
The only problem we have now is that a reboot will wipe out the xmodmap script functions. You could run the script manually every time you reboot the computer, but let’s automate this on Elementary OS (again, this step depends on our Linux distribution and the answer should only be a Google search away).
Here are the steps to launch the script at startup on Elementary OS:
- Start System Settings (Launch it using Albert and your new Caps Lock hotkey).
- Select the Applications pane.
- As shown in the image below, click the Add Startup App… button in the lower left-hand corner of screen.
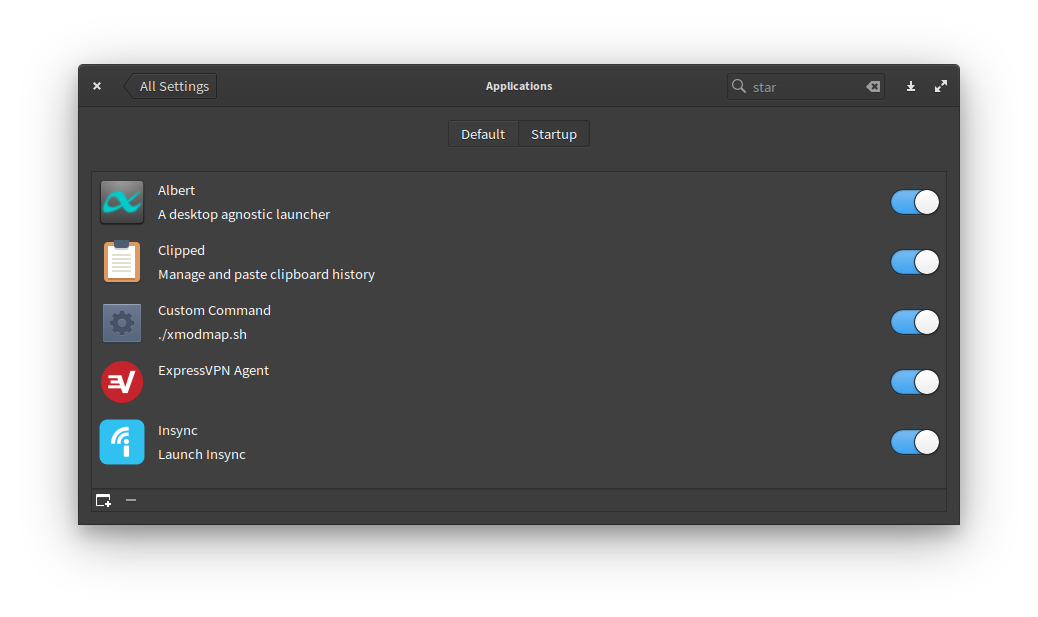
- In the custom Terminal text edit box in the lower left-hand corner type
./xmodmap.shas shown in the image below: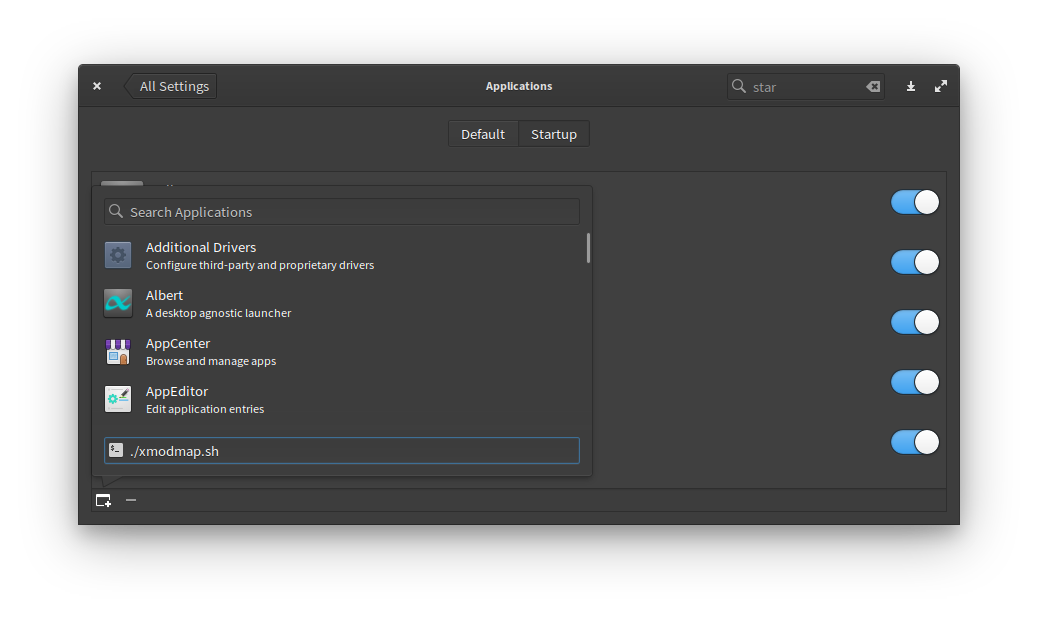
- Hit the Return key the script will be added to the default startup applications list as shown in the image below:
- Reboot the computer and if all goes well, the script will run and the Caps Lock key will act as the Albert hotkey.
And there you have it
See, that wasn’t scary and I bet along the way you thought of some other ways to automate processes on your Linux box. I’ve been searching for this answer for some time and it took a lot of trail and error before I found a solution that satisfied me.
I bet there are readers out there with other solutions or variations to this tip and I would love to read them. Drop a comment below. If you are interested in my Mac solution, let me know and I might include that in a future post.