Retro computing with a touch of modern and the home for all things, retroCombs (aka Steven Combs).
Disclosure Statement: When you click on links to various merchants on this site and make a purchase, this can result in this site earning a commission. Affiliate programs and affiliations include, but are not limited to Amazon, the eBay Partner Network, and/or others.

HOWTO: Program Arduino on Chromebook using ChromeDuino
by Steven B. Combs, Ph.D.
Recently I considered an installation of Linux on my Chromebook so I could do some light Arduino development. I asked the Google+ Chromebook community for some thoughts on the process. Imagine my surprise when Google+ user, Jonathan Berry, replied to my post that ChromeDuino was now available. Due to the ingenuity of the Chromebook community, I would not have to install Linux after all. I was happy about this as I really want a pure Chromebook experience.
This post provides my thoughts, as well as tips, on the ChromeDuino application.
Install and use ChromeDuino
Chromeduino is like any other app in the Chrome OS Web App Store. Installation couldn’t be easier. Simply browse to the ChromeDuino page and hit the + Free button.
!!NOTE!! This post based on ChromeDuino Version 1.2.
If you keep your Chrome apps in sync, the app will also install on your other computers, in my case, my Macs. To answer the obvious question, “Yes. ChromeDuino works on the Mac as well!”
Once installed, locate the ChromeDuino icon, shown below, on the Chrome App Launcher on either the Chromebook or Mac (I don’t own a Windows box but suspect it works the same way).
![]()
My expectation was that ChromeDuino would operate the same on both the Chromebook and Mac; however, I found a couple of minor differences that I will highlight in the two sections below.
ChromeDuino on the Chromebook
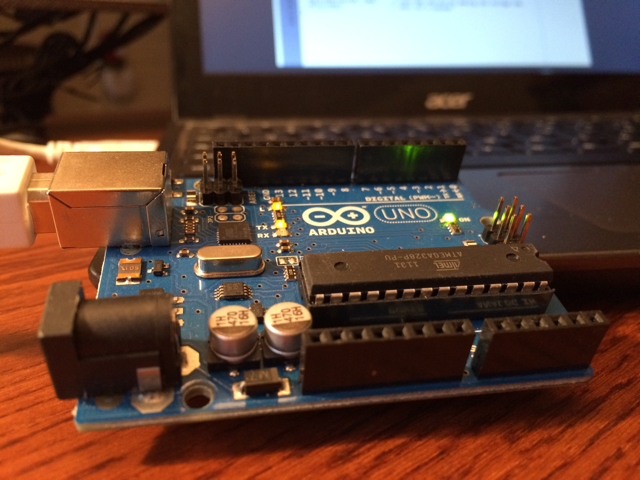
!!NOTE!! Connect an Arduino to a Chromebook/box, PC or Mac BEFORE you launch ChromeDuino.
After you launch ChromeDuino, a select a serial device prompt will appear as shown in the image below.
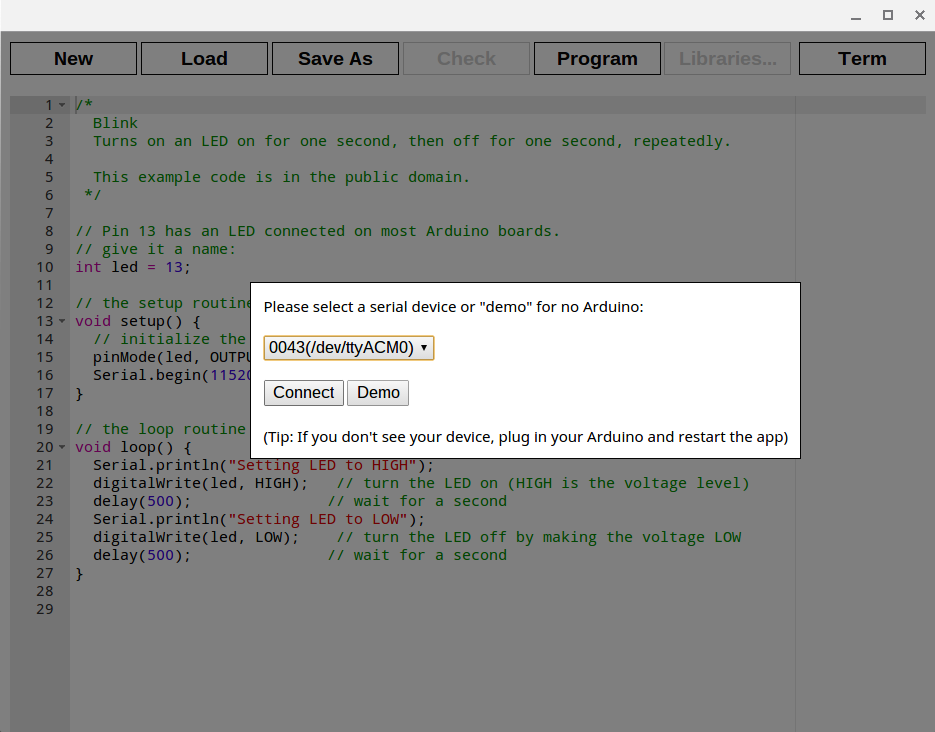
While Chrome does not include serial drivers, ChromeDuino packages them in the app. Unless you have more than one Arduino plugged in, which I’m not even sure you can do, you should have a single option shown. Select the Connect button to make the serial connection and load the programming environment.
!!NOTE!! The Demo button simply lets you try the software without making a connection to the Arduino.
ChromeDuino provides sample code that blinks the onboard light on pin 13 and sends a println command through the serial connection. I made a modification (see Code at bottom of post) of the blink period to 2 seconds.
I made an attempt to upload the code to an Arduino Diecimila. I hit the Program button. I was unsure whether ChromeDuino was actually uploading the Arduino sketch because there was no on screen indication. I hit the Program button again and looked at the Arduino TX/RX lights to verify activity. There was activity, but the sketch never worked as programmed.
Online searches reveal that the Uno seems to the only Arduino model that works consistently. I had an Arduino Uno available and tried again. It worked the first time. It was now time to try this same process on my iMac.
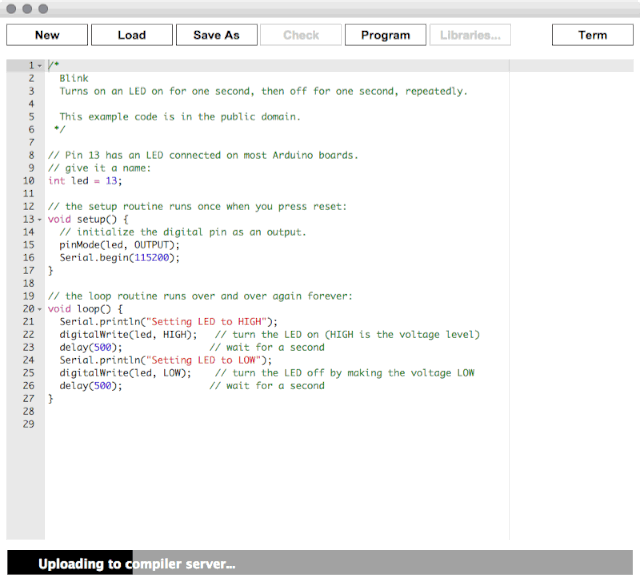
ChromeDuino on the Mac
Load the application on a Mac using the Chrome App Launcher (Alfred also works). ChromeDuino prompts you to select a serial device as shown in the image below.

On the Mac, ChromeDuino provides more serial device options than Chrome OS as OS X installs all serial connections available. I’ve highlighted the option I used in the image above. Once the correct serial devices selection is made, open a code file and hit the Program button. Interestingly, and unlike the Chromebook version, ChromeDuino on the Mac provides a status bar, as shown in the animated gif below.
I have no idea why the status bar appears on the Mac but not on the Chromebook version. Other than the number of serial devices available and the appearance of the upload status bar, usage is identical on both Chromebook and Mac.
ChromeDuino caveats
Use of ChromeDuino on the Chromebook is self explanatory for anyone familiar with Arduino programming and development; however, below is a list of things you need to know:
- ChromeDuino requires an Internet connection. Sketches are sent to an online server to compile and then sent back to the ChromeDuino to upload to the Arduino. The developer claims an offline solution is coming.
- The developer does not state server specifics. Suffice it to say that security could be an issue (if an Arduino program needs to be secure). Someone should probably do a bit of packet sniffing to see where our code is going. I really don’t suspect any malicious use; however, this is my warning to you.
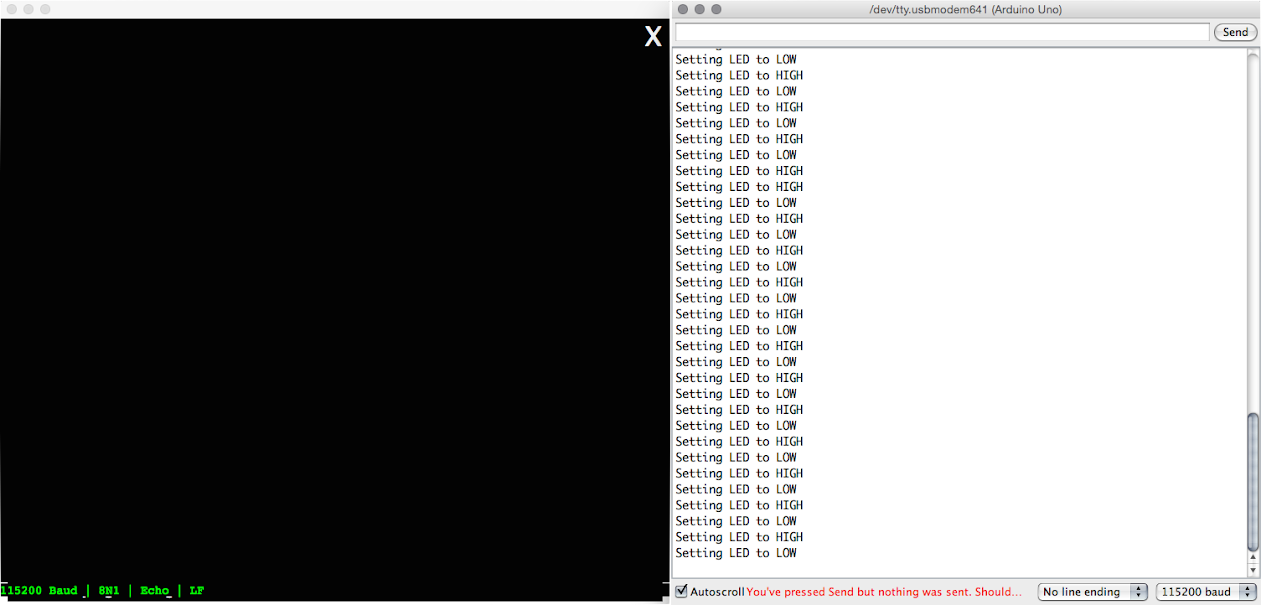
- I was not able to get the serial monitor to work on either the Mac version or the Chromebook version. Below is a side-by-side comparison of the serial monitor working using the Arduino software on a Mac, but not working on via ChromeDuino on the Mac.
- While ChromeDuino includes syntax highlighting, it does not include code completion tools.
- The Arduino Uno seems to be the only model currently compatible.
- There is no web/Github page for this application and information/support is only available on the Chrome Web Store.
Summing up
Before my purchase of a Chromebook, I thought that Codebender would be an application I could use to program an Arduino on the Chromebook. Given that it’s a web app, it makes perfect sense. I still hold out hope that they will one day figure out how to provide their service to Chromebook users. Until then, we have ChromeDuino.
ChromeDuino is an exciting addition to the Chrome Web App Store not only for its ability to program an Arduino, but because it demonstrates the coming maturity of Chromebook apps by:
- embedding serial drivers
- the use of server to compile sketches
- being written as a dedicated Chrome App
Other developers should look to this software as an example of what is possible on Chrome OS. The author states on the Chrome Web Store that we can expect the following in the next version:
- Library support
- Multi-tab support for includes
- Selectable serial rate and character entry modes
- Examples library
- Better control character support in terminal mode
- Better sketch error reporting
If development continues on this application, I think the Chromebook has a bright future as an Arduino development platform and one that is extremely cost effective at $200. It will be nice to be able to throw my Chromebook in a bag with my Arduino and some electronics components for some on the go Arduino development. I get even more excited when I think about school Chromebook adoption. Schools can now teach the basics of physical computing. This Chromebook just gets better and better!
Anyone else using ChromeDuino? Drop a comment below and let me know your thoughts. If your experience varies, I would love to read that as well. I’m also happy to correct errors.
Code
I modified the demonstration code that comes with ChromeDuino. It’s the perfect code to test your installation and connection from both the Chromebook and Mac. I’ve provided below as a reference in case you don’t install ChromeDuino.
/*
  Blink
  Turns on an LED on for one-second, then off for one-second, repeatedly.

  This example code is in the public domain.
 */

// Pin 13 has an LED connected on most Arduino boards.
// give it a name:
int led = 13;

// the setup routine runs once when you press reset:
void setup() {
  // initialize the digital pin as an output.
  pinMode(led, OUTPUT);
  Serial.begin(115200);
}

// the loop routine runs over and over again forever:
void loop() {
  Serial.println("Setting LED to HIGH");
  digitalWrite(led, HIGH);   // turn the LED on (HIGH is the voltage level)
  delay(2000);               // wait for a second
  Serial.println("Setting LED to LOW");
  digitalWrite(led, LOW);    // turn the LED off by making the voltage LOW
  delay(2000);               // wait for a second
}