Retro computing with a touch of modern and the home for all things, retroCombs (aka Steven Combs).
Disclosure Statement: When you click on links to various merchants on this site and make a purchase, this can result in this site earning a commission. Affiliate programs and affiliations include, but are not limited to Amazon, the eBay Partner Network, and/or others.

HOWTO: Install Super Retroboy on the Retroflag GPi Case
by Steven B. Combs, Ph.D.
This blog post is a companion page to two YouTube videos and provides all the links and additional information necessary for you to install Super RetroPie on a microSD card that will power a RetroFlag GPi Case for on the go retro gaming.
My goal for this project was to focus on retro-gaming. When I say retro-gaming, I’m talking about 8-bit gaming prior to Nintendo’s rise in popularity. I want to emulate classic systems such as:
- Commodore VIC-20
- Commodore 64
- Atari 2600
- Atari 5200
- Atari 7800
- Atari 400
- Atari 800
- ZX Spectrum
Super RetroPie does not include a few of these systems, so there will be some tweaking after the initial installation. I’ll share these tweaks in this blog post, but this extra content is not included in either video.
Below is a table of contents so you can link directly to various areas of this blog post:
- Equipment
- YouTube Video: WORKBENCH LIVE: Retroflag GPi Case with Super RetroPie emulation software
- YouTube Video: HOWTO: Install Super Retroboy on Retroflag GPi Case
- Install Balena Etcher
- Download Super RetroPie
- Transfer Image to microSD
- Transfer Wi-Fi Settings to Boot Partition
- Transfer ROMs
- Assemble the GPi Case
- Insert microSD into Case and Boot
- Operating Super RetroPie
- Batteries
- Activate Wi-Fi
- Expand the microSD file system
- Install the Vice Commodore Emulator
- Shutting Down the system
- Summing it all up
Equipment
Below is the list (#ad) of items for this project:
RetroFlag GPi Case Raspberry Pi Zero W 32Gb MicroSD Card Super RetroPie Image Belana Etcher
A Raspberry Pi Zero, non Wi-Fi, can be used, but this instructions assume you have the ”W” variant.
Before starting, and depending on the amount of time you have to burn, consider watching one of the videos below:
YouTube Video: WORKBENCH LIVE: Retroflag GPi Case with Super RetroPie emulation software
The first video below is the extended WORKBENCH LIVE video. This live session is unedited and includes additional information not found in my edited video below. It also includes some streaming hiccups that occurred along the way that resulted in some “herky-jerky” video moments. If you have some time to kill or just need some geeky background noise, this is the video for you.
YouTube Video: HOWTO: Install Super Retroboy on Retroflag GPi Case
The second video takes that two hour live behemoth and shrinks it down to a much more manageable thirty-minute chunk. If you just want the nuts and bolts toward a first boot of the GPi Case, this one’s for you.
Install Balena Etcher
I use Balena Etcher to burn images to USB drives and SD cards. It’s available for various platforms but here are the basics:
- Visit the Balena Etcher site.
-
Click the Download for [Your Platform] button underneath the cycling Etcher image as shown below:

- Once the download is complete, install per your computer OS’s normal process.
Download Super RetroPie
There are many pre-built images for the GPi Case, a Google search will overwhelm you, and many of them include game ROMs. I choose to use an image that does not include ROMs so I can focus, and build from scratch, my handheld system for specific 8-bit computer and game consoles. No Gameboy, NES, or Sega games here. Just good ole Commodore, Atari, and Sinclair games.
Super RetroPie uses Emulation Station and is a variation of RetroPie with tweaks specifically for the GPi Case and the Raspberry Pi Zero (with slower processor and only 256Mb of RAM). This image also includes all the scripts mentioned in the instructions that come with the GPi Case.
Be sure to visit the Super RetroPie - Facebook to learn more, ask questions, and see how others have used the image.
To download the image, follow the steps below:
-
Visit the Super RetroPie Image MEGA page as shown below:
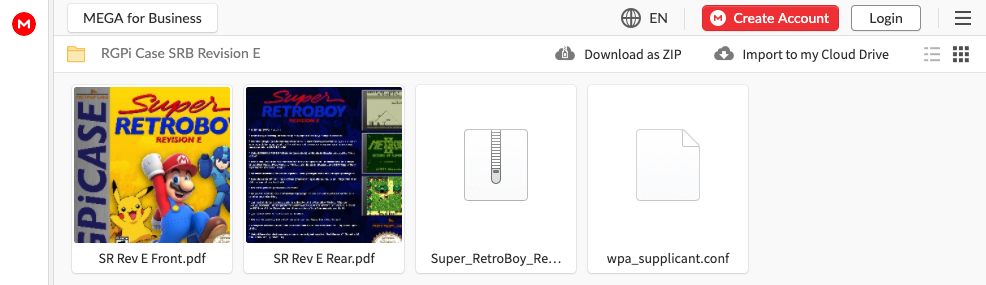
- Download the SuperRetroBoyRevE(5-5-20).rar image file.
- Extract the .rar file per your computer’s OS (on most OS’s this is as simple as a right-click and then choose Extract.)
- If you use a Raspberry Pi Zero W (that includes Wi-Fi) also download the wpa-suppliant.conf file.
Make sure you can easily locate these files. You will need them for the next section. Now that you have the files, let’s prepare a microSD card for the GPi Case.
Transfer Image to microSD
With the Super RetroPie image downloaded, it’s time to write it to the microSD card. We can use our animated image and instructions below to help guide us:
- Load Etcher (See above)
- Locate and then drag the SuperRetroBoyRevE(5-5-20).img file to the Select Image button (you can also use the file selector if you click the button).
- Click the Select Target button to choose the microSD (be careful!)
- Click the Flash! button and wait for the image to flash to the microSD. Etcher will also verify the image to ensure the integrity of the image on the microSD.
If you are using a Raspberry Pi Zero W, you can use this wait time to prepare your wpa_supplicant.conf file.
Transfer Wi-Fi Settings to Boot Partition
-
Load the wpa_supplicant.conf file into a text editor (or use the text below to start your own).
country=US ctrl_interface=DIR=/var/run/wpa_supplicant GROUP=netdev update_config=1 # RETROPIE CONFIG START network={ ssid="YourSSID" psk="YourPassWord" } # RETROPIE CONFIG END - Replace
YourSSIDandYourPassWordwith the SSID and password to connect to your home Wi-Fi router: - If the image transfer to the microSD card is complete, copy the file to the root partition of the microSD drive.
Transfer ROMs
While you have the microSD card connected to your computer, you can speed up the transfer of ROM files by copying them over via a USB connection. ROMs must go into specific folders. The Emulation Station starter page includes a list of all folder names. Consult this list before you drag and drop ROM files into folders.
NOTE: Just because you have a folder with ROMS, this does not mean the proper emulator is installed. In the case of Super RetroPie, you still need to install VICE to run Commodore games. More on this process later.
Assemble the GPi Case
I cover the assembly of the case extensively in both videos and as they say, “a picture is worth a thousand words…that I don’t have to type!” (Okay, I added that last part!); however, a few notes and observations are below:
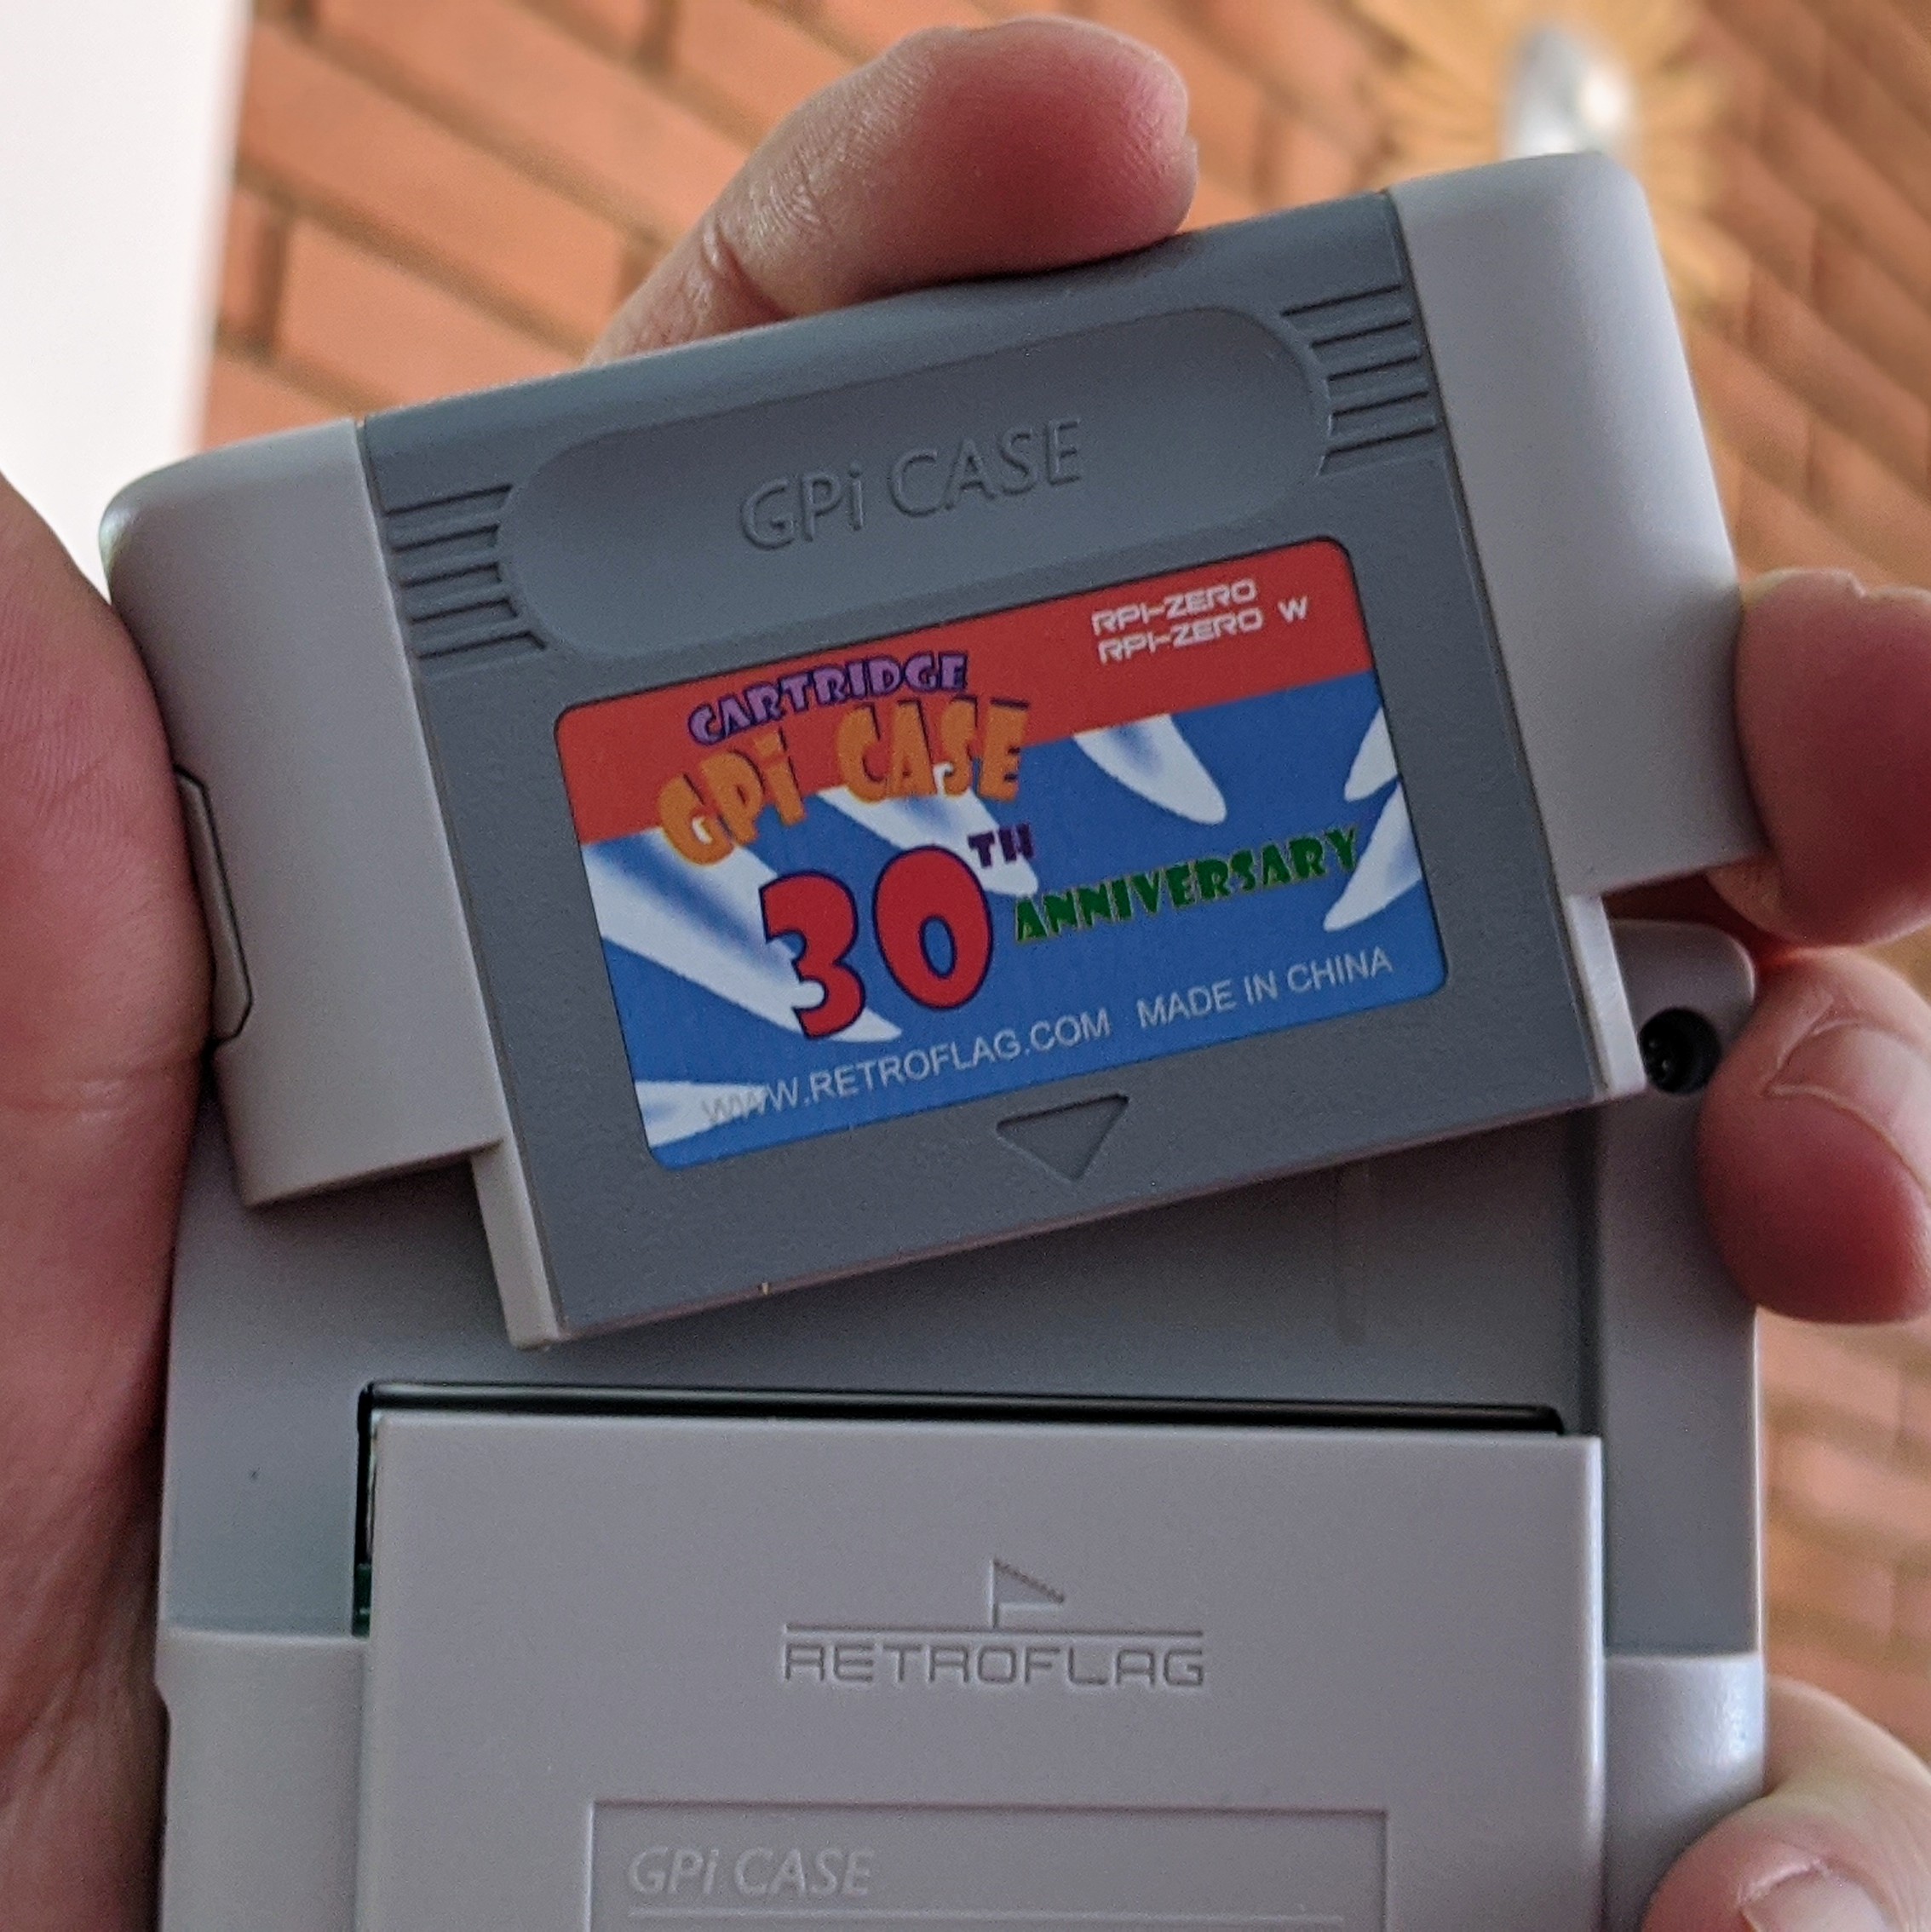
- Pull the cartridge cover pieces apart carefully. I don’t think they would break, but forcing them apart might cause damage.
- The small brass square with the embossed Raspberry Pi logo is in fact a heat sink. Place it on the CPU of the Raspberry Pi Zero W to help dissipate heat.
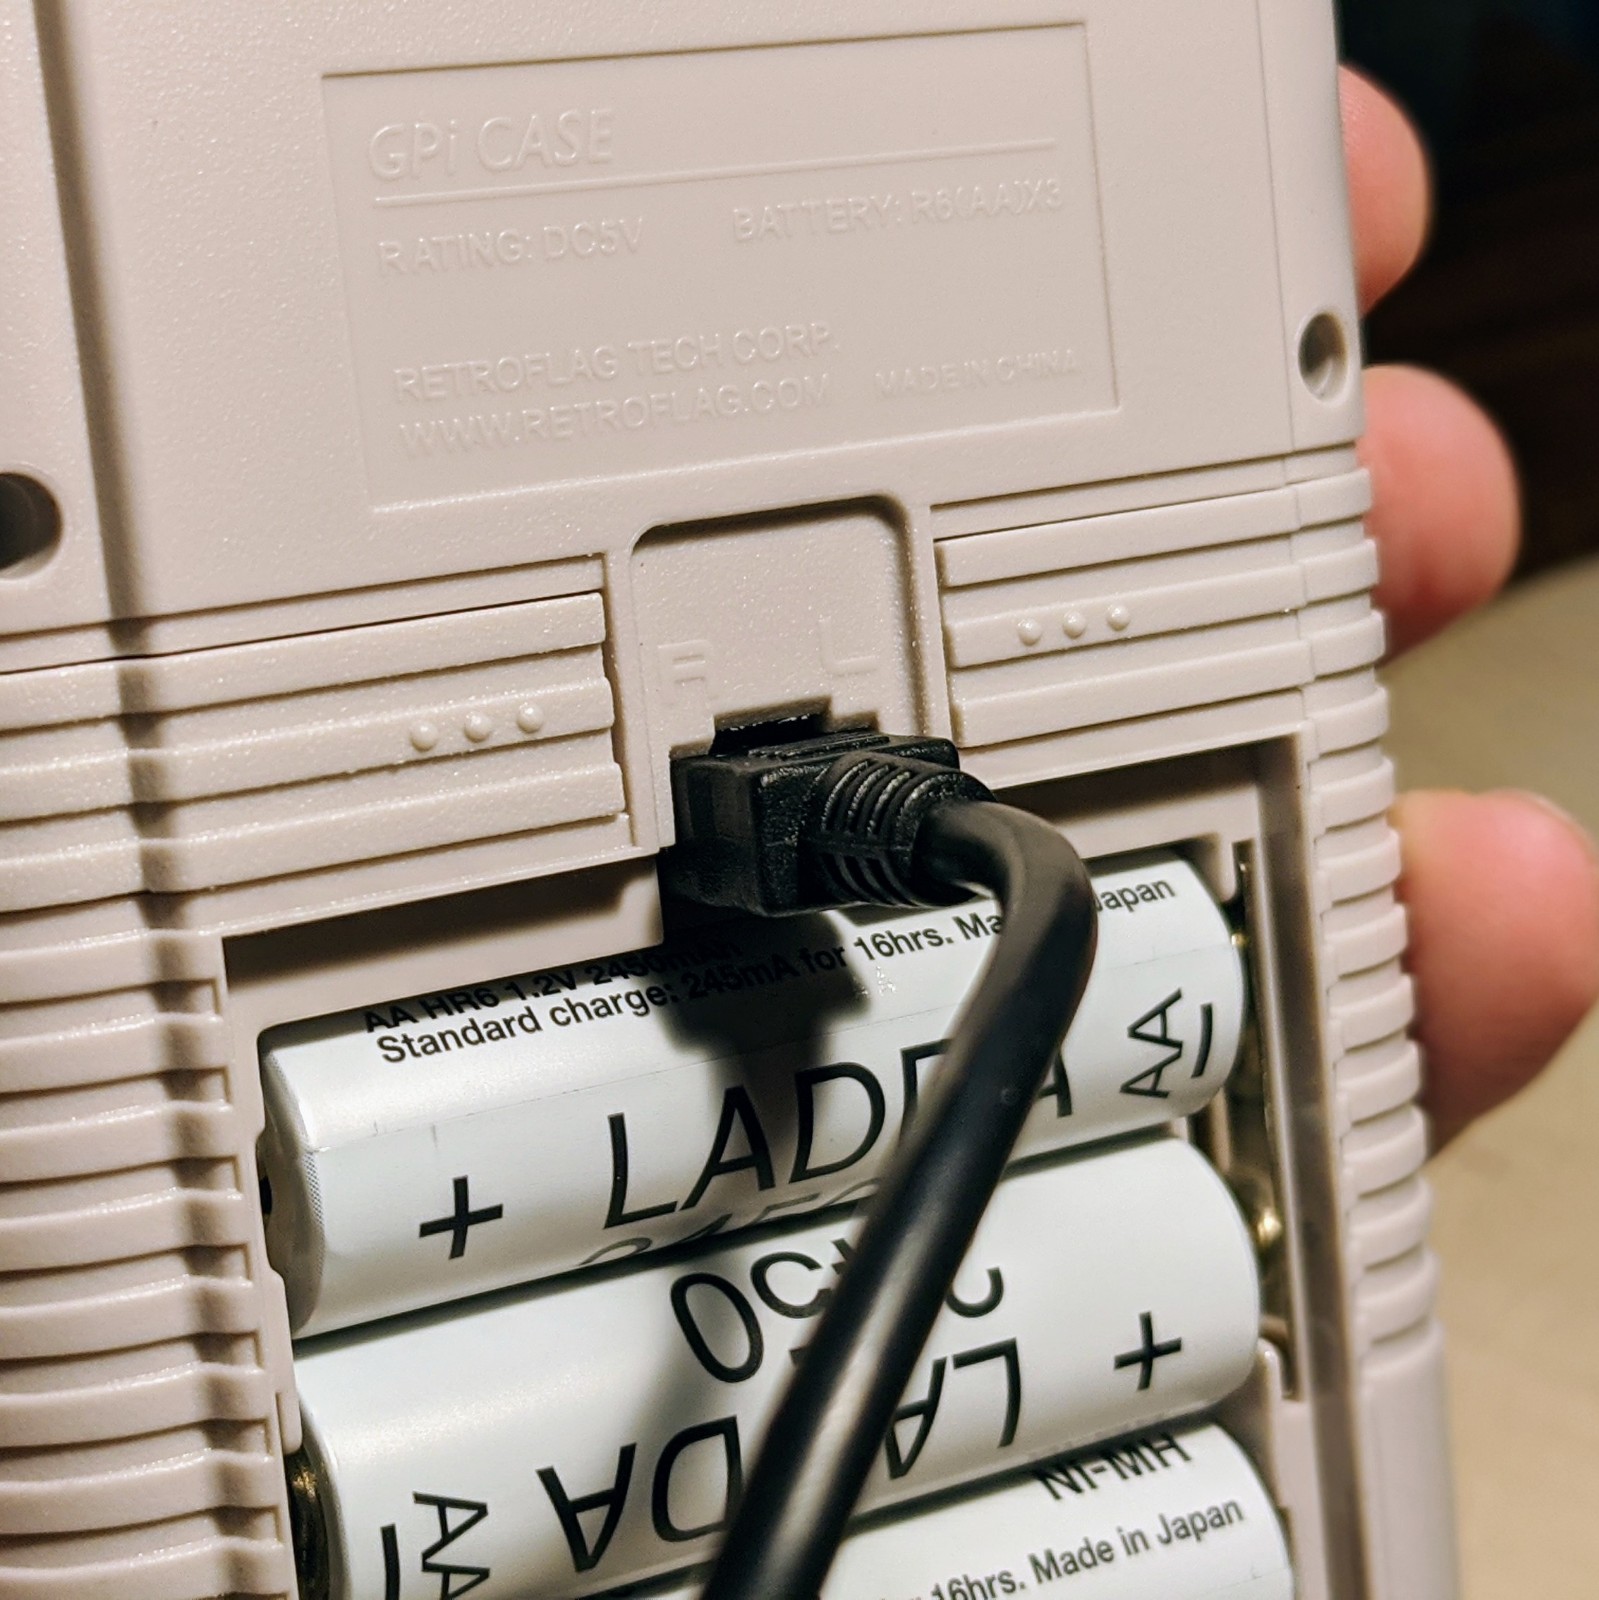
- Keep watch on your power cable. It’s not a standard micro USB port. Might I recommend you throw this cable in the included case?
-
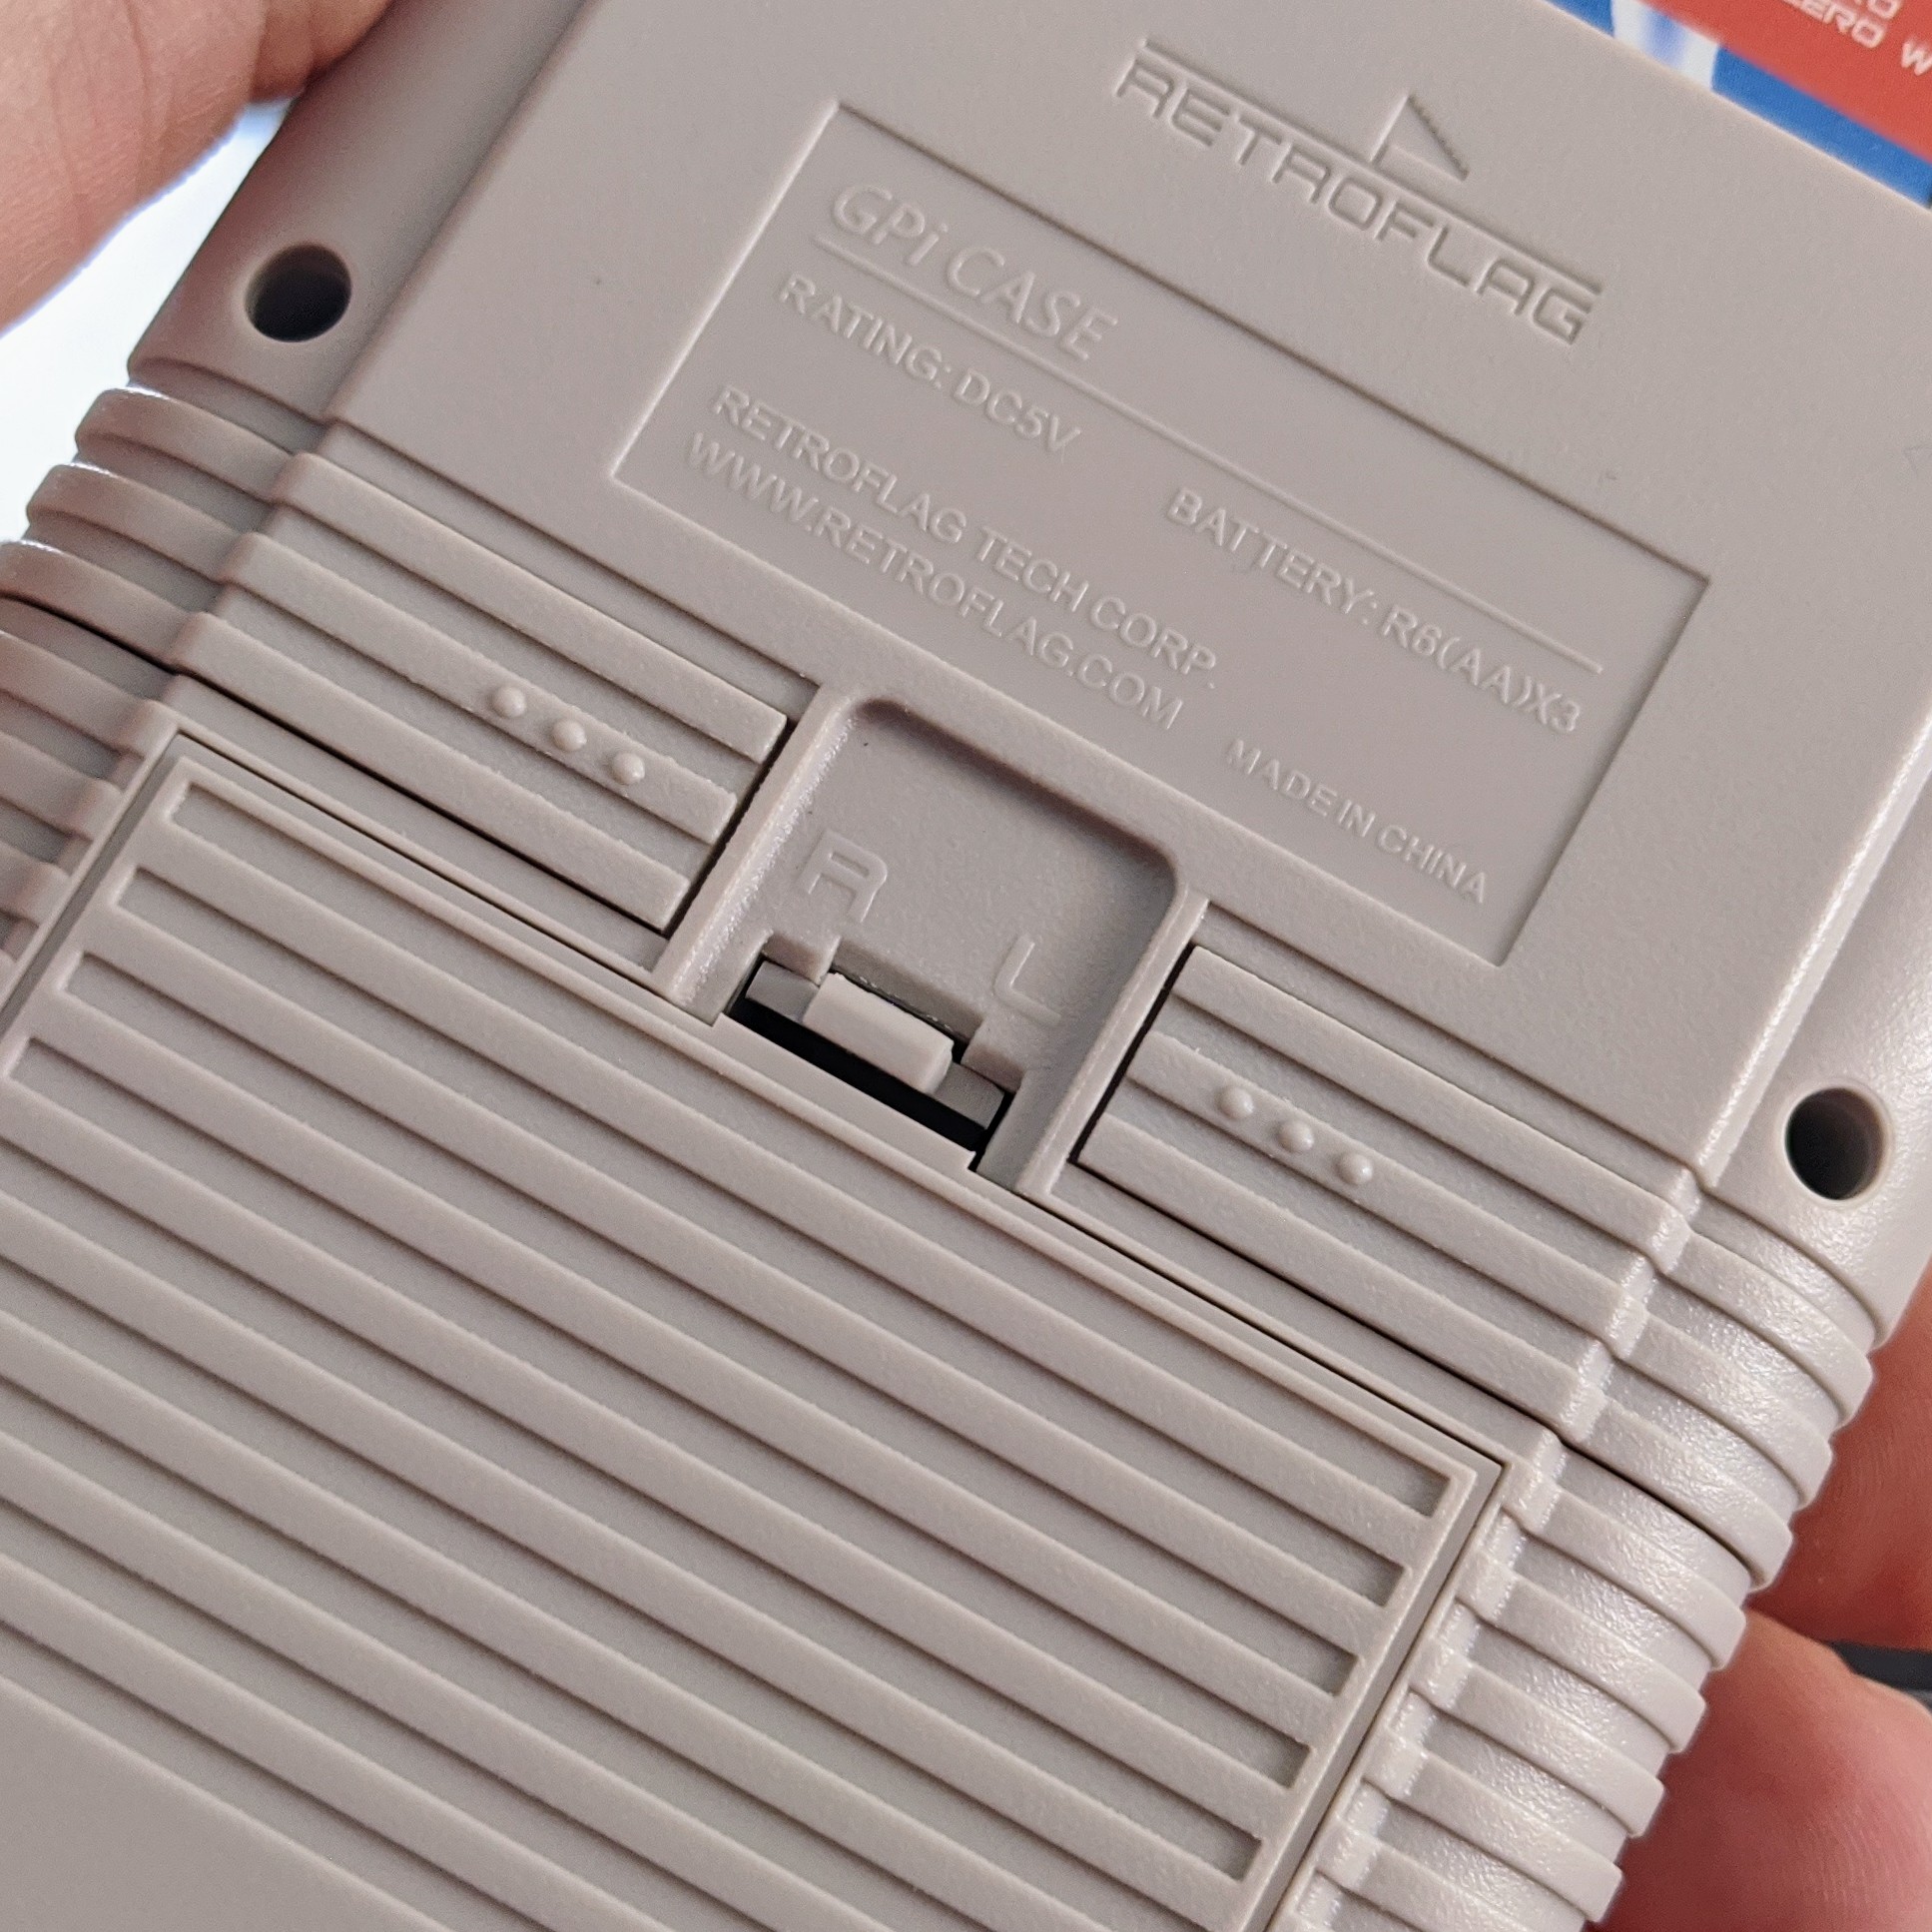
Speaking of micro USB ports, If you remove the battery compartment, there’s access to a micro USB port. Check out these instructions to learn how you can use the port to connect external USB devices.
- As I note in the video, after my own mistake, be sure not to remove the microSD tab cover while you assemble the cartridge holder.
- The screws to the Raspberry Pi holder a tiny! Keep them in the bag until you need them.
- The included screw driver was a nice surprise and incredibly useful for those tiny screws.
Insert microSD into Case and Boot
Now that the case is assembled, it is time to insert the microSD card and boot this thing up:
- Open the microSD tab cover on the cartridge case.
- Insert the microSD card and ensure the pins face toward the back of the unit.
- Replace the tab cover.
-
Slide the cartridge into the GPi Case body.
- Plug in the power cord (recommended) or place 3 AA batteries in the battery compartment and replace the cover.
- Slide the power switch on the top of the case all the way to right and the power light will come on.
-
Wait for the device to boot up.
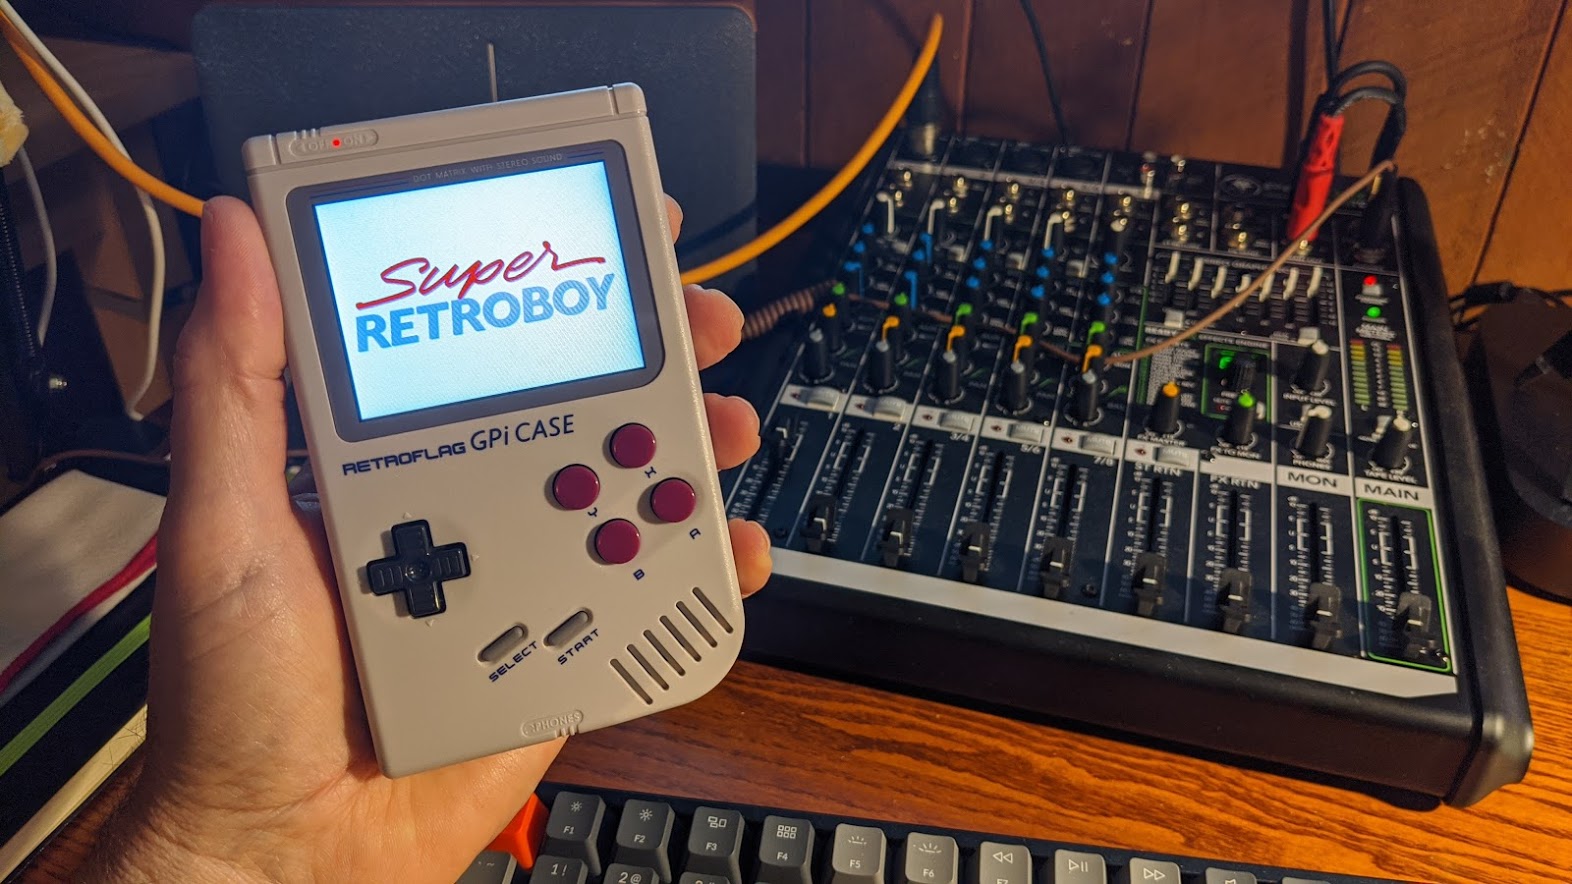
You have now successfully constructed your portable handheld retro gaming device. You were successful, right? If not, verify all of the steps again.
Operating Super RetroPie
I’m not going deep here and playing a game using Super RetroPie should be self explanatory at this point. Below is a basic control table that explains the use of the buttons to control Emulation Station and the Atari 2600 emulator. Other emulators will use different button configurations, but this will get you started:
| Control | RetroBoy | Atari 2600 |
|---|---|---|
| 4-way Thumb Pad | Navigation | Move in-game character |
| Select | Main Menu | Options |
| Start | Options | Reset |
| Select + Start | Exit Emulator | N/A |
| A | Select Option | N/A |
| B | Go Back | Fire Button |
| X | Random | N/A |
| Y | N/A | N/A |
| Left-Shoulder | N/A | N/A |
| Right-Shoulder | N/A | N/A |
There are many “N/A” items in the table, but usage depends on the emulator and this table will just get you started.
NOTE: The case also includes shoulder buttons on the back for emulators that require them (as shown in the image below).
Batteries
Three AAA batteries provide hours of fun; however, the case does not replenish rechargeable batteries when you connect the power adapter. That would be a nice addition. Maybe in a future version or maybe some reader can share with us an electronics hack?
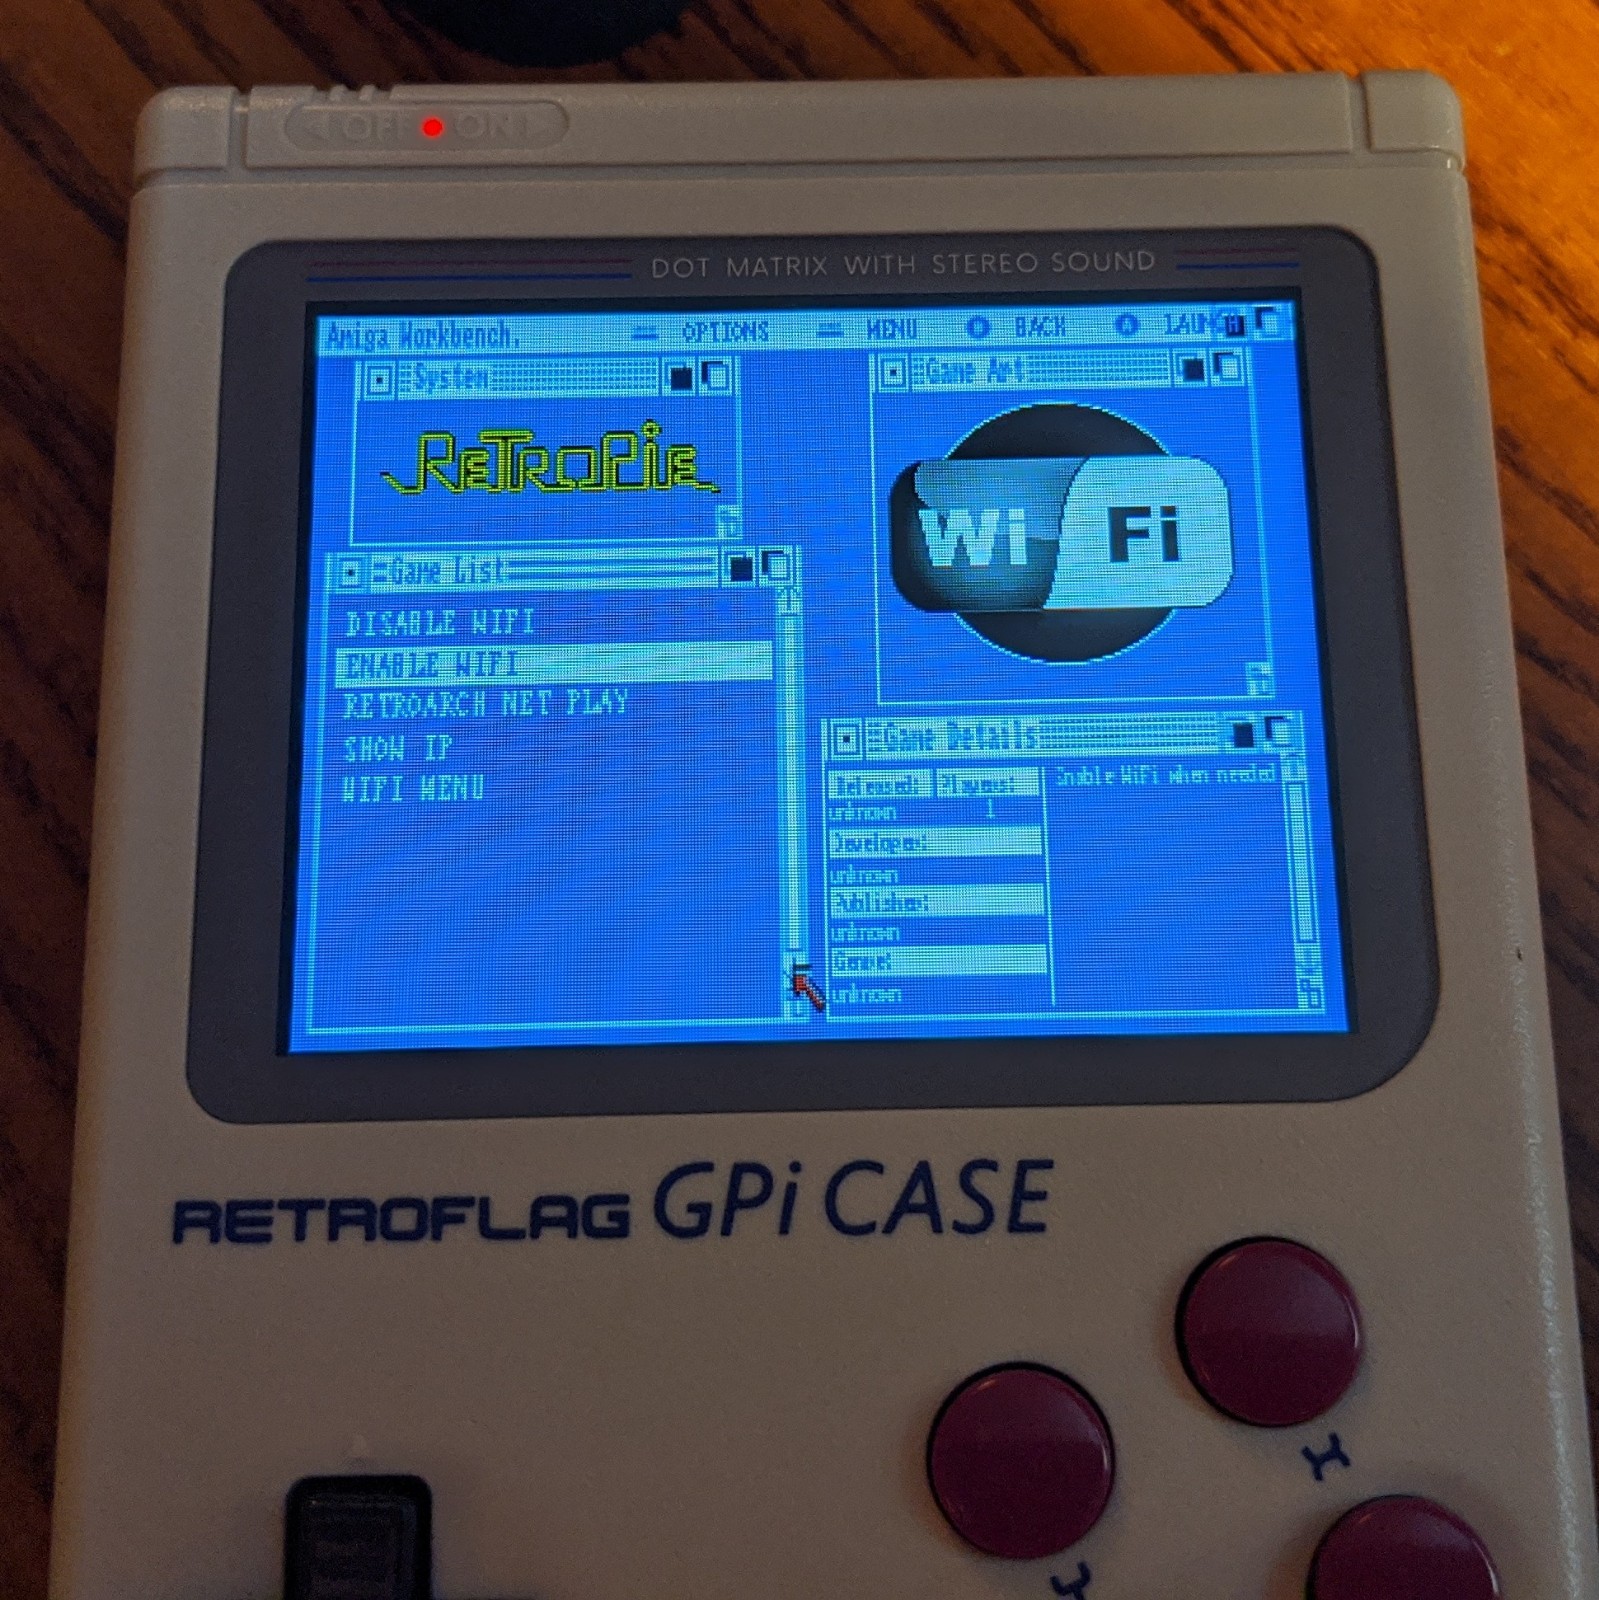
Activate Wi-Fi
Wi-Fi is not active by default. Use the steps below to turn it on:
- Use the navigation keys to navigate to the Emulation Station RetroPie options screen using the A button.
- Select WIFI.
-
Select ENABLE WIFI. The screen will blank and a Wifi enabled… notification will appear.
NOTE: The
wpa_supplicant.conffile you copied to the microSD card, if created properly, will automatically use those credential to connect the GPi Case to your home network.
Use the same procedures, except select DISABLE WIFI, to toggle Wi-Fi to off. Be sure to turn off Wi-Fi to extend the life of your batteries.
Expand the microSD file system
The next step is to expand the available microSD card space to the entire 16Gb. When the image installs on the microSD card, it only allocates the space taken by the image. Use the steps below so you can all the space on the microSD:
- Use the navigation keys and navigate to the Emulation Station RetroPie options screen using the A button.
- Select RETROPIE UTILITIES.
- Select RASPI-CONFIG.
- Use the cursor controls to select Advanced.
- Press the right-arrow button to highlight the Select option.
- Press the B button (confused yet?)
- Press the right-arrow button to highlight the Expand File System option.
- Press the B button and a screen will confirm resizing.
- Press the B button to return to the previous screen.
- Press the right-arrow button to highlight the Select option.
- Press the right-arrow button again to move to the Back option.
- Press the B button. This will display the main menu again.
- Repeat steps 8 through 9 to select the Finish option. A Would you like to restart now? option will appear.
- Press the B button to reboot.
The entire microSD card can now be used to store ROMs and additional options and emulators. You will never, THANKFULLY, have to go through this button-mashing again for this microSD card!
Install the Vice Commodore Emulator
I want to demonstrate how to install the Commodore emulator the case. This will help you customize your own personal installation, but also share my love of Commodore computers. As an aside, this one is a bit tricky if you’ve never used a Raspberry Pi or Linux before and you are sure to learn a few things along the way. Let’s get started:
- Make sure Wi-Fi is active.
- Use the navigation keys and navigate to the Emulation Station RetroPie options screen using the A button.
- Select the WIFI option.
- Select the SHOW IP option. The screen will go black and display a terminal window with network information.
- At the top of the screen, note the IP address of the internal Raspberry Pi Zero W and write it down (unless your memory is better than mine).
- Press the B button to exit.
- On a computer sharing the same Wi-Fi network, open a Terminal window.
-
At the command line, type the following (where the x’s represent the IP address you captured earlier):
ssh pi@xxx.xxx.xxx.xxx -
If this is the first time you connect, you will receive a prompt similar to the one below:
The authenticity of host 192.168.86.36 (192.168.86.36) not established. ECDSA key fingerprint is SHA256:6qdmyn+WHar2VMvgUyJUrdLOKcJoIs9zoTIXCw8iSDM. Are you sure you want to continue connecting (yes/no/[fingerprint])? - Select yes.
-
At the password prompt, enter:
raspberry -
The terminal will display:
.***. Saturday, 16 May 2020, 23:53:05 ***** Linux 4.14.114+ armv6l GNU/Linux `***' |*| Filesystem Size Used Avail Use% Mounted on |*| /dev/root 15G 4.4G 9.9G 31% / ..|*|.. Uptime.............: 0 days, 00h43m16s .*** * ***. Memory.............: 34048kB (Free) / 249162kB (Total) *******@@** Running Processes..: 91 `*****@@**' IP Address.........: 192.168.86.36 `*******' Temperature........: CPU: 42°C/107°F GPU: 43°C/109°F `"""' The RetroPie Project, https://retropie.org.uk pi@retropie:~ $ _ - Type
sudo RetroPie-Setup/retropie_setup.shand the RetroPie setup window will appear. - Select Manage Package.
- Select Manage Optional Packages.
- Select 152 vice.
- Select Install from binary and the vice emulator will download and install.
- When complete, select the Back option three times.
- Select Perform Reboot to start and refresh ROMs directories.
- The SSH connection will automatically close.
NOTE: To close the SSH connection manually, type
exitin the Terminal window.
- Once the GPi case complete a reboot, if you have Commodore ROMs in the proper directories, you will a Commodore system option in Emulation Station when browsing for games.
You can use this process to install other emulators, but remember, you will need to manually configure the GPi controls and if a game requires a keyboard, that will be a “no go!” In my case, I’ve been able load Commodore games, but I’ve not figured out how to map the controls on the case to the emulator. So…I can’t play them! That will take some research, trial, and error. I believe that will be another supplementary post, so stay tuned!
Shutting Down the system
When you are done playing, it’s time to shut down the system and there is a specific way to do this.
This is important! Don’t simply pull the plug or move the power switch all the way to the left. Doing so will likely (and I mean likely) corrupt the image on the microSD card.
Follow these steps:
-
Move the power switch from the far right position to the middle position and you will hear a slight click that will activate the shutdown script.

- EmulationStation will close and exit to a terminal screen where you view the script shutdown commands.
- When the shutdown commands are complete, the screen will fade to either black or a strip of horizontal colors. When it does, move the switch all the way to the left to cut power to the device.
Follow this process EVERY time! ‘nuff said?
Summing it all up
I love this case! I know I’ve only touched the surface of what this system is capable of and I’m looking forward to hours of exploration. Since I’ve recorded my videos, I’ve enjoyed numerous hours exploring classic Atari 2600 games and the memories wonderful! I hope this guide was helpful and that you will also enjoy hours of reto-gaming goodness. What could make this guide better? Drop a comment below and let me know.
🕹️ retroCombs, OUT!