Retro computing with a touch of modern and the home for all things, retroCombs (aka Steven Combs).
Disclosure Statement: When you click on links to various merchants on this site and make a purchase, this can result in this site earning a commission. Affiliate programs and affiliations include, but are not limited to Amazon, the eBay Partner Network, and/or others.

retroCombs: Update the MEGA65 and utility software
by Steven B. Combs, Ph.D.
Updating the MEGA65 requires several steps that can confuse new owners (count me in that group!). This blog post and associated FAST LOAD video will demonstrate the process and serve as a reference to update a MEGA’s SD card essential files, MEGA65.ROM, core (bitstream), and the M65Connect software. Before reading the rest of the post, I recommend you watch the retroCombs FAST LOAD video. You will find it after the table of contents below.
MEMBERSHIP: I now offer retroCombs memberships from $1 (PET level membership) to $20 (MEGA65 level membership) that include levels in between for all budgets (VIC-20, C64, Plus/4, and C128). If you’d like to support my content and get access to my Discord server along with other cool freebies, check out each level at https://www.buymeacoffee.com/retroCombs.
Table of Contents
- YouTube Video: FAST LOAD: Update the MEGA65 / SD card files, core, and .ROM / Includes a short demo (w/GEOS)
- Video Errata (as of 2021-02-04)
- Why Update?
- Update the SD Card
- Update the Kernal ROM
- Update the Core
- Update M65Connect
- BONUS: Format an SD card using the MEGA65
- Summing Up
YouTube Video: FAST LOAD: Update the MEGA65 / SD card files, core, and .ROM / Includes a short demo (w/GEOS)
In the video below, I demonstrate the process to update the MEGA65 (Dev Kit), core, SD card essential files, MEGA65.ROM, and M65Connect software.
Video Errata (as of 2021-02-04)
- Discord is a tricky thing and before the video was even live, there was a change. I reference using the stable-releases channel to access the core. That channel is no longer available. Use the experimental-releases channel. I’ve made the change in the Update the Core section.
- Only one hour after posting this blog post and I’m already receiving great feedback. The MEGA.ROM is only available to those who entered their ROM developer code into the MEGA65 Files Host; however, “its surely possible to get the rom “elsewhere” if you don’t have a dev code!”
- The developers also want me to share that they understand the process is a bit cumbersome right now; however, it is evolving and they want to implement an “all-in-one” web solution. That will be AWESOME!
Why Update?
MEGA65 ownership (especially the Dev Kit), means continual updates full of fixes, compatibility enhancements, and new features. Luckily, there’s a community on developers devoted to these updates. In their free time, they even help non-developers like me.
I reached out to atdbm (@adtbm#1347) and asked, “What’s the priority for updates, the MEGA65.ROM or the CORE.” Below is the answer used to guide the flow of my update process. He wrote (not a direct quote and modified):
MOST IMPORTANT:
- Always use the latest SD card essential files
- Choose a bitstream that works for you, (I use the latest version after confirming that all standard functions work)
- ROM, chose either 911210 (latest as of this writing) or the latest MEGA65 ROM by BitShifter (I use Bitshifter’s ROMs because they are super fast and clean)
The starter guide and user’s guide both include parts of the update process; however, I’ve tried to capture them all in this single easy to follow blog post and video.
Let’s get started!
Update the SD Card
This step assumes you have an SD card formatted. If you do not, check out the BONUS: Format an SD card in the MEGA65 section below. The first step is to update the SD card “essential” files listed below:
FREEZER.M65AUDIOMIX.M65BANNER.M65C65HUMB.M65C64HUMB.M65DEFAULTP.FPKMEGA65.ROM(Not included in download)
WARNING: If you have .d81 or .d64 files (other files) on the SD card, this process won’t overwrite them; however, I recommend you make a backup.
- Login to the MEGA65 File Host.
- Select the Files area.
- Download the MEGA65 SD card essentials - No ROM files.
- Use your operating system’s tools to extract the files. The file is a compressed
.rarand operating systems (OSs) usually include the ability to extract these files. -
Copy/Move the extracted files to the SD card.
NOTE While it is not necessary to reformat the SD card to update the MEGA65, I do include the instructions in the BONUS: Format an SD card in the MEGA65 section below in case you have a brand new SD card.
- If you have older versions of these files on the SD card, your computer will prompt you to overwrite them. Select yes, but again, make sure you have all SD card files backed up in case your upgrade goes awry.
If you have the latest MEGA65.ROM file on the SD card, your update is complete. If you need to update the .ROM file, continue to the next section.
Update the Kernal ROM
- Login to the MEGA65 File Host.
- Select the Files area.
-
Download the latest MEGA65 SD Kernal ROM. The file will have a
.BINextension.NOTE: The link above works for MEGA65 FILE HOST account holders who own hardware. An Open ROM for MEGA65 is available for XEMU emulator users.
- Rename the
MEGA65.ROMon your SD card to the previous version number (for example:MEGA65-3-6.ROM). This will archive the previous.ROMin case the new one doesn’t function properly. - Rename the new
.BIN(named:920124.BINas of this writing) file toMEGA65.ROM - Copy the
MEGA65.ROMfile to the root directory of the MEGA65 SD card along with the other essential files. - Eject the SD card from your computer.
- Ensure the MEGA65 is off.
- Insert the SD card into the MEGA65.
- Turn on the MEGA65. The ROM version will display in the last line of boot screen information as shown in the image below:
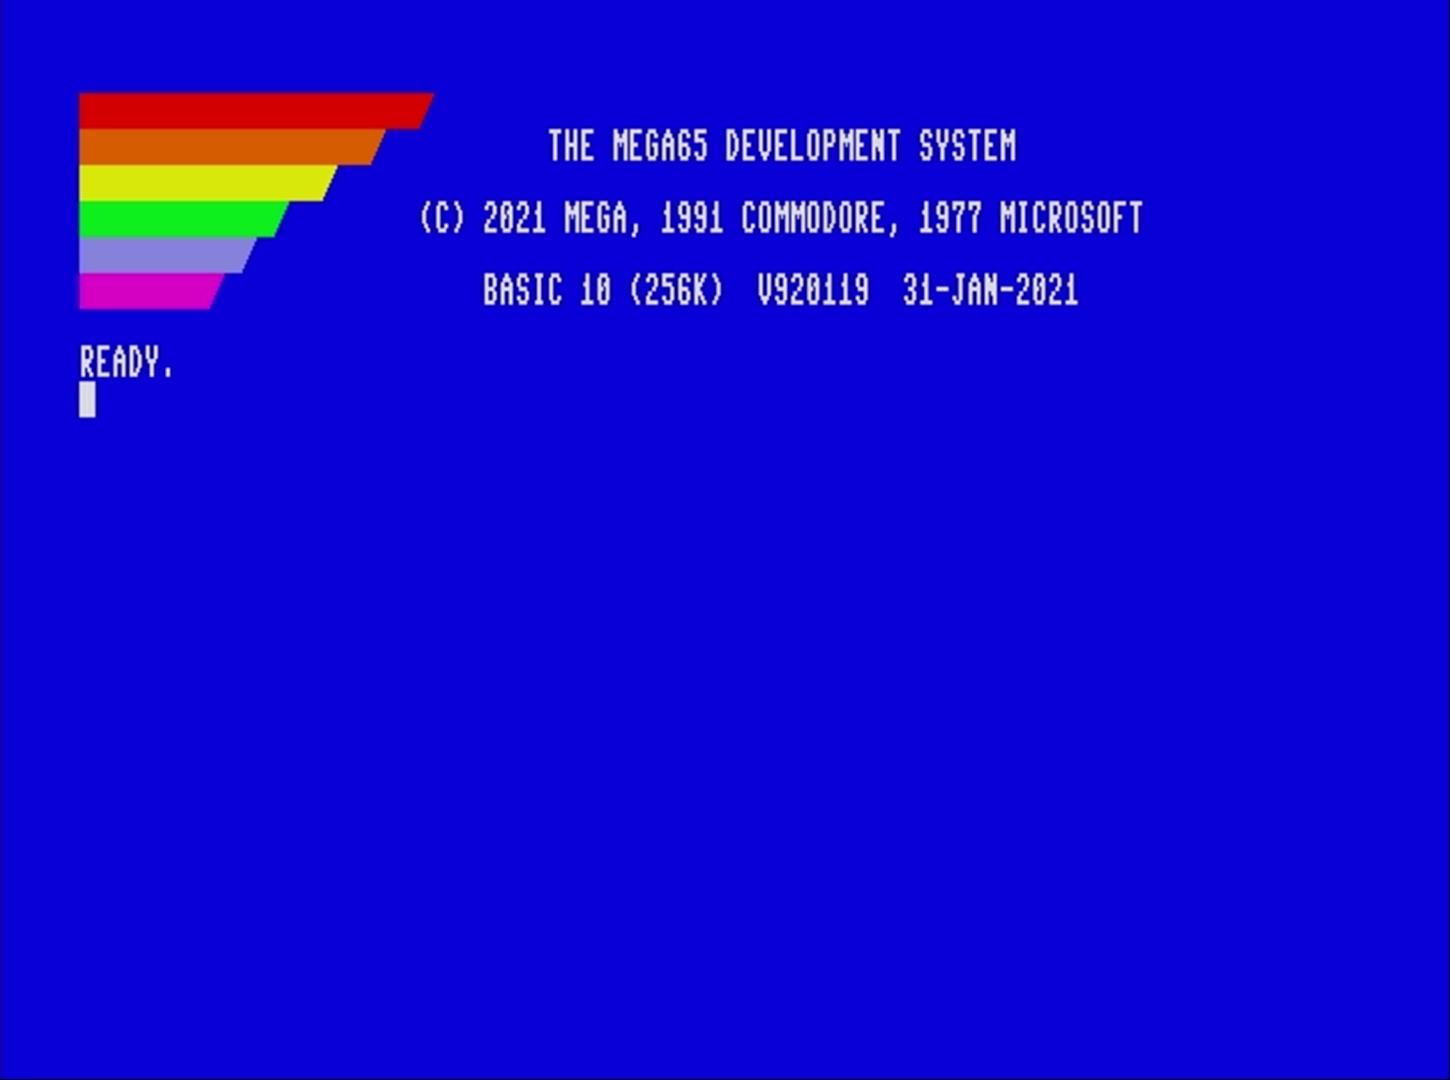
With the essentials file on the SD card updated, you can now explore the new features and upgrades; however, there is one more thing to do; update the hardware, via a bitstream (core), as I demonstrate in the next section.
Update the Core
Bitstream cores do not currently reside on the MEGA65 File Host. You will find them on the MEGA65 Discord.
- Visit the experimental-releases channel on the MEGA65 Discord.
-
Use the Search tool in the upper-right corner to search for the bot, Jenkins. These posts will contain a link to the latest version of the cores in
.bitor.mcsfile formats.NOTE: In the future, MEGA65 cores will come in
.corfile format. For now, we convert.bitand/or.mcsfiles and transfer the core via M65Connect or copy it directly to the SD card (my preferred). - Download the most current
.bitfile. - Load the M65Connect software.
-
In the main menu, select File / Create COR File. The Create COR file dialog box will appear as shown below:
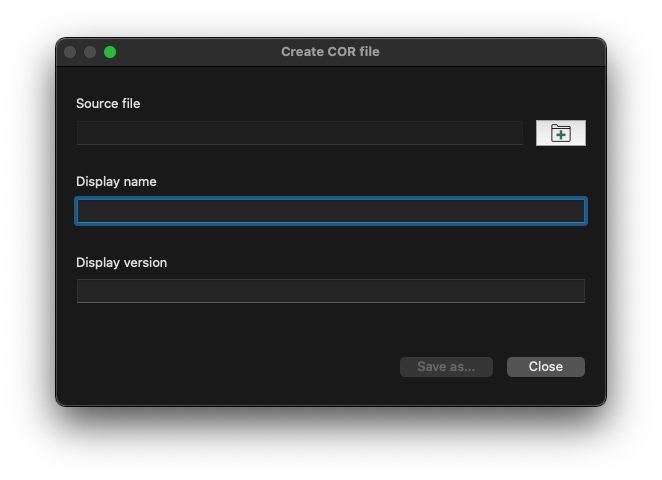
- Select the Source file, or the
.bitfile, you downloaded in step #3. - Select a Display name. I recommend something similar to:
2021-02-04 MEGA65r3. - Select a Display version. I recommend the date of the display:
2021-02-04. - Select the Save as… button. M65Connect will create the
.corfile in the same directory as the original.bitfile. - Copy the
.corfile to the root directory of a MEGA65 formatted SD card that contains all essential files. - Eject the SD card.
- Ensure the MEGA65 is off.
- Insert the SD card into the MEGA65.
-
Hold the No Scroll button and turn on the MEGA65. The cores utility screen will appear as shown below.
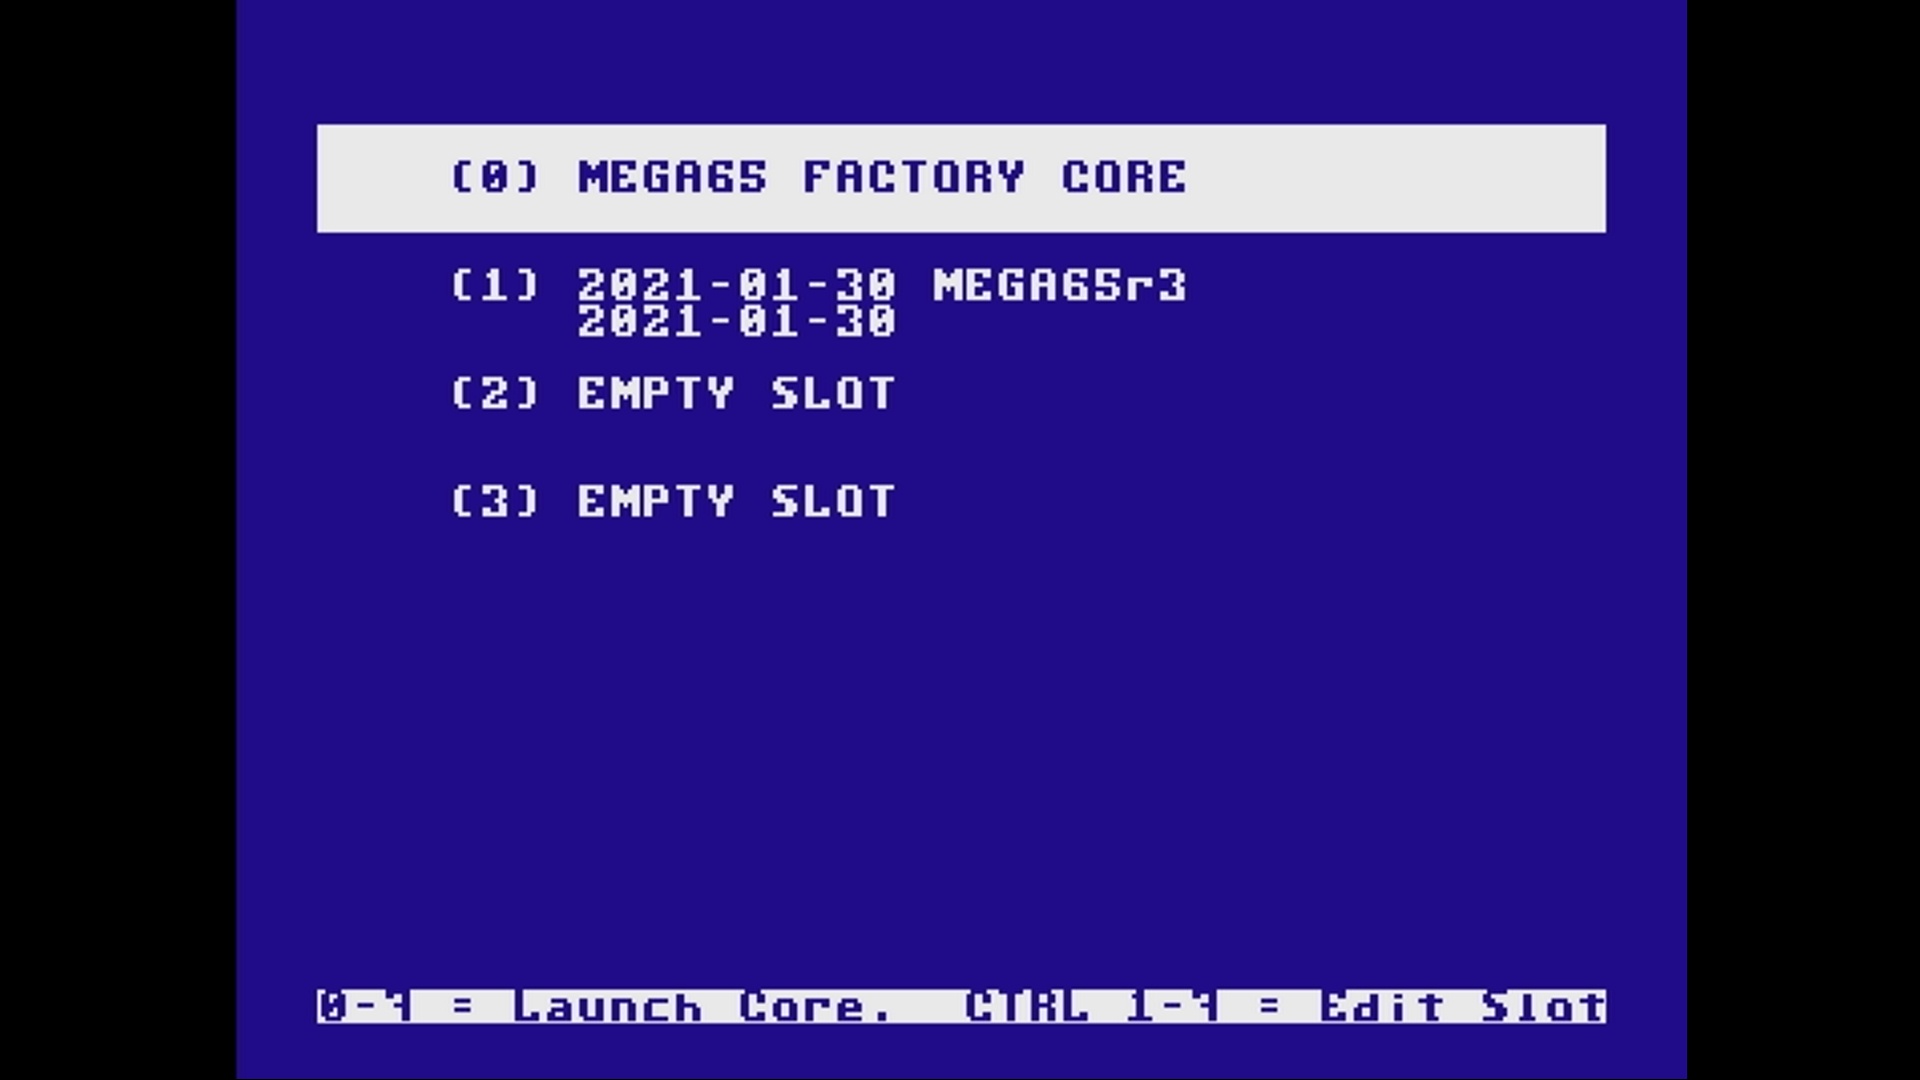
NOTE: THE MEGA65 supports eight cores. Core 0 is reserved and will always contain a default MEGA65 core that is hard, by design, to change. This ensures a working core is always available.
-
Select an empty core, or a core to replace using
CTRL+ the core number (1→7). The screen border will flicker and the core selection screen, listing new cores found on the SD card, will appear as shown in the image below: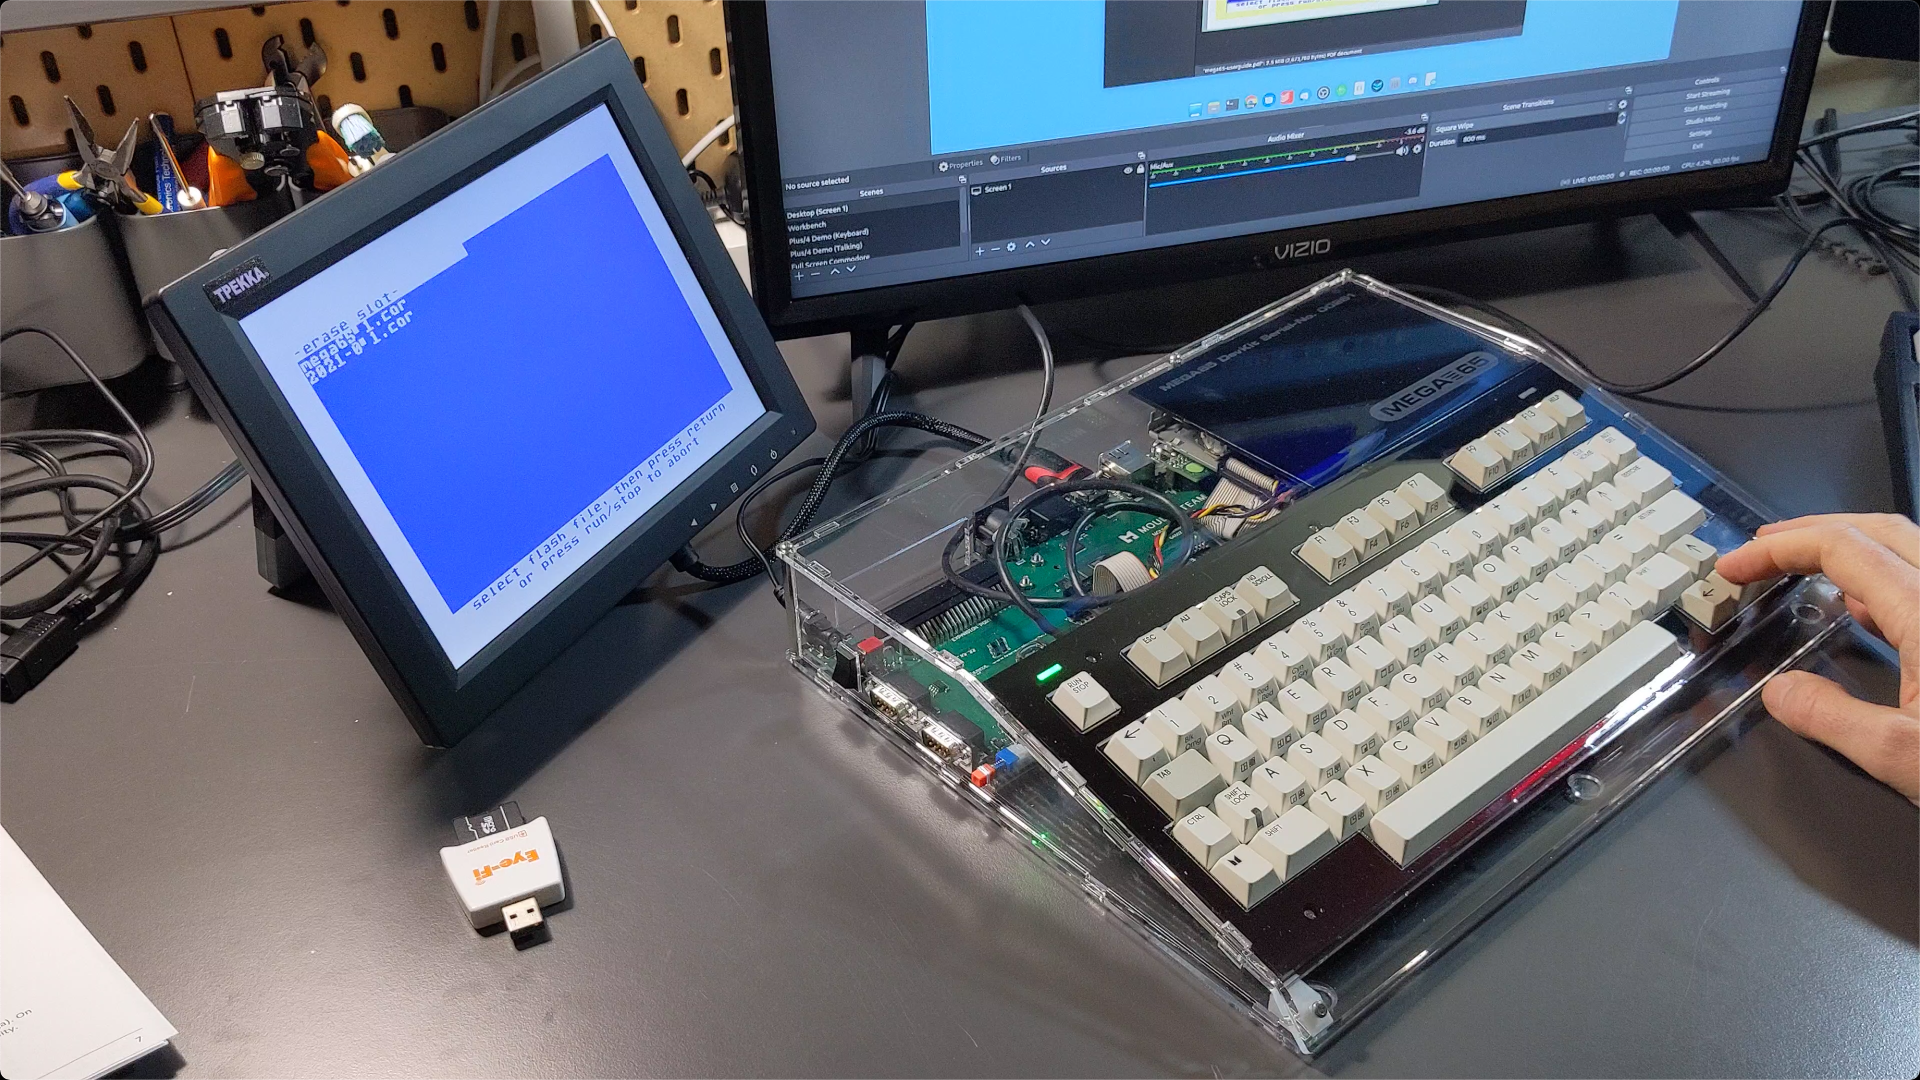
-
Use
↑and↓keys to move through the list, select the core to flash, and hit⏎. The MEGA65 will first erase the core in the flash slot (if there is one), install the new core/bitstream, and then verify the core/bitstream. When complete, the MEGA will indicate, Flash slot successfully written. Press any key to return to menu.NOTE: This is not a fast process and can take up to 20 minutes if a core needs to be erased first. Luckily, the MEGA65 includes a progress bar.
- Press
⏎and the core menu will appear again. - Use the
↓to move to the new core item in the menu and press⏎. The MEGA65 will restart with the new core and use flag this core as the default core until you load the core menu and select another core. That’s a lot of core! - Unless you want to archive this core, after flashing, you can delete it from the SD card.
As mentioned, you have seven usable cores. You can use them to test various MEGA65 cores, or in the future, there will be new cores for more computers such as Atari and Amiga computers. As of this writing, you can install a ZX Spectrum core, the ZX-Uno!
Update M65Connect
While not required to update the MEGA65, go ahead and check on a M65Connect update. The latest version (1.2 as of this writing) of the M65Connect software is available to anyone on the MEGA65 File host or you can click the links in the instructions below for specific operating systems versions:
| Mac | Linux | Windows |
The link’s page lists the current version number to compare with the currently installed version. Once downloaded, install the M65Connect software following your operating systems process. I don’t cover the features of M65Connect in this blog post. If you are interested, drop a comment below and let me know.
BONUS: Format an SD card using the MEGA65
Before beginning, you must have a SDHC SD card in either 8, 16, or 32Gb size. Anything smaller or larger may not work.
- Ensure the MEGA65 is turned off.
-
Remove all cards from the MEGA65 except the one you intend to format. This will ensure you don’t accidentally format a working SD card.
NOTE: The internal SD card is on bus 1, and the external card is on bus 0. The MEGA65 will always attempt to boot the external, bus 0, SD card first.
- Insert an SD card to format into the MEGA65. If it’s an original or large SD card, insert in the internal slot. If it’s a micro SD card, insert it in the external slot.
-
While holding down the [ALT] key, power-on the MEGA65 and the MEGA65 Hypervisor Menu will appear as shown in the image below:
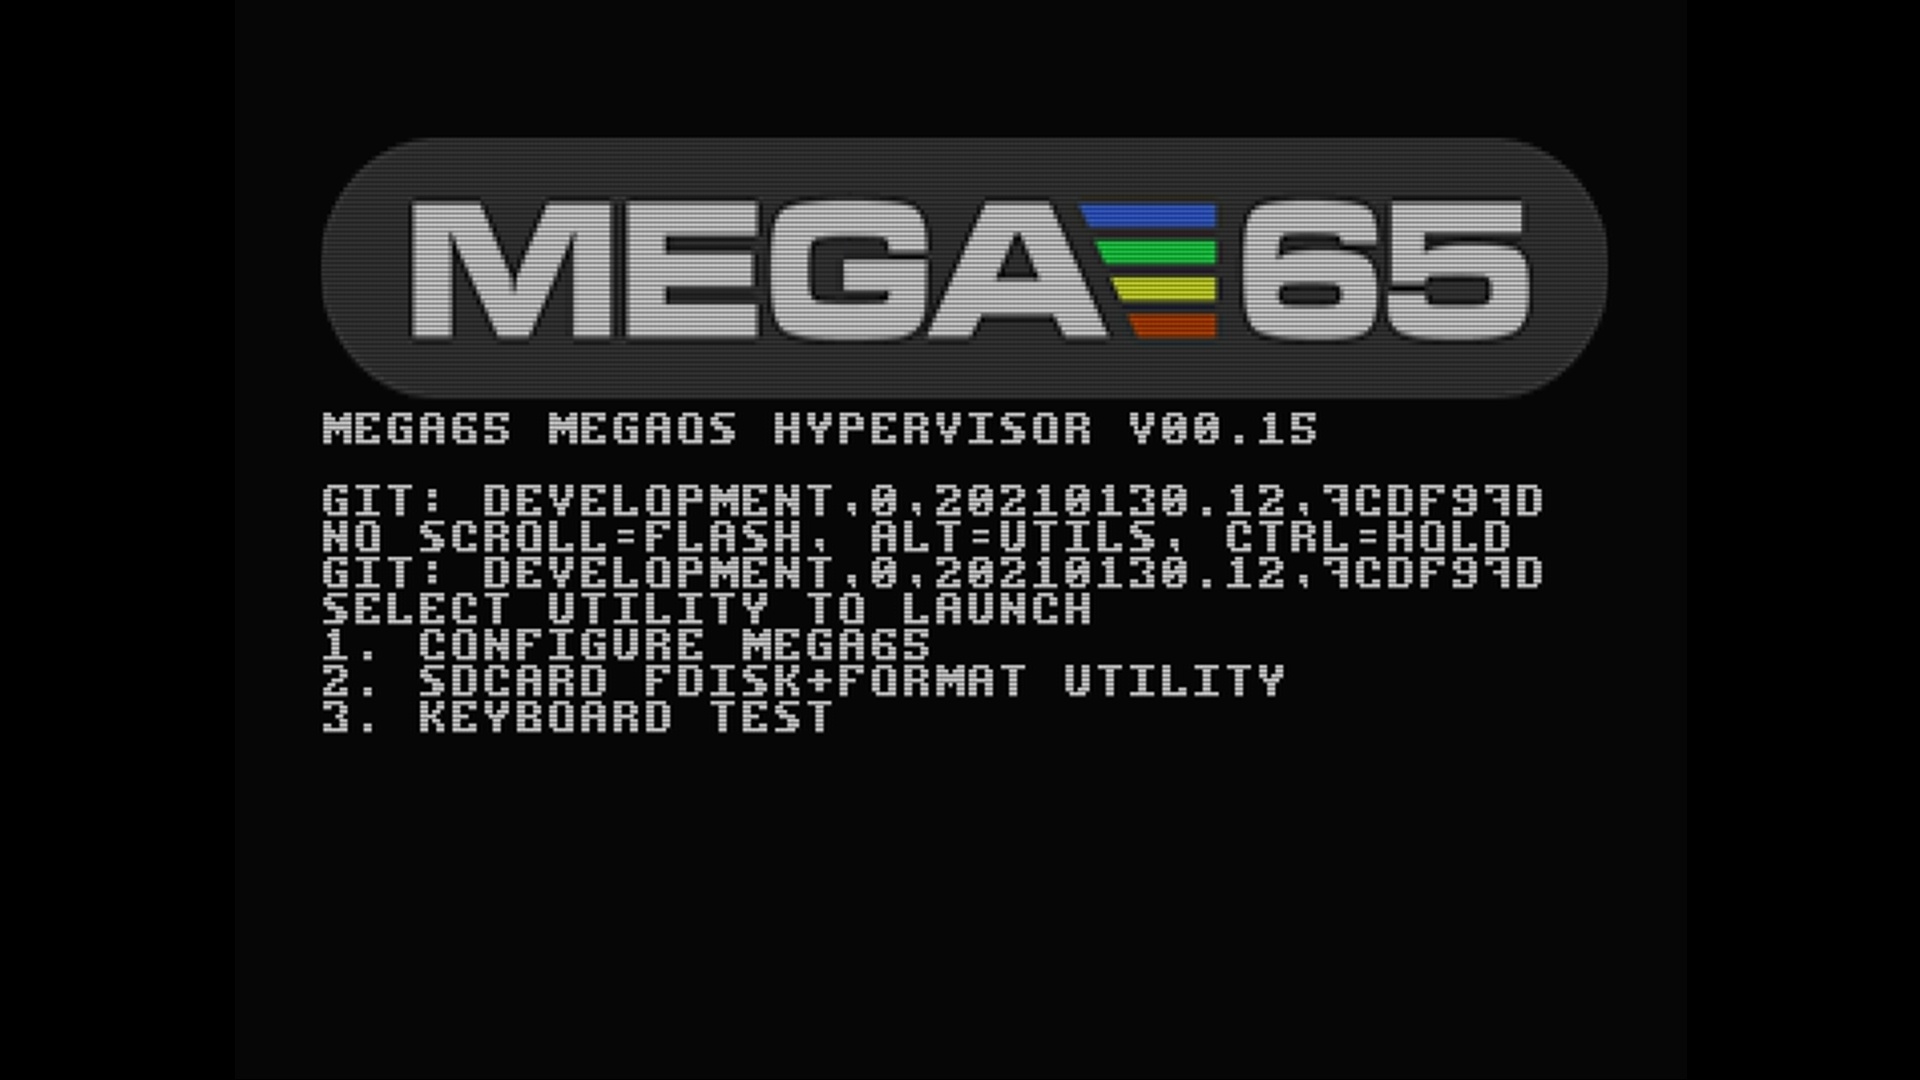
-
Select SDCARD FDISK+FORMAT UTILITY from the menu and the screen below will appear and then poll each SD card reader to determine if and what size card is attached.
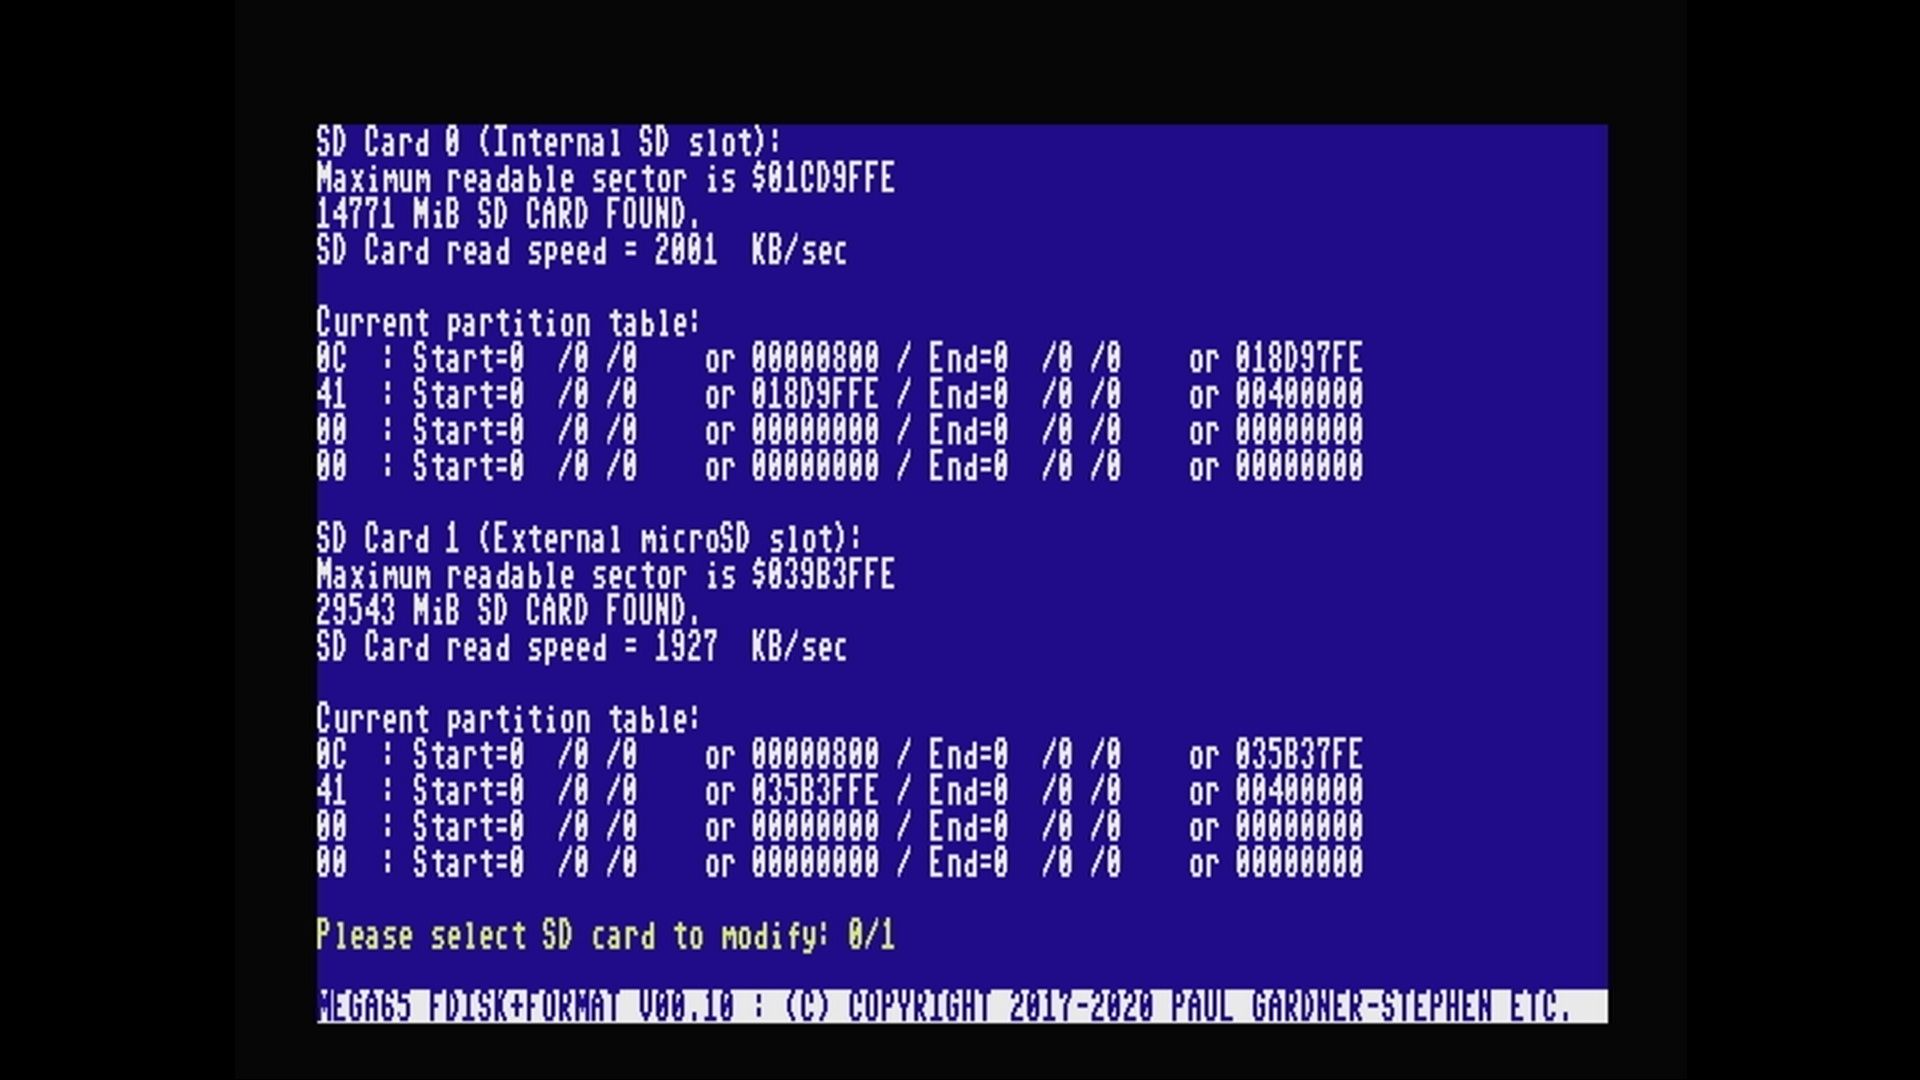
- If you followed my steps, you will have a single SD card attached to format. Select the corresponding number (either
0or1). - The MEGA65 will prompt you to type a long verification statement. Type this string as shown and press the
⏎. The MEGA65 will format the SD card.
When the process is complete, you will need to either copy an archive of your essential files, or follow the steps beginning in the Update the SD Card section.
Summing Up
Those are the steps for keeping the MEGA65 (DevKit) updated and I hope these will be the same steps for the product’s final release. If not, no fear. I’ll update this post with the most up-to-date process. When and if I do update, you will find strikethroughs and timestamps.
Since these procedures are not something I do everyday, I’m sure I will come back to this post the next time I need to upgrade my MEGA65. Hopefully, you will too! Let me know in the comments below, or under the video, if there’s something missing or I could explain with better clarity. Enjoy the MEGA65 folks! I know I am.
🕹️ retroCombs, OUT!