Retro computing with a touch of modern and the home for all things, retroCombs (aka Steven Combs).
Disclosure Statement: When you click on links to various merchants on this site and make a purchase, this can result in this site earning a commission. Affiliate programs and affiliations include, but are not limited to Amazon, the eBay Partner Network, and/or others.

retroCombs: Create a blank .c64 disk image for the Pi1541 or SD2IEC
by Steven B. Combs, Ph.D.
In my last post and video, I shared my experience with the assembly and first use of a Commodore4Ever Pi1541 for the Raspberry Pi Zero. Not familiar with the device? Take look here for more information.
The Pi1541 turned out to be a great device; if you have a bunch of disk images laying around your computer. As I began to prepare for my next using the Commodore Plus/4 episode, it became evident that I needed a blank disk image so I could save and load my own basic program and application files. I wasn’t sure you could do this with the Pi1541 by itself, so I began to look for hints online. Turns out, you cannot. You need to do this on a computer using some software. In this post and the accompanying video, I share that process as well as some other tips.
NOTE: While this process focuses on the creation of a .d64 diskette image for the Pi1541, it turns out that this same process works for SD2IEC devices. I updated the title and the contents to reflect this use case.
YouTube Video: Create a blank .c64 disk image for the Pi1541 or SD2IEC
In the video below, I share the content found in the blog post below.
Links Mentioned in this Episode:
Below are the links (#ad) mentioned in the video:
- PiDRIVE ZERO Raspberry Pi HAT pi1541 1581 Commodore 64, 128, and Vic-20 Emulator with OLED display
- The Versatile Commodore Emulator (VICE)
- Commodore4Ever
- Pi1541 Project
- Raspberry PI Zero
- Serial Cables
- microSD Card
- microUSB Cable
- SD2IEC
Creating a blank .c64 disk image
The process for creating a blank image utilizes the VICE (Versatile Commodore Emulator) emulator software. Installation of VICE varies by computer; however, I will run through the installation on a Linux distribution (Elementary OS). Check out the VICE download page for the many other versions available.
Install VICE
For Linux users, the most recent version of VICE should be ready to install from your distribution’s repositories. On my Elementary OS install (based on Ubuntu), it’s as simple as:
- Launch the Terminal.
- Type
sudo apt updateand wait for the repository lists to update. -
Type
sudo apt install viceand a terminal message similar to the one below will appear:Reading package lists... Done Building dependency tree Reading state information... Done The following additional packages will be installed: libgtkglext1 libpangox-1.0-0 The following NEW packages will be installed: libgtkglext1 libpangox-1.0-0 vice 0 upgraded, 3 newly installed, 0 to remove and 0 not upgraded. Need to get 5,257 kB of archives. After this operation, 34.0 MB of additional disk space will be used. Do you want to continue? [Y/n] - Type
yat the prompt and VICE will install.
For the Linux version, VICE will install several VICE launchers as shown in the image below:
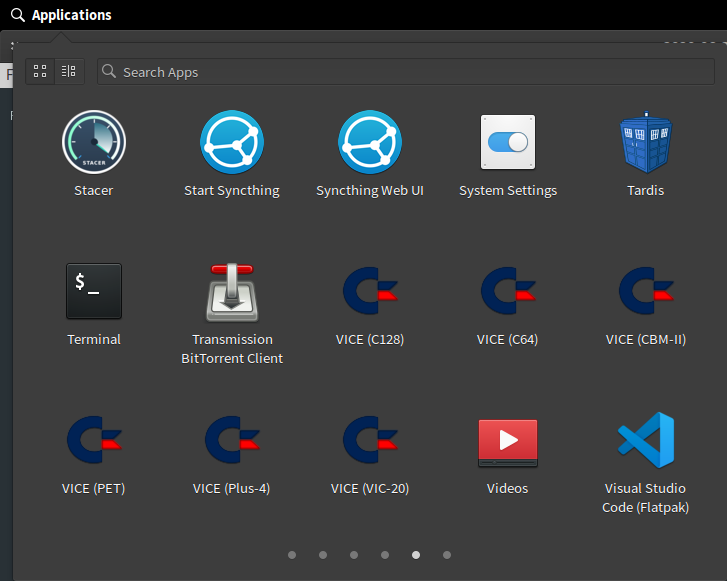
While you can use this software to create your own .d64 diskette image, the software is also a whole lot of fun for on-the-go retro-computing on other devices; but that’s for another post. Let’s not get distracted and get back to the task at hand.
Create the diskette image
With VICE installed, create a diskette image using the following steps:
-
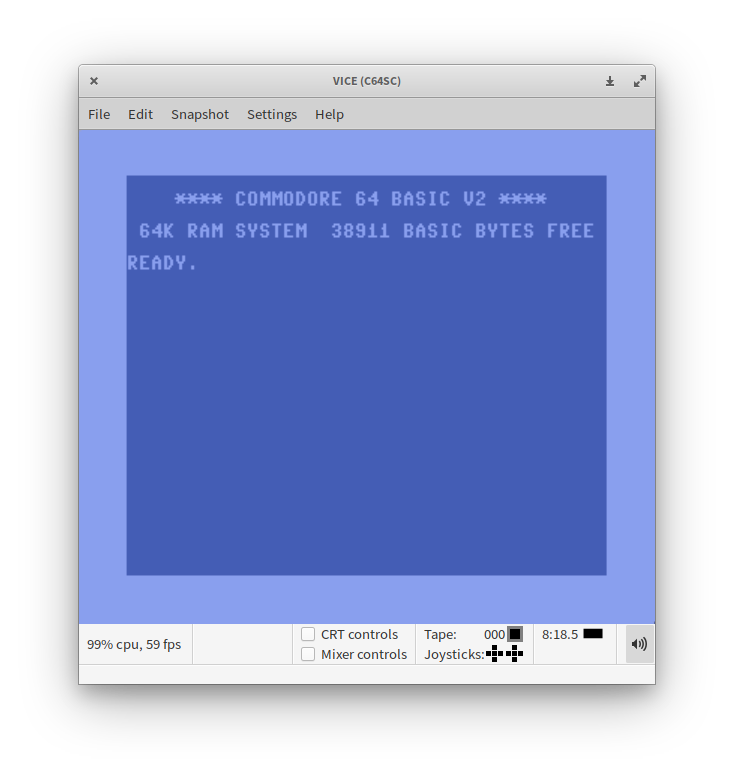
Start the VICE (C46) emulator on your computer. A screen similar to the one below will appear:
-
From the VICE menu, select File / Create and attach an empty disk image / Device #8. The following dialog box (or something similar), will appear:
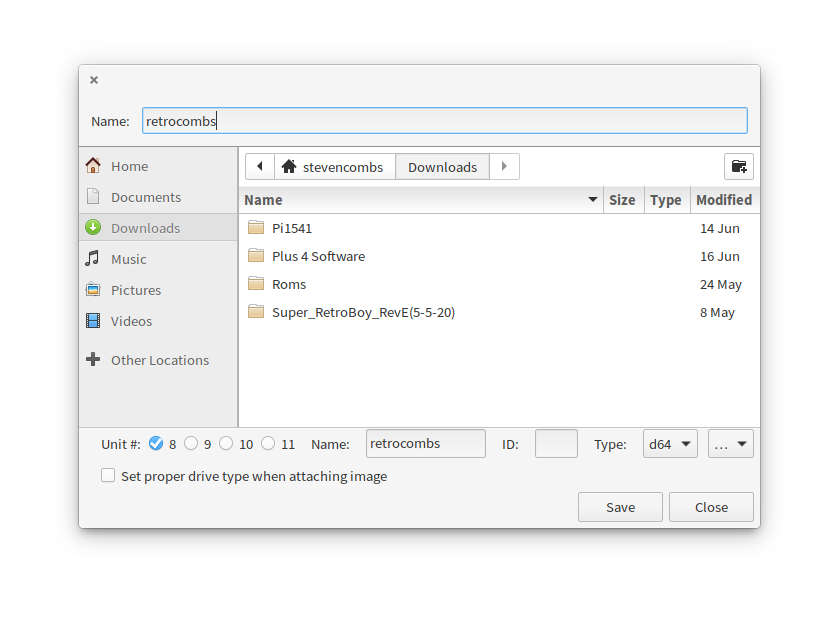
- Navigate to a location where you can easily find the .d64 file. I like to use the Downloads folder.
- In the Name text edit area, type the name of the file you want to create.
- You can select which device to automatically connect in the lower-left of the dialog box; however, that has nothing to do with the creation of the image. It simply connects the new image to that device number for VICE after the image is created. Use the default;
#8. - In the Name text edit box, type a name for the image in all lower case and no more than 16 characters. This text will display in the directory listing when you display the contents of the .d64 disk image on your Pi1541, SD2IEC, or within VICE.
NOTE: Type everything in lower case characters because they will be converted to upper-case when using on a Commodore computer or emulator. You can use other symbols, but I recommend you first take a look online at what symbols are allowed.
- The formatting ID: text edit box is purely cosmetic and can be any two alpha-numeric characters. You can also leave this box blank.
- Using the Type dropdown menu, select the
d64option (it will be the default). - Select the Save button to create the diskette image. VICE will also attach this new diskette image to the current VICE instance. If you remember your diskette commands (such as
LOAD "$",8and thenLIST), you can play around with the image on your computer before we transfer it to the Pi1541. - Once you are done mucking around with the image under VICE, close the VICE application.
Transfer the disk image
Now that the diskette image is created, let’s move it to the Pi1541.
- Place the Pi1541 SD card into the computer.
- Open a file manager.
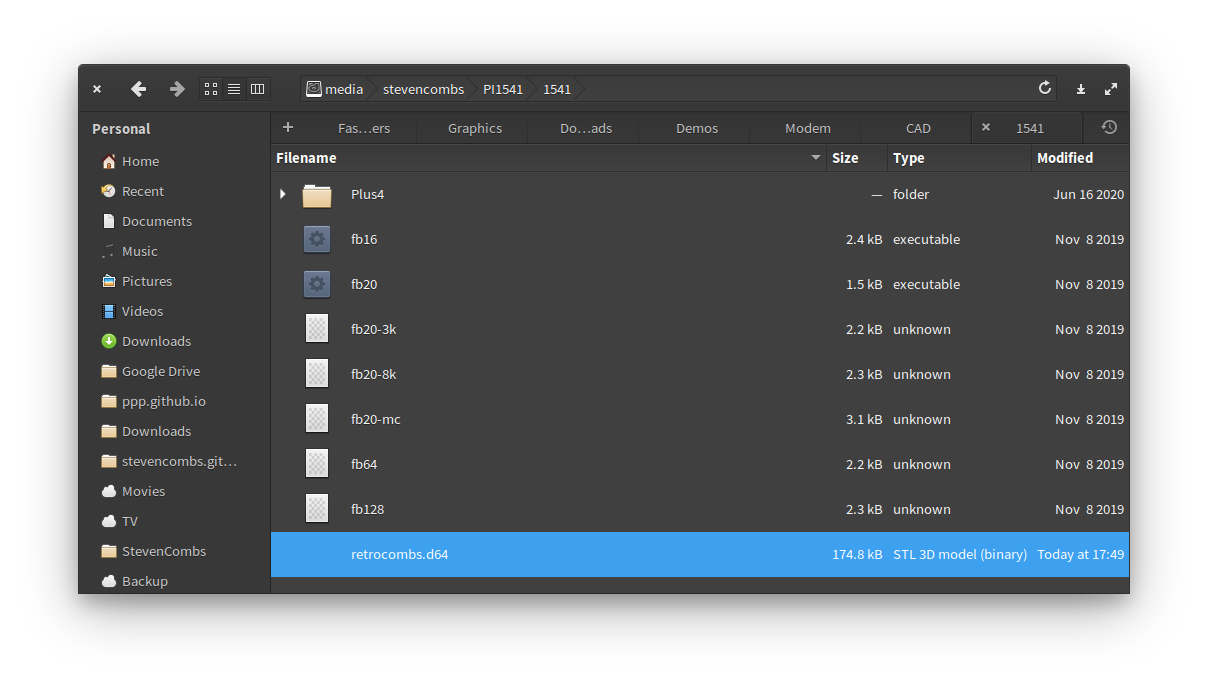
- Browse to the 1541 directory on the SD card.
-
Copy the newly created .d64 from the computer to the 1541 directory as shown in the image below:
- Once the image is transferred (it will take less than a second), eject the SD card.
Use the disk image
With the image transferred, we can now use it on a Commodore 8-bit computer.
- Insert the SD card into the Pi1541 (or SD2IEC device).
- Connect the Pi1541 to the computer using a cable.
- Apply power to the Pi1541 using a microUSB cable. The Pi1541 screen will flash and the green power light will illuminate.
- Turn on the Commodore computer (in my case, a Plus/4). The Pi1541 screen will display the contents of the microSD card.
- Use the buttons on the Pi1541 to navigate to the .d64 image created.
- On the Commodore computer, list a directory with either the
LOAD "$",8orDIRECTORYcommands (depending on the Commodore computer you are using with the first option usable by all).
The directory listing will include the new .d64 image contents and it can now be used like a diskette inserted into a 1541 disk drive.
Final Thoughts
You could find a copy of a blank .d64 file online, download it, and then place it on the SD card; but where’s the fun, and learning, in that? Besides, now that you have the secret sauce, you can now easily add your own header text to the image and create other types of diskette or tape image files using the same process, but with different options. The fun is in the exploration.
I’d also like to point out that you can transfer a .d64 file between computers and devices. Want to code on your computer? Place the SD card from the Pi1541 or SD2IEC device into a computer, use VICE to code (using a modern keyboard and emulating any Commodore 8-bit you wish), save the program to the disk image, and then place it back into the Pi1541 (or SD2IEC) and try the program on an actual Commodore computer. It’s a great way to take your retro-computing hobby on the road with you! While you’re at it, load up the SD card with other programs and disk images and use the VICE IEC option to access them all (you are welcome for that extra tip and can Google that one!).
One last reminder. As I’ve learned over time, SD cards, can be fragile. Make sure you have many on hand (#ad) and back up your data regularly.
Join the Fun
Know another way to create a .64 disk image? Have other tips and suggestions for me and the community? Well, why don’t you help make this post better! Leave your comments and thoughts below or in the comments under the YouTube video.
🕹️ retroCombs, OUT!