Retro computing with a touch of modern and the home for all things, retroCombs (aka Steven Combs).
Disclosure Statement: When you click on links to various merchants on this site and make a purchase, this can result in this site earning a commission. Affiliate programs and affiliations include, but are not limited to Amazon, the eBay Partner Network, and/or others.

HOWTO: Mirror a monitor connected to a Raspberry Pi on a Mac
by Steven B. Combs, Ph.D.
There are several tutorials available online that demonstrate how to setup a VNC connection to a Raspberry Pi from a Mac; however, most of them use TightVNC. This is fine if you want to control your Raspberry Pi remotely and do not have a monitor connected to the Raspberry Pi; however, I want to connect the Raspberry Pi to a monitor and then control the Raspberry Pi desktop, displayed on the monitor, from a Mac across the room.
To the best of my knowledge, TightVNC does not provide this feature (If I am mistaken, please leave a comment at the end of this post). TightVNC only allows a connection to a virtual screen. The result is that you see a virtual desktop on the remote computer, not the desktop on the display connected to the Raspberry Pi. My solution uses the VNC server, x11vnc to correct this.
NOTE: These instructions assume you have a Raspberry Pi, the Raspian operating system, an Internet connection, and the IP address of the Raspberry Pi.
Install x11vnc
The first step is to install the x11vnc server on the Raspberry Pi. We will use terminal commands to do this. You can use the Terminal application on the Raspberry Pi or you can connect remotely from a Mac using SSH.
It is good practice to first update the Raspian repositories using the command below:
sudo apt-get update
Install x11vnc using the command below:
sudo apt-get install x11vnc
Raspbian will display the following:
Reading package lists... Done
Building dependency tree
Reading state information... Done
The following extra packages will be installed:
  libvncclient0 libvncserver0 tcl tcl8.6 tk tk8.6 x11vnc-data
Suggested packages:
  tcl-tclreadline
The following NEW packages will be installed:
  libvncclient0 libvncserver0 tcl tcl8.6 tk tk8.6 x11vnc x11vnc-data
0 upgraded, 8 newly installed, 0 to remove and 1 not upgraded.
Need to get 1,621 kB of archives.
After this operation, 3,403 kB of additional disk space will be used.
Do you want to continue? [Y/n]
Select Y and follow with the ↩ key.
Set Password
Create a connection password for x11vnc using the command below:
x11vnc -storepasswd
The prompts below will display:
Enter VNC password:
Verify password:
Write password to /home/pi/.vnc/passwd?  [y]/n y
Password written to: /home/pi/.vnc/passwd
Type a password and verify. The password does not have to be lengthy. I use a six digit pin. Select y to write the password to the Raspberry Pi.
Start Server
Use the command below to start the x11vnc server on the Pi.
x11vnc -forever -bg -usepw -httpdir /usr/share/vnc-java/ -httpport 5901 -display :0
That’s a pretty long command so I recommend you copy and paste. In a nutshell, the command runs x11vnc in the background using the password created earlier and then sets the display to port 5900. Later I will demonstrate how to run this command using an easier to remember shell script.
Connect to Server
I use the built in Mac VNC viewer, Screen Sharing, to make the connection to the Raspberry Pi.
NOTE: Users of Apple’s Remote Desktop will be able to connect to the Raspberry Pi using this configuration; however, Remote Desktop will not discover the Raspberry Pi on the network automatically. You will need to add it manually in the All Computers area.
From the Finder menu, select Go / Connect to Server… or use the ⌘ + k keyboard combination.
Enter vnc://XXX.XXX.XXX.XXX into the Server Address text area, as shown in the image below. Substitute XXX.XXX.XXX.XXX for the IP address of the Raspberry Pi. In this example, the IP address is 10.0.1.100.
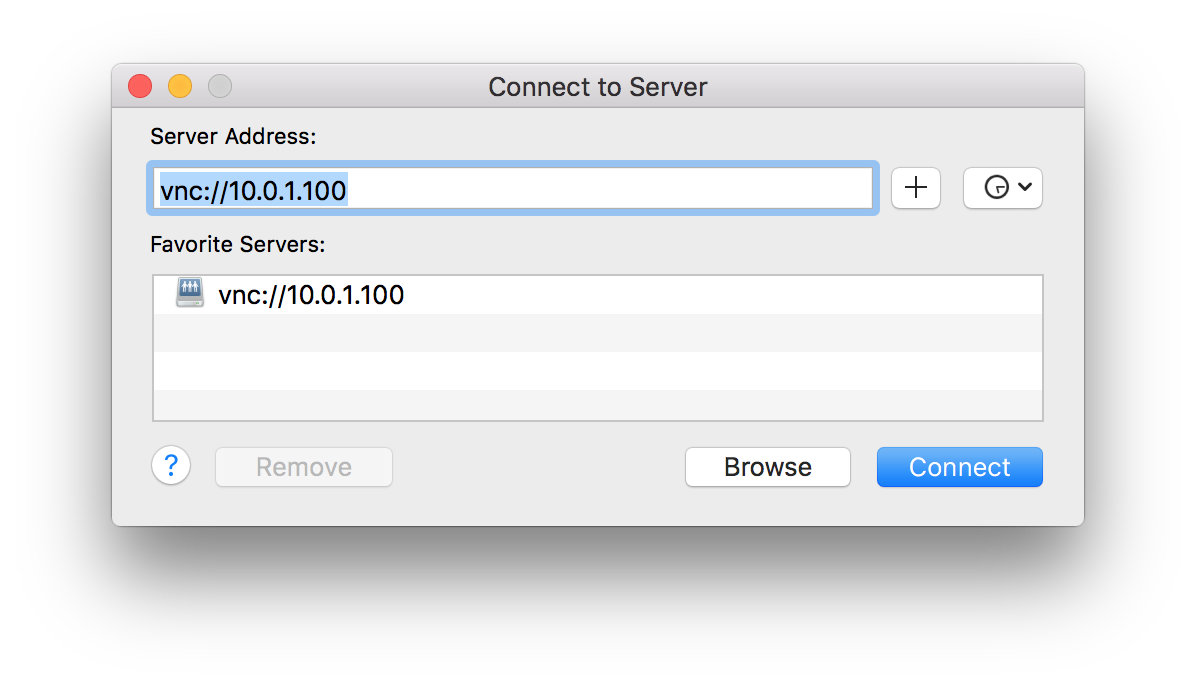
Click the Connect button and the dialog box below will display:
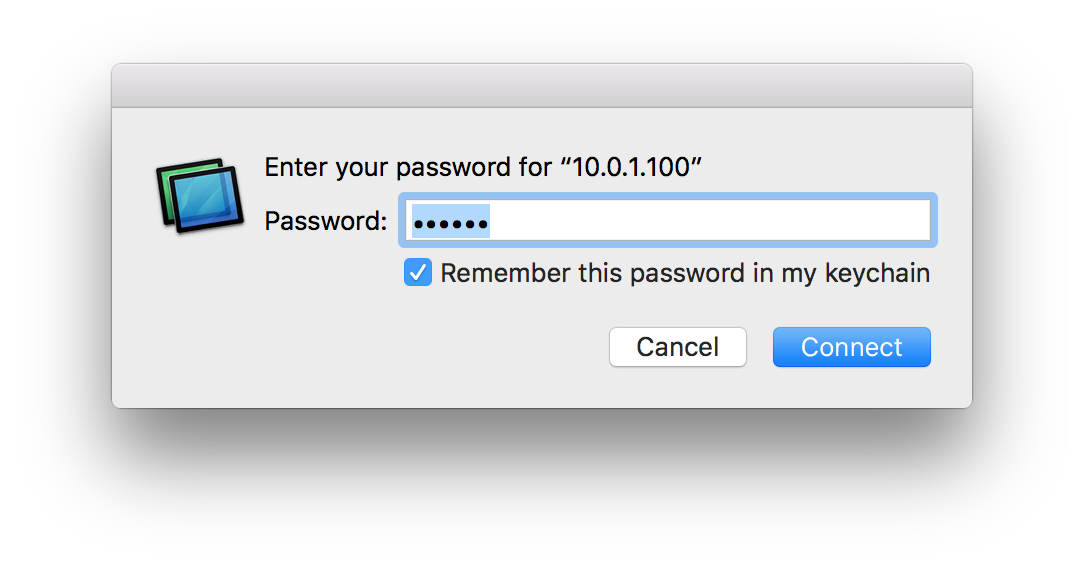
Enter the password, choose whether or not to remember the password in the keychain, and then select the Connect button. After a second or two, the Mac will mirror the main display on your Raspberry Pi as shown in the image below:

Use the Mac’s keyboard and mouse to control the Raspberry Pi. If you look on the actual display connected to the Pi, you will notice the mouse moves in sync with your Mac mouse. Success!
TROUBLESHOOTING TIP: If you cannot connect, ensure System Preferences / Sharing / Screen Sharing is off, or not selected.
Stop Screen Sharing
On the Mac, from the main menu, choose Screen Sharing / Quick Screen Sharing to stop mirroring the Raspberry Pi screen on the Mac.
Create a shell script
The entire x11vnc command with parameters is hard to remember. Create a shell script to make it easier to start the x11vnc server. The single line of code shown below will create a new shell script in the home directory:
echo "/usr/bin/x11vnc -forever -bg -usepw -httpdir /usr/share/vnc-java/ -httpport 5901 -display :0" > ~/x11vnc.sh
Use the ls command to verify that a new script file named x11vnc.sh is in the home (~/) directory.
This script does not have permission to run. Change permissions with the command below:
chmod +x ~/x11vnc.sh
Run this script manually using the command below:
./x11vnc.sh
Remembering ./x11vnc.sh is far easier to remember than the longer command we wrote to the shell script file.
Kill the x11vnc server
If you need to stop (kill) the x11vnc server, use the command below to determine the process ID for x11vnc.
pgrep x11vnc
Raspian will display a three or four digit number.
Next type the command below:
kill XXXX
Where XXXX is the process number identified in the previous step. The x11vnc server will stop. If you need to restart, just enter the short shell script name: ./x11vnc.sh
Conclusion
It took me some time, much research, and much trial and error to figure this out. I was never able to find complete instructions online that work or a step-by-step guide. Hopefully others who want to mirror their Raspberry Pi’s “main” display on their Mac will find these instructions. My goal has been to write them in such a way that even those new to Linux can do this.