Retro computing with a touch of modern and the home for all things, retroCombs (aka Steven Combs).
Disclosure Statement: When you click on links to various merchants on this site and make a purchase, this can result in this site earning a commission. Affiliate programs and affiliations include, but are not limited to Amazon, the eBay Partner Network, and/or others.

Creating my YouTube retroCombs video bumper
by Steven B. Combs, Ph.D.
On 2020-05-23, I began a new series of YouTube videos about the Commodore Plus/4. You can learn more about the first episode and the series here. In preparation of that series, I created a video bumper; a short 14 second brand animation to introduce all retroCombs videos. In this post, I’m going to share my process. This post is not a step-by-step tutorial, but rather a description of the tools I used and the flow to put it all together. Let’s take a look at the bumper first in the YouTube video below.
YouTube Video: retroCombs Animated Video Bumper
As you watch the video below, see if you can identify which tools I used to create the bumper. I think my list, of all FREE apps, will surprise you.
Think you’ve identified the tools? Let’s see if you were correct.
Creating the Artwork (Google Slides)
This one is going to confuse a whole bunch of graphic artists out there. Every graphic I create for my YouTube videos or my podcast is created in…wait for it…Google Slides. You can view the Google Slides file that contains the artwork for this bumper video below.
This is a live file. As I add additional graphics, you can always return to this page and see the additions. Being able to embed a presentation on a webpage is the first advantage of Google Slides.
You may wonder why I use Google Slides instead of Google Drawings (or why I use Google Slides at all). Easy answer. Google Slides includes every drawing tool found in Google Drawings. In addition, Google Drawings can only contain a single drawing, not a series of drawings as I demonstrate in my presentation above. Having multiple slides means I can easily duplicate a slide to transfer the color palette, copy portions of images from one slide to the next, and collect a series of images into a single file.
You will notice in my bumper that the monitor and the computer are surprisingly similar to a Commodore monitor and the Plus/4, but not quite. I created these images by tracing over photos I took of the actual objects and then modified my designs to fit the tools available in Google Slides. If you look closely, you will see some of the liberties I took; and that was okay. These images do not need to be exact because they are my vision and design of these real-life objects.
The drawings created in Google Slides are vector images. As a former computer-aided drafting educator, I’m familiar with the more flexible vector, rather than bitmap, drawing tools and feel right at home in Google Slides. Google Slides allows me to combine bitmap with vector graphics, but I rarely use this feature. I create each unique drawing on its own slide and if I want to combine items to make a system, I copy and paste onto another new slide.
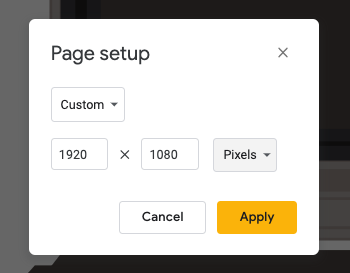
Before I create video assets, I specify the size of the presentation in pixels. Since I create video in HD, I set the presentation dimensions to 1280 x 1080 pixels. There’s an option in Google Slides to choose standard 16:9 HD, but when you export images using this setting, you don’t get full HD resolution, but rather a 720P resolution. This will produce blurry images when upscaled.
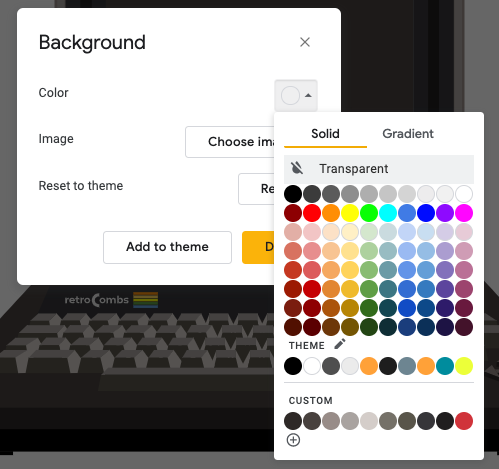
Slide backgrounds are always transparent. Few people know this option exists. Instead of selecting a color for the background, I chose transparent. When you export a slide as a .png file, that image will have the background removed and you can overlay images on top of each other when you export them as a video asset (more on that below). While I didn’t use them here, I also use this technique to create lower-thirds for other video content.
Unfortunately, Google Slides does not include some necessary tools. While I appreciate the .png, .svg, and .pdf export options available, an option missing is the ability to export a presentation as a movie or animation for self playing presentations. You can embed self playing HTML5 animations into the web sites, but there’s no way to export a video file or animation. Because of this limitation, for this bumper video project, I needed to use another tool to create my animations and export them as video.
Creating the Animation (Apple Keynote)
If you’ve ever seen an Apple presentation, you’ve experienced the graphic and animation capabilities of the Keynote application. I created the entire bumper animation with the Keynote application on a Mac mini.
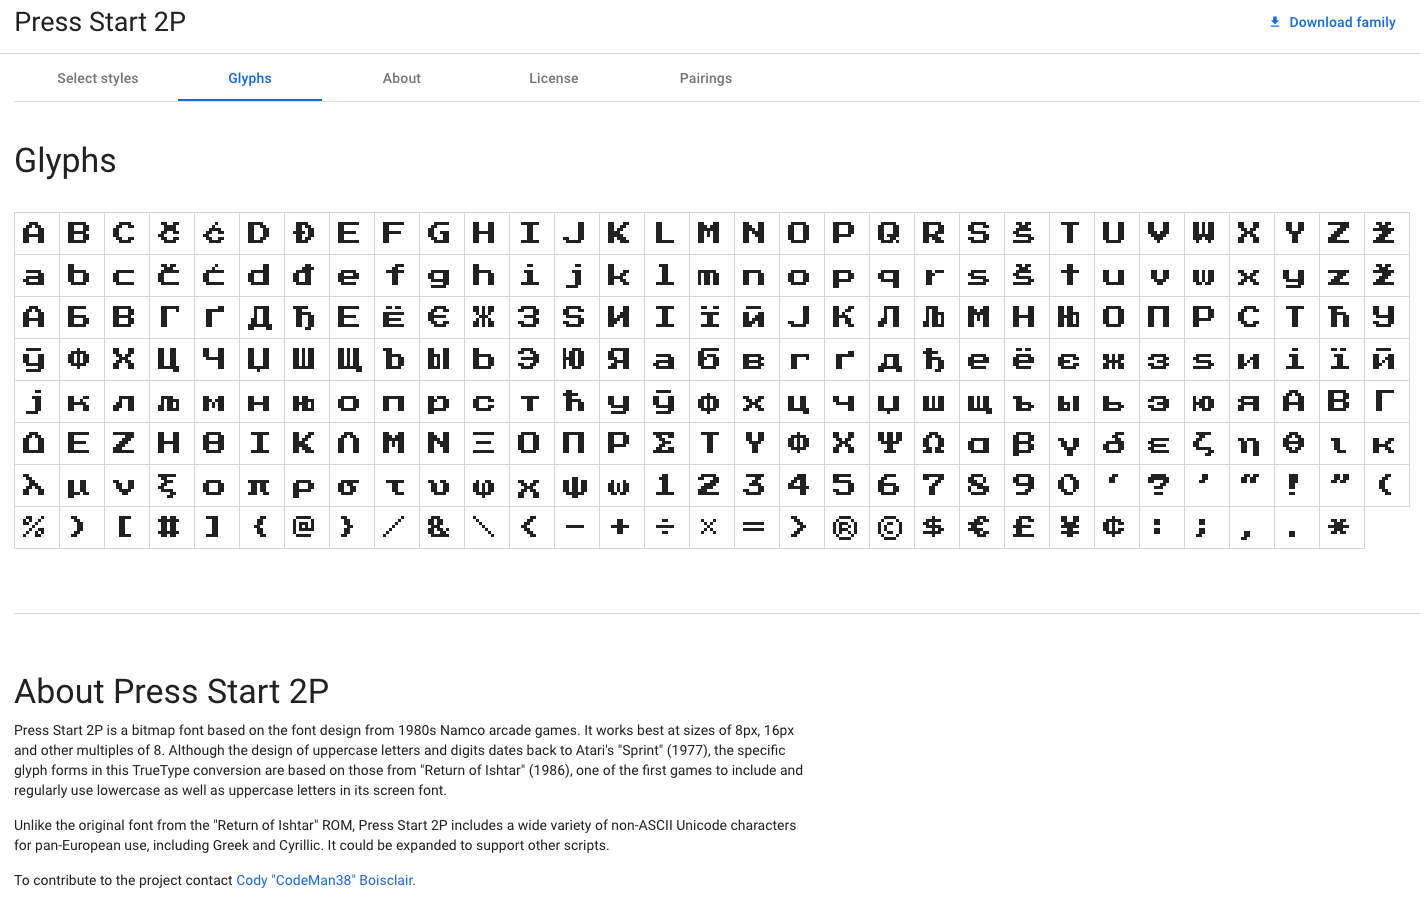
The images were easy to import but I did need to install the same fonts used in Google Slides on the Mac mini to maintain consistency. Luckily, Google makes this easy. Visit the Google Fonts site, download the font, and double-click to install on the Mac. I used a fun 8-bit style font called, Press Start 2P.
Keynote was used to build out my storyboard (which was originally hand drawn). There were no slide transitions. The entire animation uses object animations. One particularly fun animation was the Keyboard Build-in. This animation mimics typing. Using this animation with the Press Start 2P font, on a blue background, allowed me to simulate typing on an 8-bit computer. I think the text animation looks really good. I also used another cool Keynote tool, Magic Move, to animate objects “automagically” between slides. You will notice the use of this tool toward the end of the animation.
I could have included audio in Keynote to simulate the sound of someone typing; however, my goal was also to include the actual sound of typing on a Commodore Plus/4. To ensure exact placement of this recorded audio, I needed a more robust tool (more later).
Creating the Audio (Audacity and Audio Recorder)
To record Commodore Plus/4 keystroke sounds, I broke out an inexpensive handheld audio recorder, connected a lavaliere microphone, and clipped the microphone to the top of a Commodore Plus/4. I then tried to type, at the same speed, the keystrokes animated in Keynote. That was a disaster. I kept messing up. I counted the characters and just typed random keys. I ended the line by hitting the Return key firmly. This gave the audio an extra “umpf” at the end of the line. I did this several times in the same audio file until I felt I had a good take.
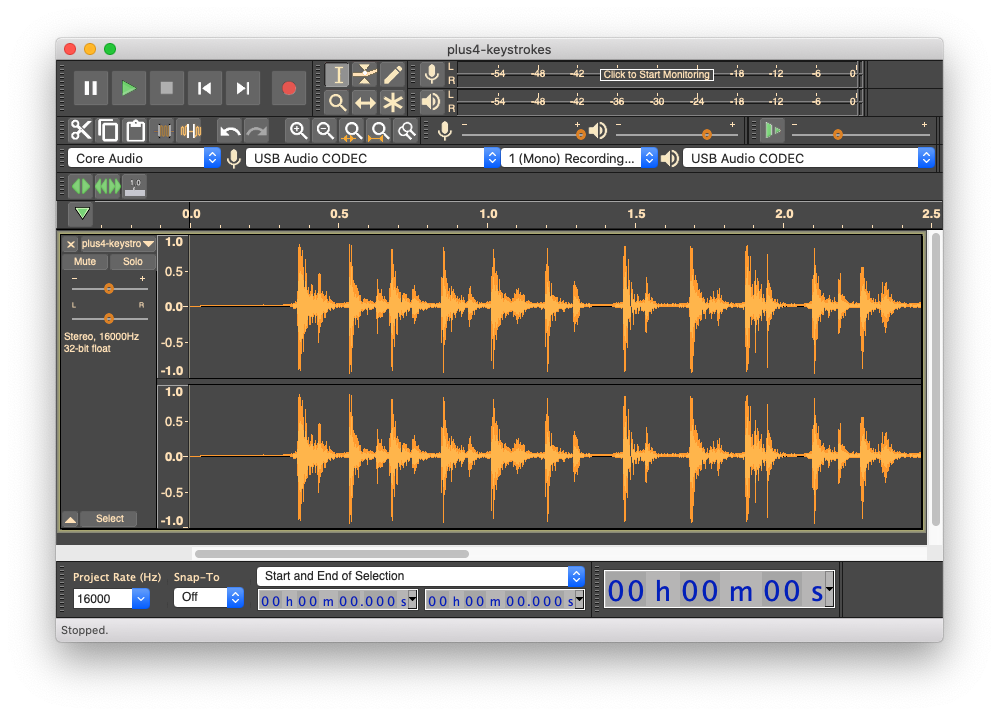
My bumper includes 8-bit sound effects. I found 8-bit sound effects in several YouTube videos. I’ve since figured out how to grab those directly from 8-bit devices using my Cloner Alliance Box Pro. I used an online YouTube to MP3 converter to download the audio from these videos. From this large audio file, I used Audacity to grab and create the snippets for the bumper. While Audacity was open, I loaded my keyboard audio and clipped the best take of the keystroke audio.
With all the video and audio assets ready, it was time to compile the final animation.
Putting it all Together (DaVinci Resolve)
I’ve used DaVinci Resolve for several months now (a COVID learning opportunity) and it is now my goto video editing package. It has been used to edit and upload most of the videos found on my YouTube channel. Below are the reasons I recommend DaVinci Resolve:
- A free version with every tool I will ever need is available for Mac and certain Linux distributions.
- Despite its complex editing tools, it is easy to pick up and use if you watch a few YouTube videos which leads to the next bullet…
- There are a ton of wonderful YouTube video tutorials to get you started.
- They even throw in an integrated audio editor.
- Includes professional titling (I did not use this feature) if you want to modify or create flying text and logos.
- If you need advanced tools, you can grow into the application, with a single fee of $299, to create truly amazing and professional videos.
I am pleased with how quickly I was able to edit the bumper video down into the 14 second spot. You can see my timeline and a screenshot of DaVinci Resolve in the image below.
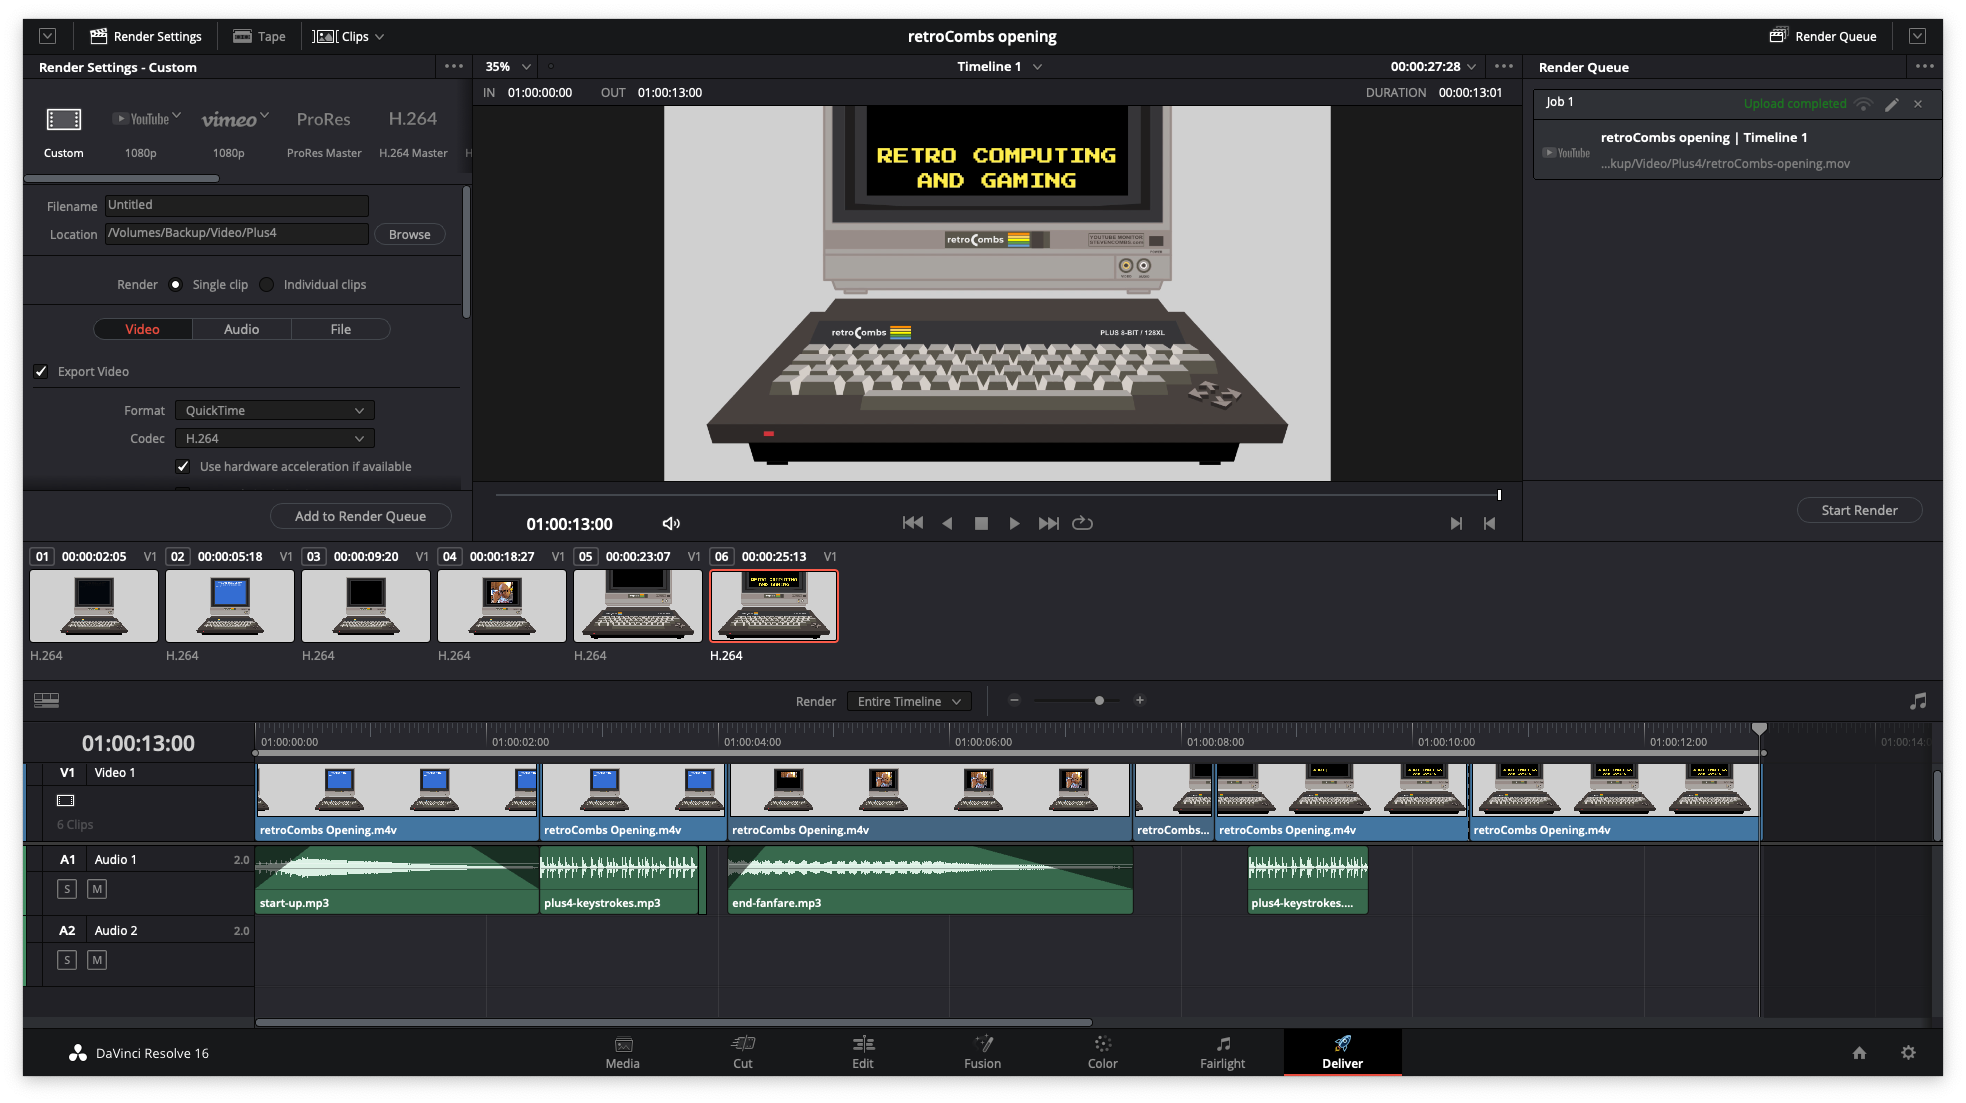
Total time to edit the entire video, once I had all assets created and exported in their own folder, was about 30 minutes. This includes the removal of a segment where the computer crashed into location. It made the segment longer, wasn’t really in the spirit of the bumper, and was just tacky. That’s the one advice I would offer when creating a bumper video. Keep just what you need and if it looks out of place, it probably is. Kill it!
What’s next?
I’m already considering some changes to the retroCombs bumper. I’d like to shave it by four-seconds and get it right at ten-seconds. This may seem like an easy task, but those four-seconds will significantly change the flow of the bumper. After some thought, I think I can combine the typing on the first screen with the typing on the second. I’ll work on it. This extra work will make the bumper more impactful.
And here’s my last tip. Keep refining your ideas. If you are like me (I only hope you aren’t), all my first draft video and blog posts include more than I need and I always end up cutting to make them more succinct (if you have read this far you are probably wondering why I didn’t cut even more of this post). While some will say you should “kill your darlings,” I say you should “clone your darlings” and then cut the original. I’ve found out way too many times that I had wished I kept the first draft.
I hope someone finds this post helpful or causes you to think about your process. My process isn’t necessarily for everyone and I’m sure there are professionals and amateur video editors are would like to rip my video apart. That’s okay, if they do, I learn from that. As long as I’m “cool” with the video, that’s all that matters.
Leave a comment below and let me know what you think.