Retro computing with a touch of modern and the home for all things, retroCombs (aka Steven Combs).
Disclosure Statement: When you click on links to various merchants on this site and make a purchase, this can result in this site earning a commission. Affiliate programs and affiliations include, but are not limited to Amazon, the eBay Partner Network, and/or others.

Install C64 OS using the VICE Commodore Emulator
by Steven B. Combs, Ph.D.
You have C64 OS and you can’t wait to install and play with this new incredible operating system for the beloved Commodore 64. The only problems is, your C64 is kaput or has yet to arrive from that eBay seller who promised it you days ago. Never fear! You can install C64 OS on VICE for Windows or Mac and I’m going to show you how to get C64 OS up and running as quickly as possible.
I show how to install C64 OS on VICE 3.7 for Mac; however, the steps are almost identical in Windows. I’ve not yet tried this on Linux, but hope to give that a shot later. Let’s get started.
Table of Contents
- Table of Contents
- Support the Blog and Channel
- Companion YouTube Video
- Video Errata
- Links Mentioned
- Required Files
- Prepare Files
- Install VICE
- Configure the Pointing Device
- ROM Configuration
- Configure and Attach Virtual Floppy Drives
- Configure and Attach Virtual CMD HD
- Configure C64 OS
- Reset VICE
- Boot C64 OS
- Using the Pointing Device
- Exit and Load C64 OS
- Homework
- Conclusion
Support the Blog and Channel
Check out the supporters page to learn about my amazing supporters and how you can join our community.
Companion YouTube Video
Title: Install C64 OS using the VICE Emulator on a Mac or Windows Computer
Video Errata
None as of 2023-02-04.
Links Mentioned
I use affiliate links. Thanks for your support of the blog and the YouTube channel when you use these links.
- C64 OS Simplified VICE Configuration
- C64 OS
- CMD HDD Boot ROM 2.80 Binary Image - RETRO Innovations
- JiffyDOS 64 KERNAL ROM Overlay Image - RETRO Innovations
- Insync
- VICE - the Versatile Commodore Emulator
Required Files
Before you install C64 OS on VICE, you will need to make two required and one optional purchase:
- Required: C64 OS - There are two bundles available: Starter for $59 CAD and Standard $64 CAD. I use the Standard bundle and recommend you spend the extra $5 CAD.
- Required: CMD HDD Boot ROM 2.80 Binary Image - RETRO Innovations for $8.00. This is the ROM VICE required to read and write a virtual CMD HD device.
- Optional: JiffyDOS 64 KERNAL ROM Overlay Image - RETRO Innovations for $8.00. This is not required, but will significantly speed access to the CMD HDD virtual device.
Prepare Files
This next step is optional and a matter of choice; however, I recommend you copy the contents of the C64 OS card to a cloud drive and synced to a local drive your Mac. This provides three advantages:
- You have a backup.
- Once configured, you can port your C64 OS environment to another Mac or PC.
- With Google Drive, you have versioning so you can back up to a previous version of your C64 OS install.
Below are the steps I used to sync with Google Drive:
-
Created a new folder within my Mac’s Google Drive folder (that is synced using Insync tool) called
C64 OS ver 1and then copied the contents of the C64 OS SD card into that folder, as shown in the image below: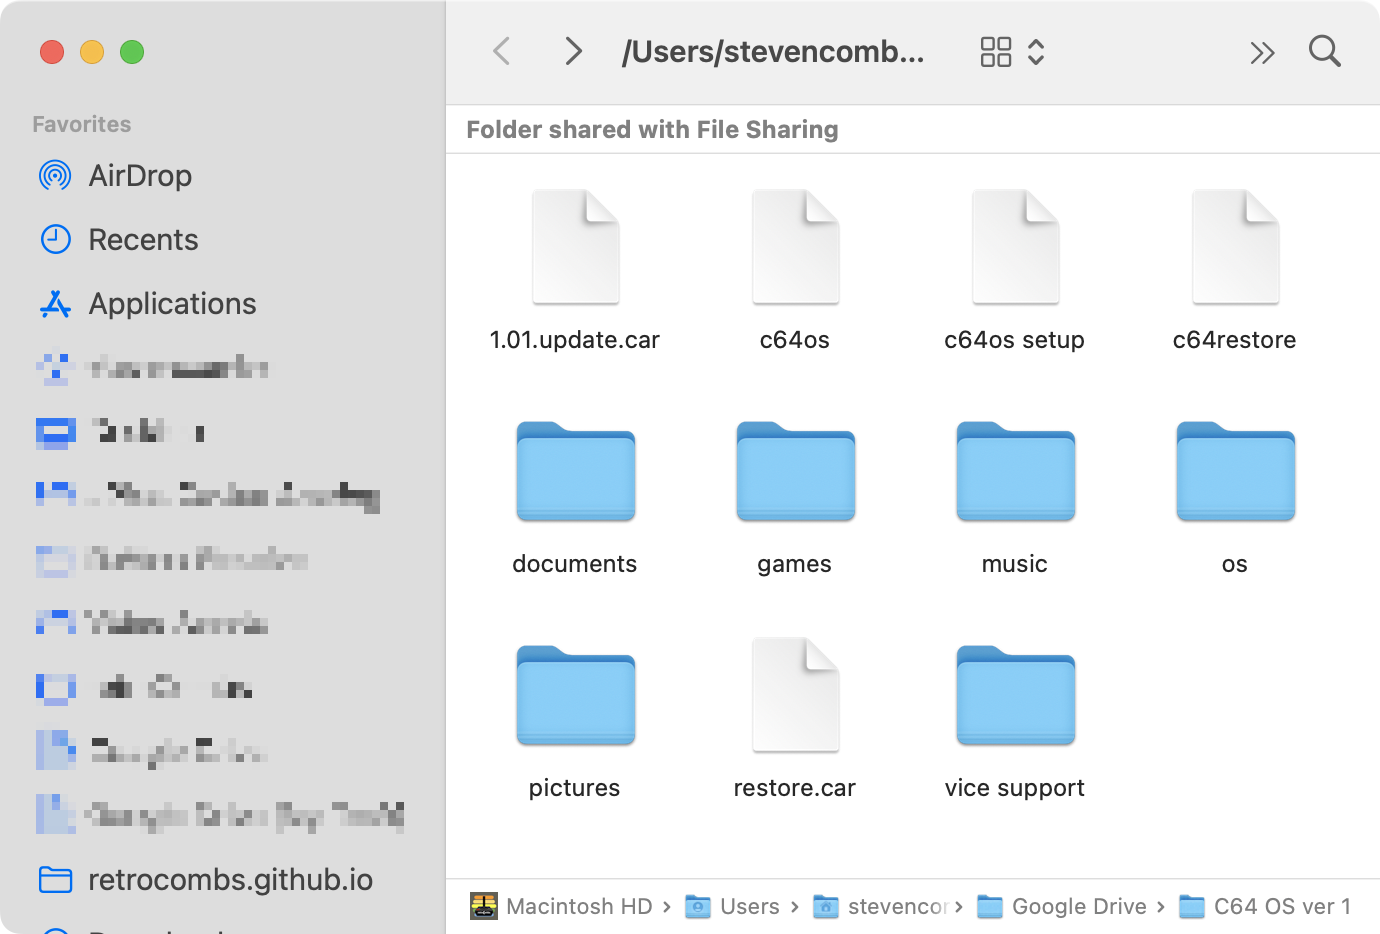
-
Copy the required CMD HDD ROM (
doscmdh_v280.bin) and the optional JiffyDOS ROMs (jiffydos_c64.binandjiffydos_c1541.bin) into the vice support folder. There are other files in that folder we will use later.
Install VICE
The next step is optional if you already have a VICE install; however, in December 2022 the developers released version 3.7 and I recommend the upgrade. The previous version, 3.6.1, had several Mac GUI issues.
- Download VICE - the Versatile Commodore Emulator
- VICE for Mac doesn’t have a native installer. Unpack the archive to get a folder full of emulators and tools.
-
Drop the folder into the Applications folder.
NOTE: I’m sure others will tell me, “NO!!!” since the folder includes command-line tools. I deal with those in another way and I will not cover in this blog post.
- Open
~/Applications/VICE 3-7-1/x64sc.appto ensure the application works properly.
Configure the Pointing Device
C64 OS requires the use of a joystick or 1351 mouse. You can’t connect original 9 pin DIN devices directly to your Mac, but you can configure VICE to use your trackpad or connected BT or USB mouse as a Commodore 1351 Mouse. Let’s set that up using the steps below:
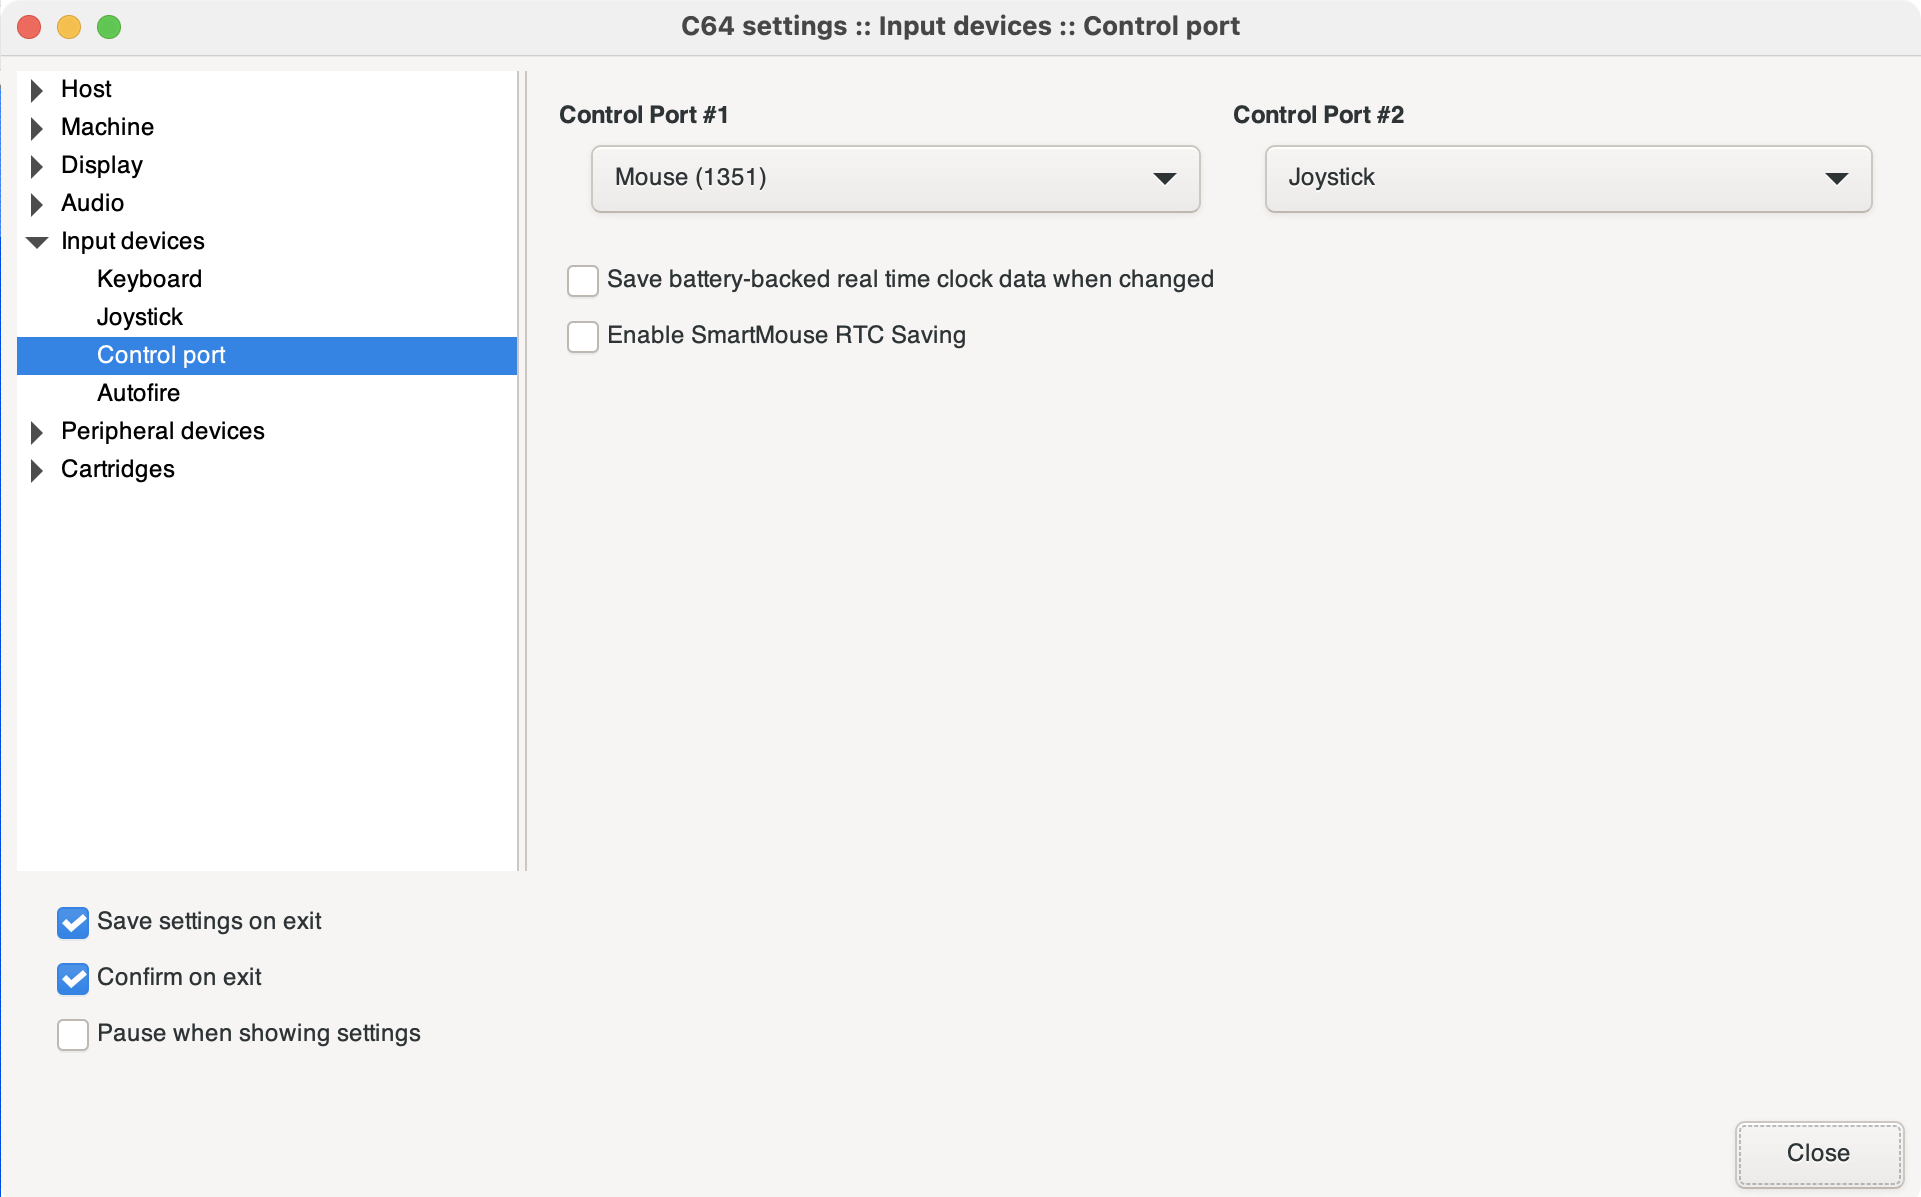
- From the pull-down menu, select Preferences | Settings | Input devices | Control port.
- Use the Control Port #1 drop-down selector to choose Mouse (1351).
-
While on this page, ✓ the Save settings on exit option to ensure VICE continually saves your preferences. Your dialog box should look similar to the one below:
- Select the Close button.
ROM Configuration
Remember those JiffyDOS and CMD HDD ROMs we downloaded and you placed in the vice support directory? It’s time to use the ROMs in the steps below:
- Select Preferences | Settings | Machine.
- Ensure Machine ROMs is highlighted.
- Click the Browse… button to the right of the Kernal option.
-
Navigate to the
vice supportfolder you created earlier on the Mac and select thejiffydos_c64.binfile as shown below: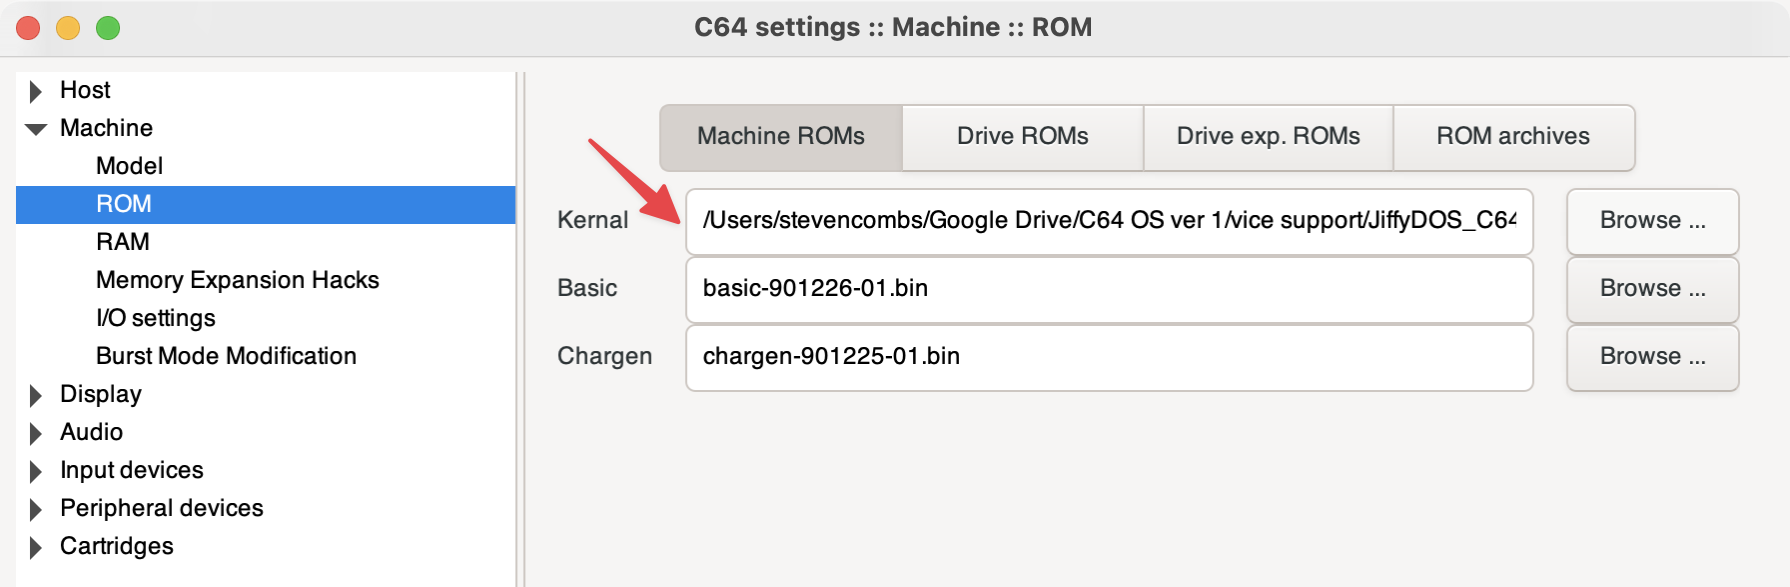
- Click the Open button.
- Click the Drive ROMs option at the top of the page.
- Click the Browse… button to the right of the 1541 option.
-
Navigate to the
vice supportfolder and select thejiffydos_c1541.binfile as shown below:
- Click the Open button.
- Click the Browse… button to the right of the CMD HD option.
- Navigate to the
vice supportfolder and select thedoscmdhd_v280.binfile as shown above. - Click the Open button.
- Leave the Settings dialog box open.
Configure and Attach Virtual Floppy Drives
Configure the virtual drive 8 to use JiffyDOS and access a .d64 disk image within C64 OS.
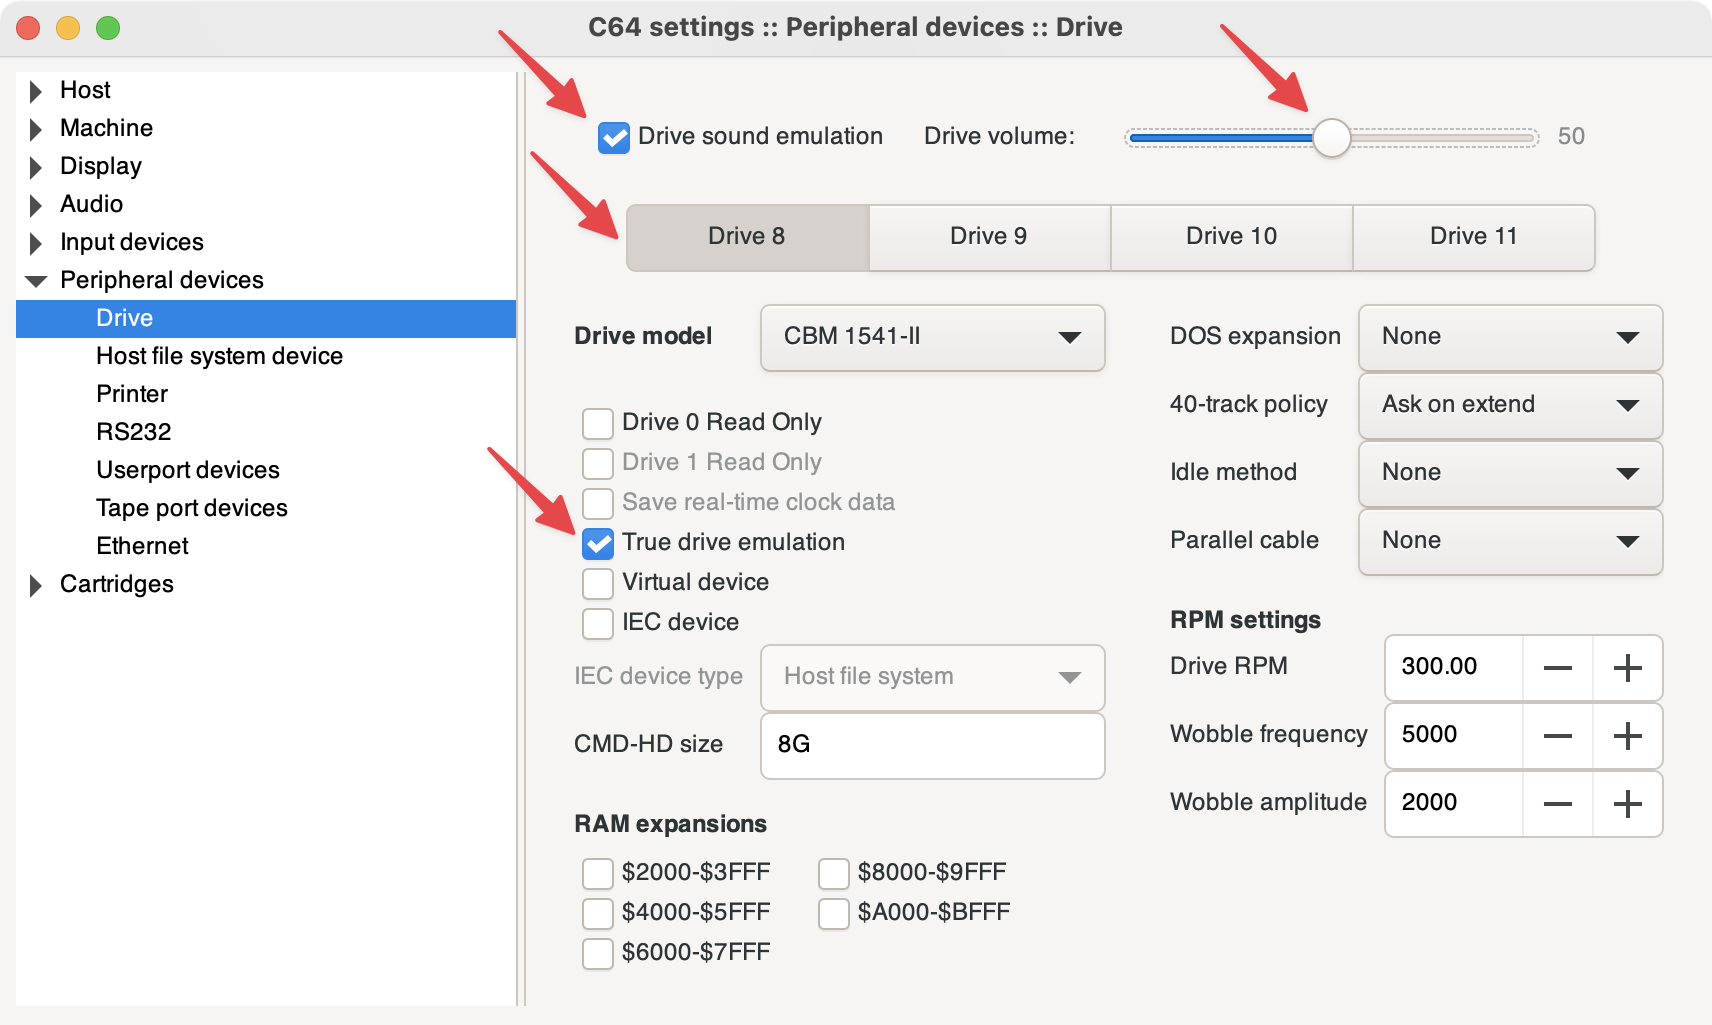
- From the open Settings dialog box, select Peripheral devices | Drive.
- Optional - ✓ the Drive sound emulation option.
- Optional - Adjust the Drive volume: to 50%.
- Ensure Drive 8 tab is highlighted.
- Select CBM 1541-II in the Drive model pull-down menu.
- ✓ the True drive emulation option.
-
The dialog box should look like the one below:
- Click Close to close the Settings dialog box.
NOTE: To attach a virtual disk image to C64 OS, select File | Attach disk image | Drive #8 and when the file selection dialog box appears, navigate and select the
.D64disk image. If you don’t have a virtual disk image, you can create one using the File | Create and attach an empty disk image … option.
Configure and Attach Virtual CMD HD
With drive #8 configured to support virtual floppy disks, it is now time to configure drive #9 to emulate a CMD HD.
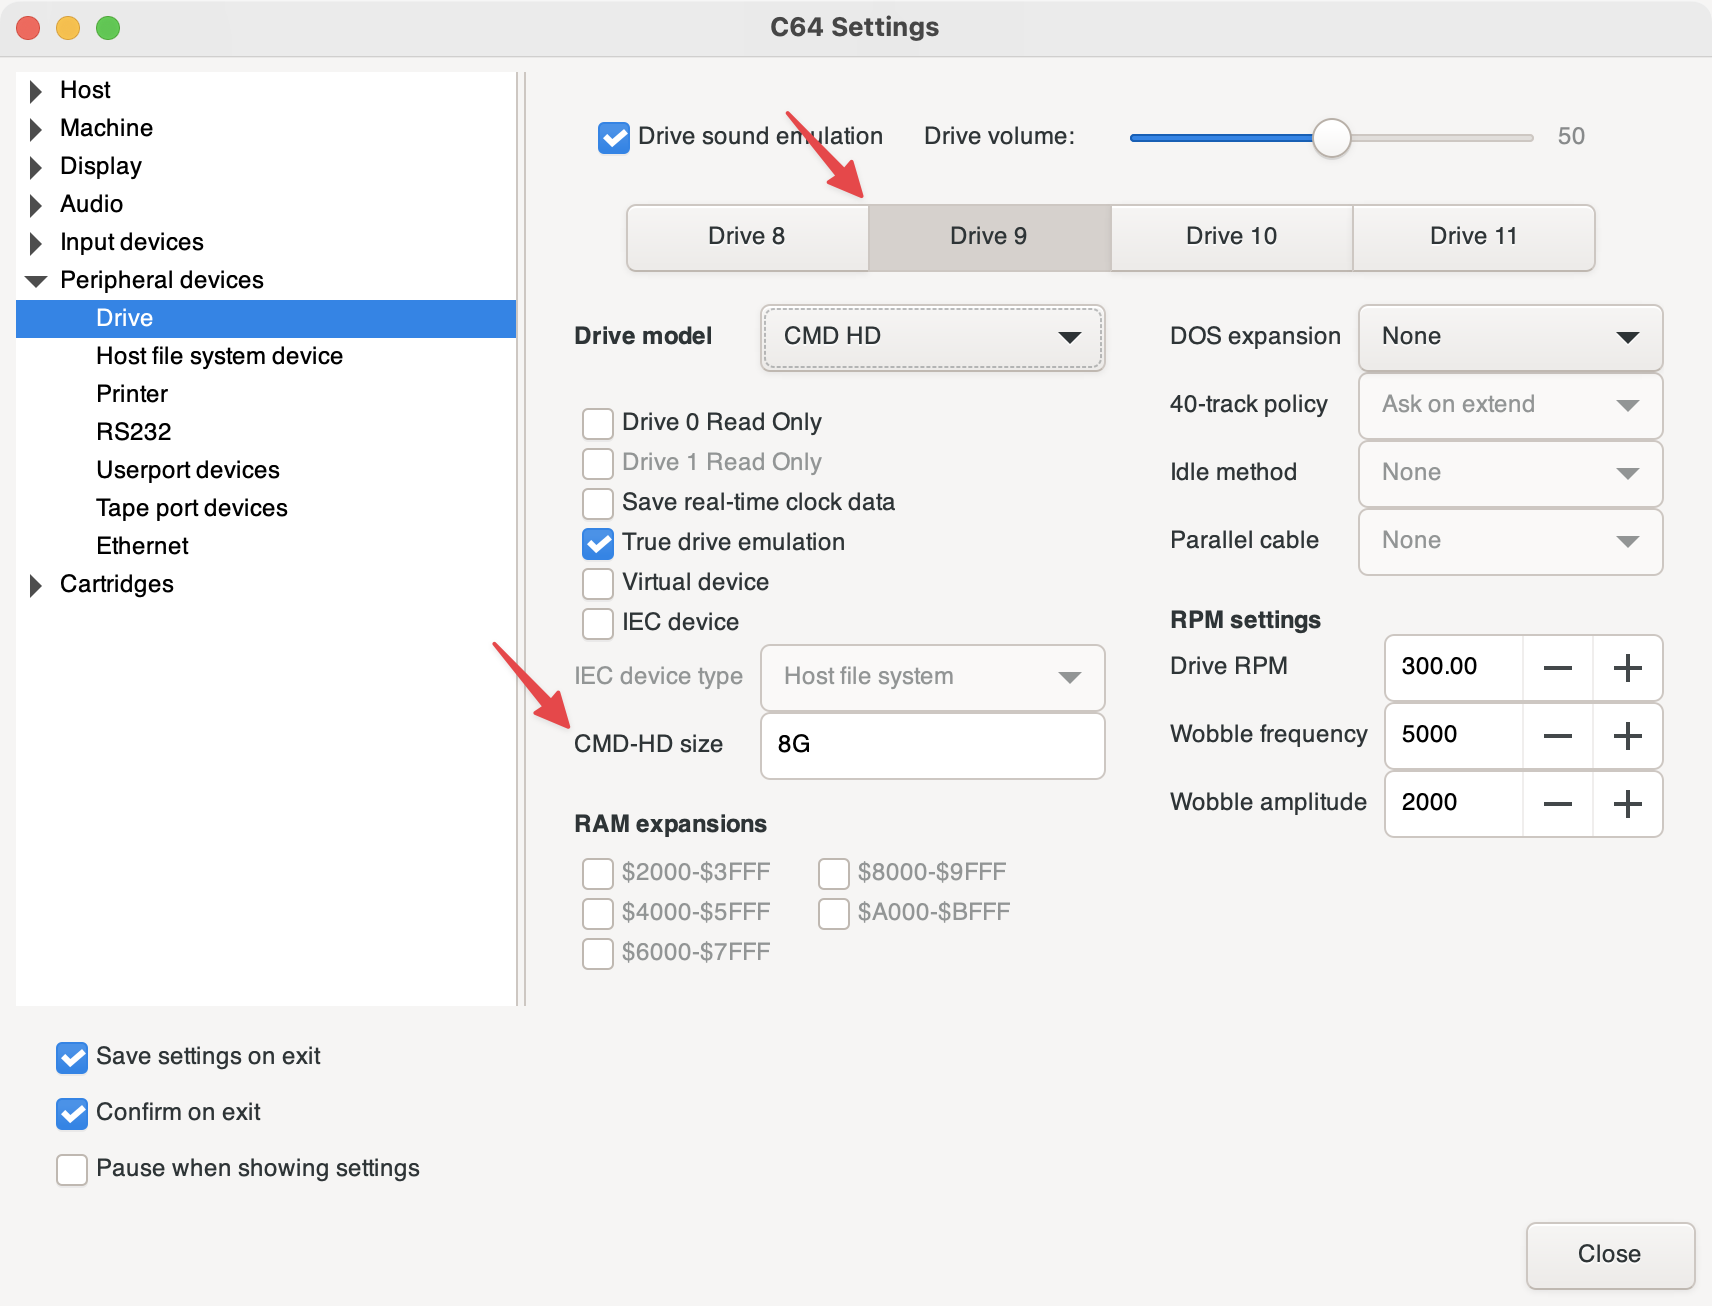
- Select Settings | Peripheral devices | Drive and highlight Drive 9.
- Select CMD HD in the Drive model pull-down menu.
- Verify the CMD-HD fixed size is
8G. -
The dialog box should look like the one below:
Let’s attach the CMD HD to drive #9.
- Close the Settings dialog box.
- Select File | Attach disk image | Drive #9 from the pull-down menu.
-
Select the
c64os v1.0.dhdfound in thevice supportfolder. When you select the file, VICE will present a preview like the one found below.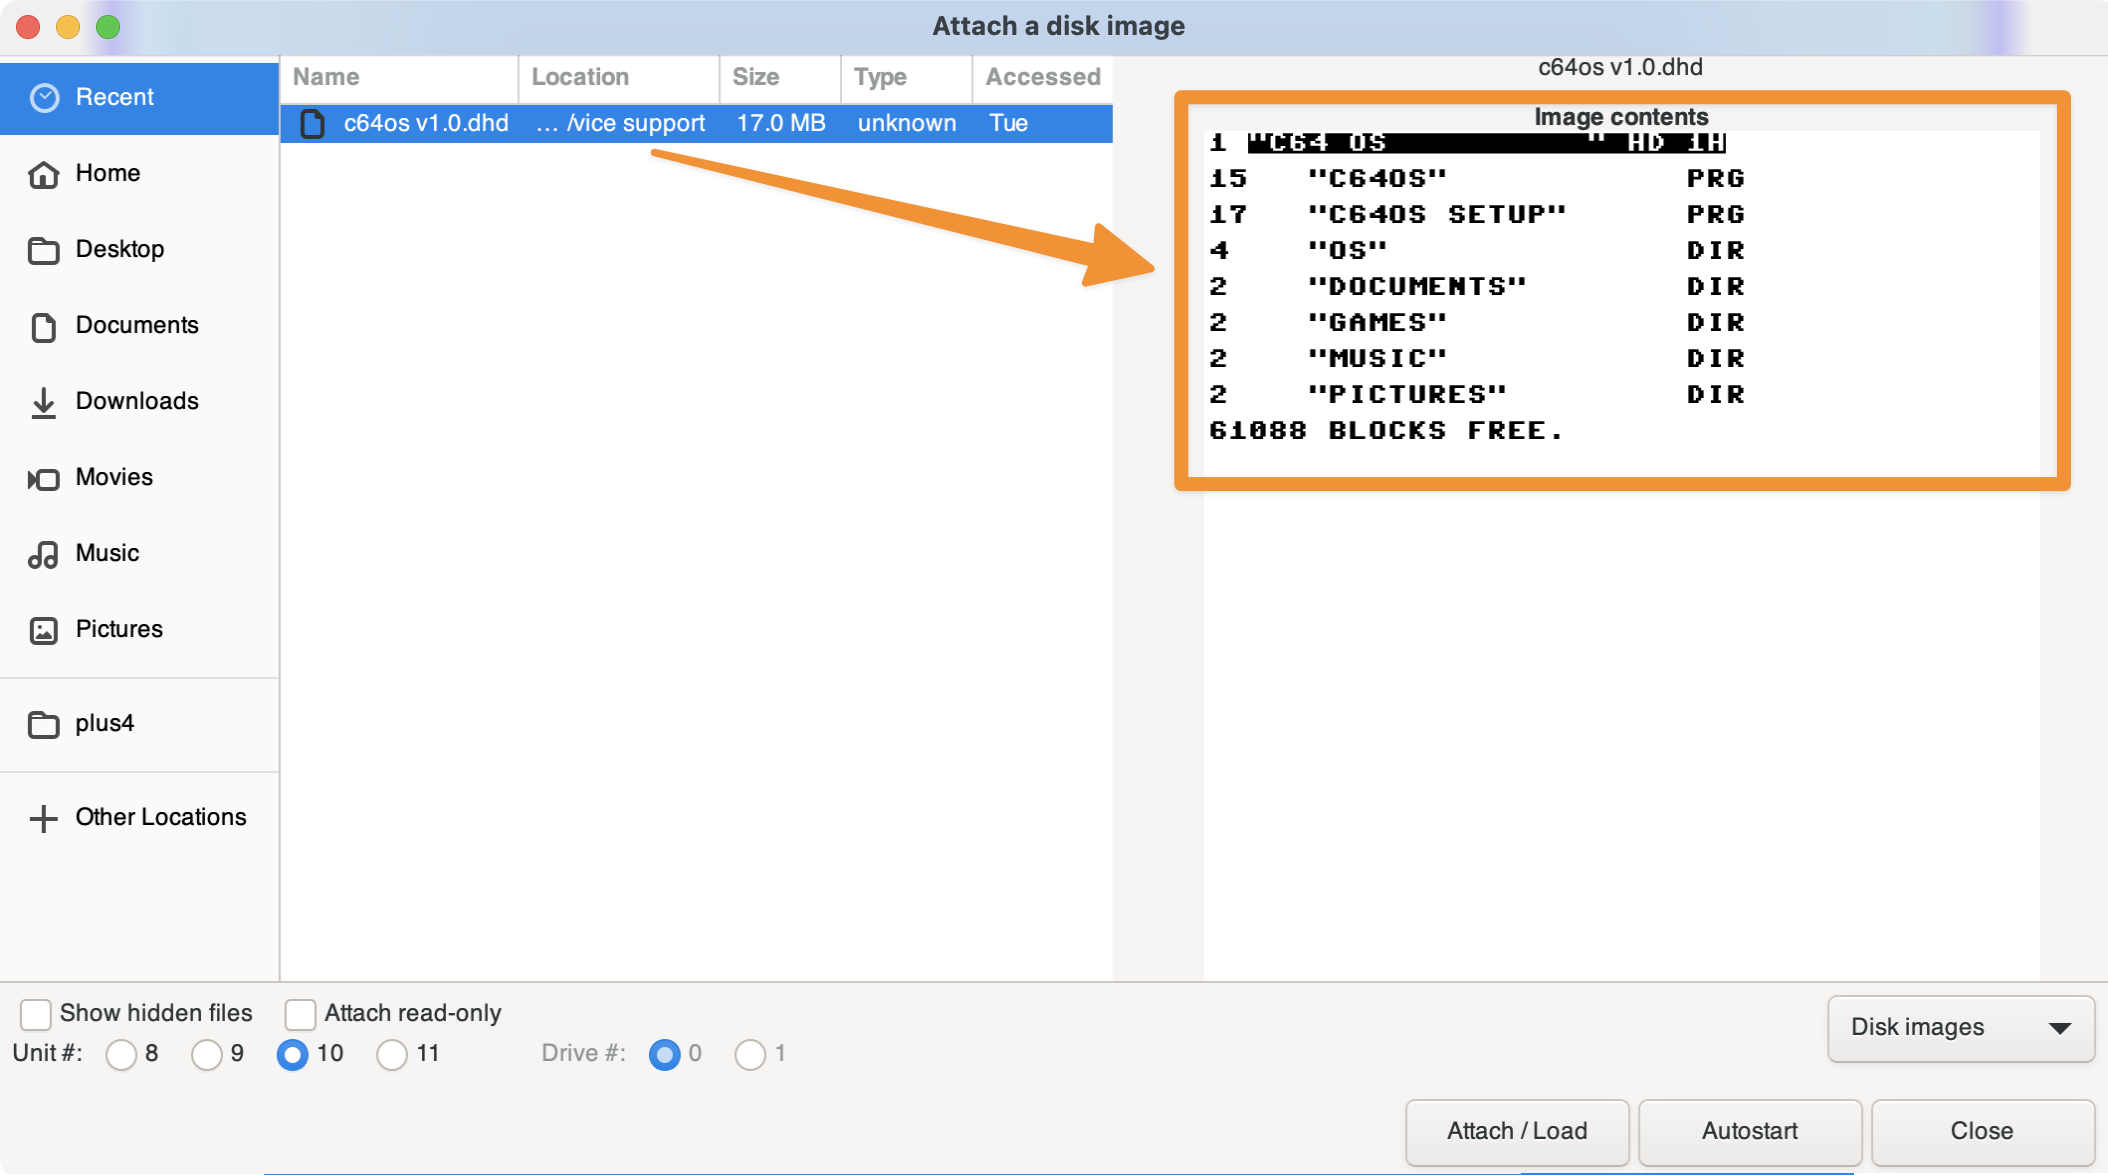
- Select the Attach / Load button.
Your virtual C64 OS CMD HD is attached. The next step is to configure C64 OS.
Configure C64 OS
We will use a Commodore 64 program, the C64 OS configure tool, to prepare the OS to boot. Type the commands below in Commodore 64 immediate mode:
@#9
@CD//OS/SETTINGS
↑CONFIGURE
HINT: The
↑is not the up arrow on the Mac keyboard. Use⇧+6to enter this character.
The Configure Tool will load as shown below:
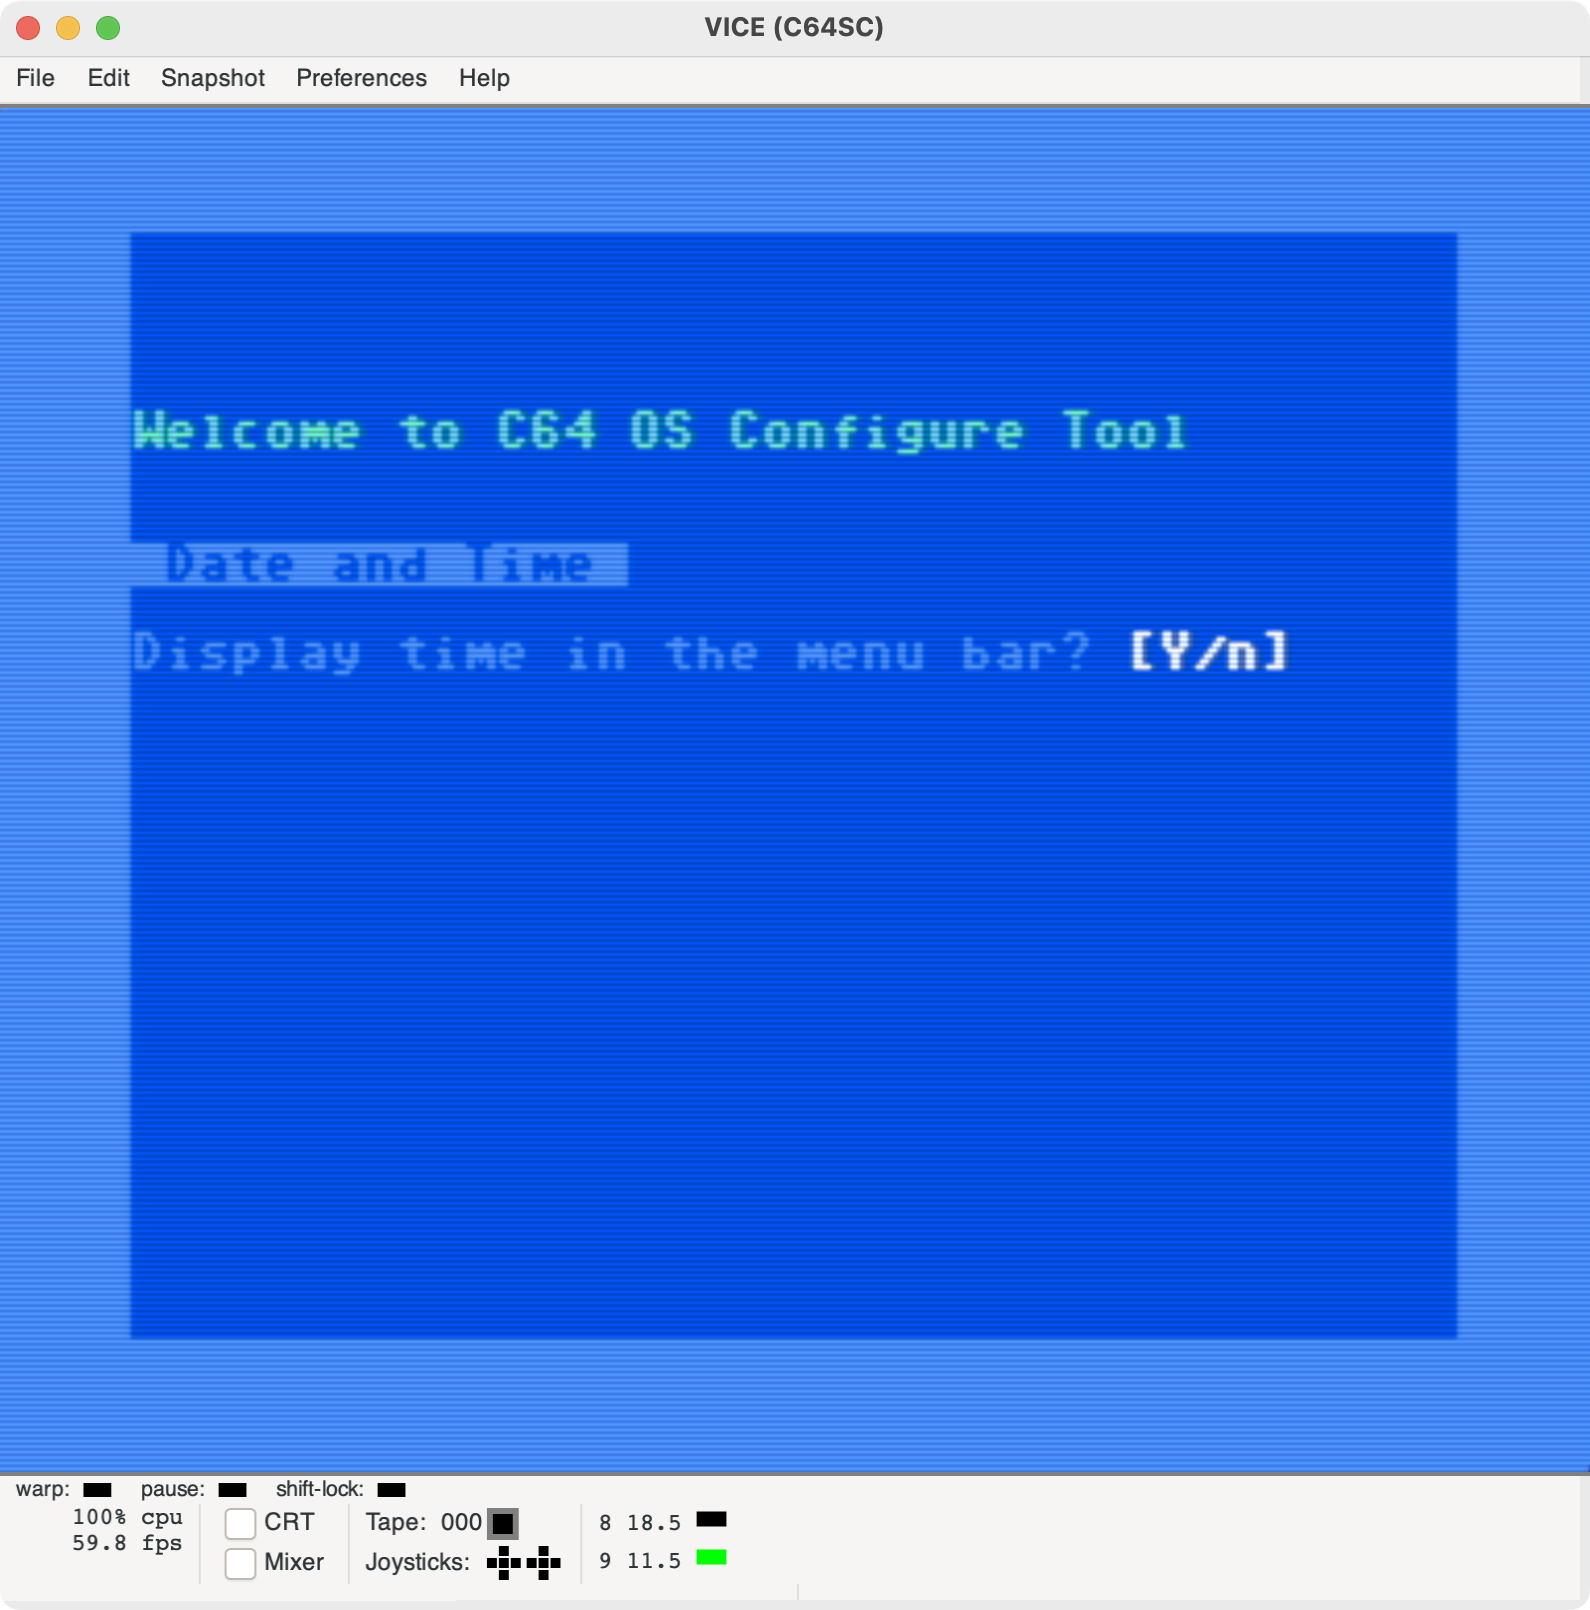
I won’t cover each option in the configure tool. The goal of this blog post is to get you up and running as quickly as possible using VICE. The list below provides the option (in bold) I used.
- Display time in the menu bar? = Y
- Use 12 hour time? = N
- Blink the seconds indictor? = Y
- Which mouse pointer? = 1
- Mouse speed? = 20
- Double-click delay? = 480 ms
- Pointer inner color? = black
- Pointer outer color? = l.grey
- Mouse hand right or left? = R
- Show CPU busy indicator? = Y
- Toggle menu bar: CTRL+space Accept? = Y
- Toggle status bar: CTRL+COMMODORE+space Accept = Y
- Toggle GFX mode: COMMODORE+← Accept = Y
- Take screenshot: CTRL+COMMODORE+p Accept = Y
- Which status bar mode at boot-up? = 1
- How many fast app switching slots? = 0KB
- Double click free memory to open: = 1
- Display memory values in: = 1
- Realtime clock driver? = 4
- Pointer input driver? = 1
- Configure default places? = Y
Once you make the choices, a Configuration Complete prompt will appear along with the READY prompt. You can return to the Configure Tool to make changes when you become more familiar with C64 OS.
Reset VICE
I’ve found after using the configuration tool that a VICE hard reset makes things smoother. Follow this step:
- Select File | Reset | Hard Reset
VICE will reset and remove your attached drives. This is not an issue! We will reconnect our CMD HD.
Boot C64 OS
The easiest way to boot C64 OS is to attach the .dhd disk image and use the Autostart feature following the instructions below:
- Select File | Attach disk image | Drive #9 from the pull-down menu.
- Select the
c64os v1.0.dhdin thevice supportfolder. - Select Autostart.
VICE will attach the drive and load the first program on the drive, C64 OS.
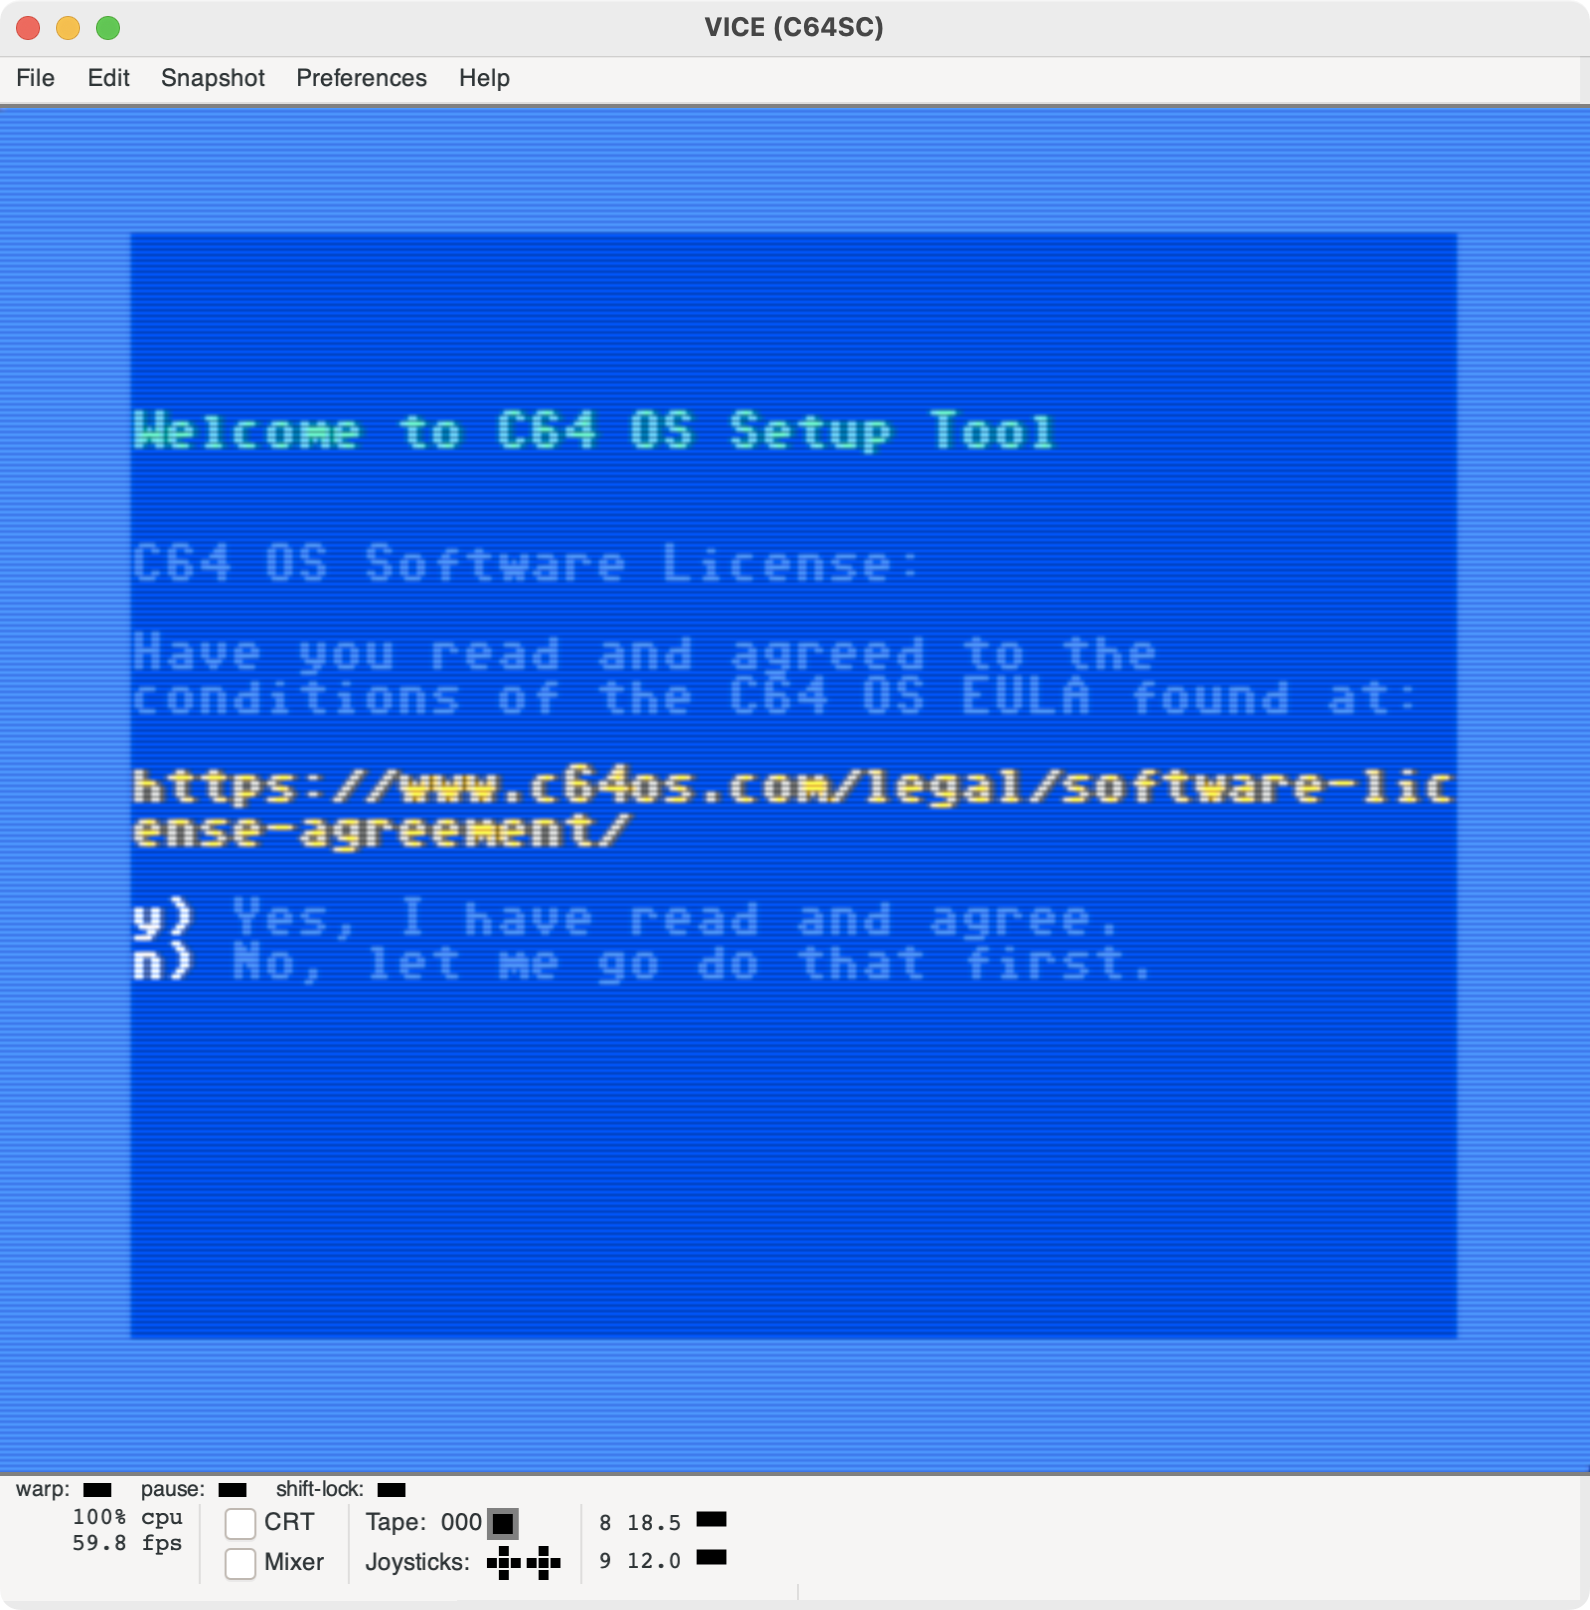
I won’t cover each option in the C64 OS Setup Tool. The selections I use are below.
- Yes, I have read and agree. = Y
- Fresh installation. = C
- C64 OS Device # = 9
- C64 OS Partition # = 1
- System Directory? = os
- Is that correct? [y/n] = y
- Options: = b
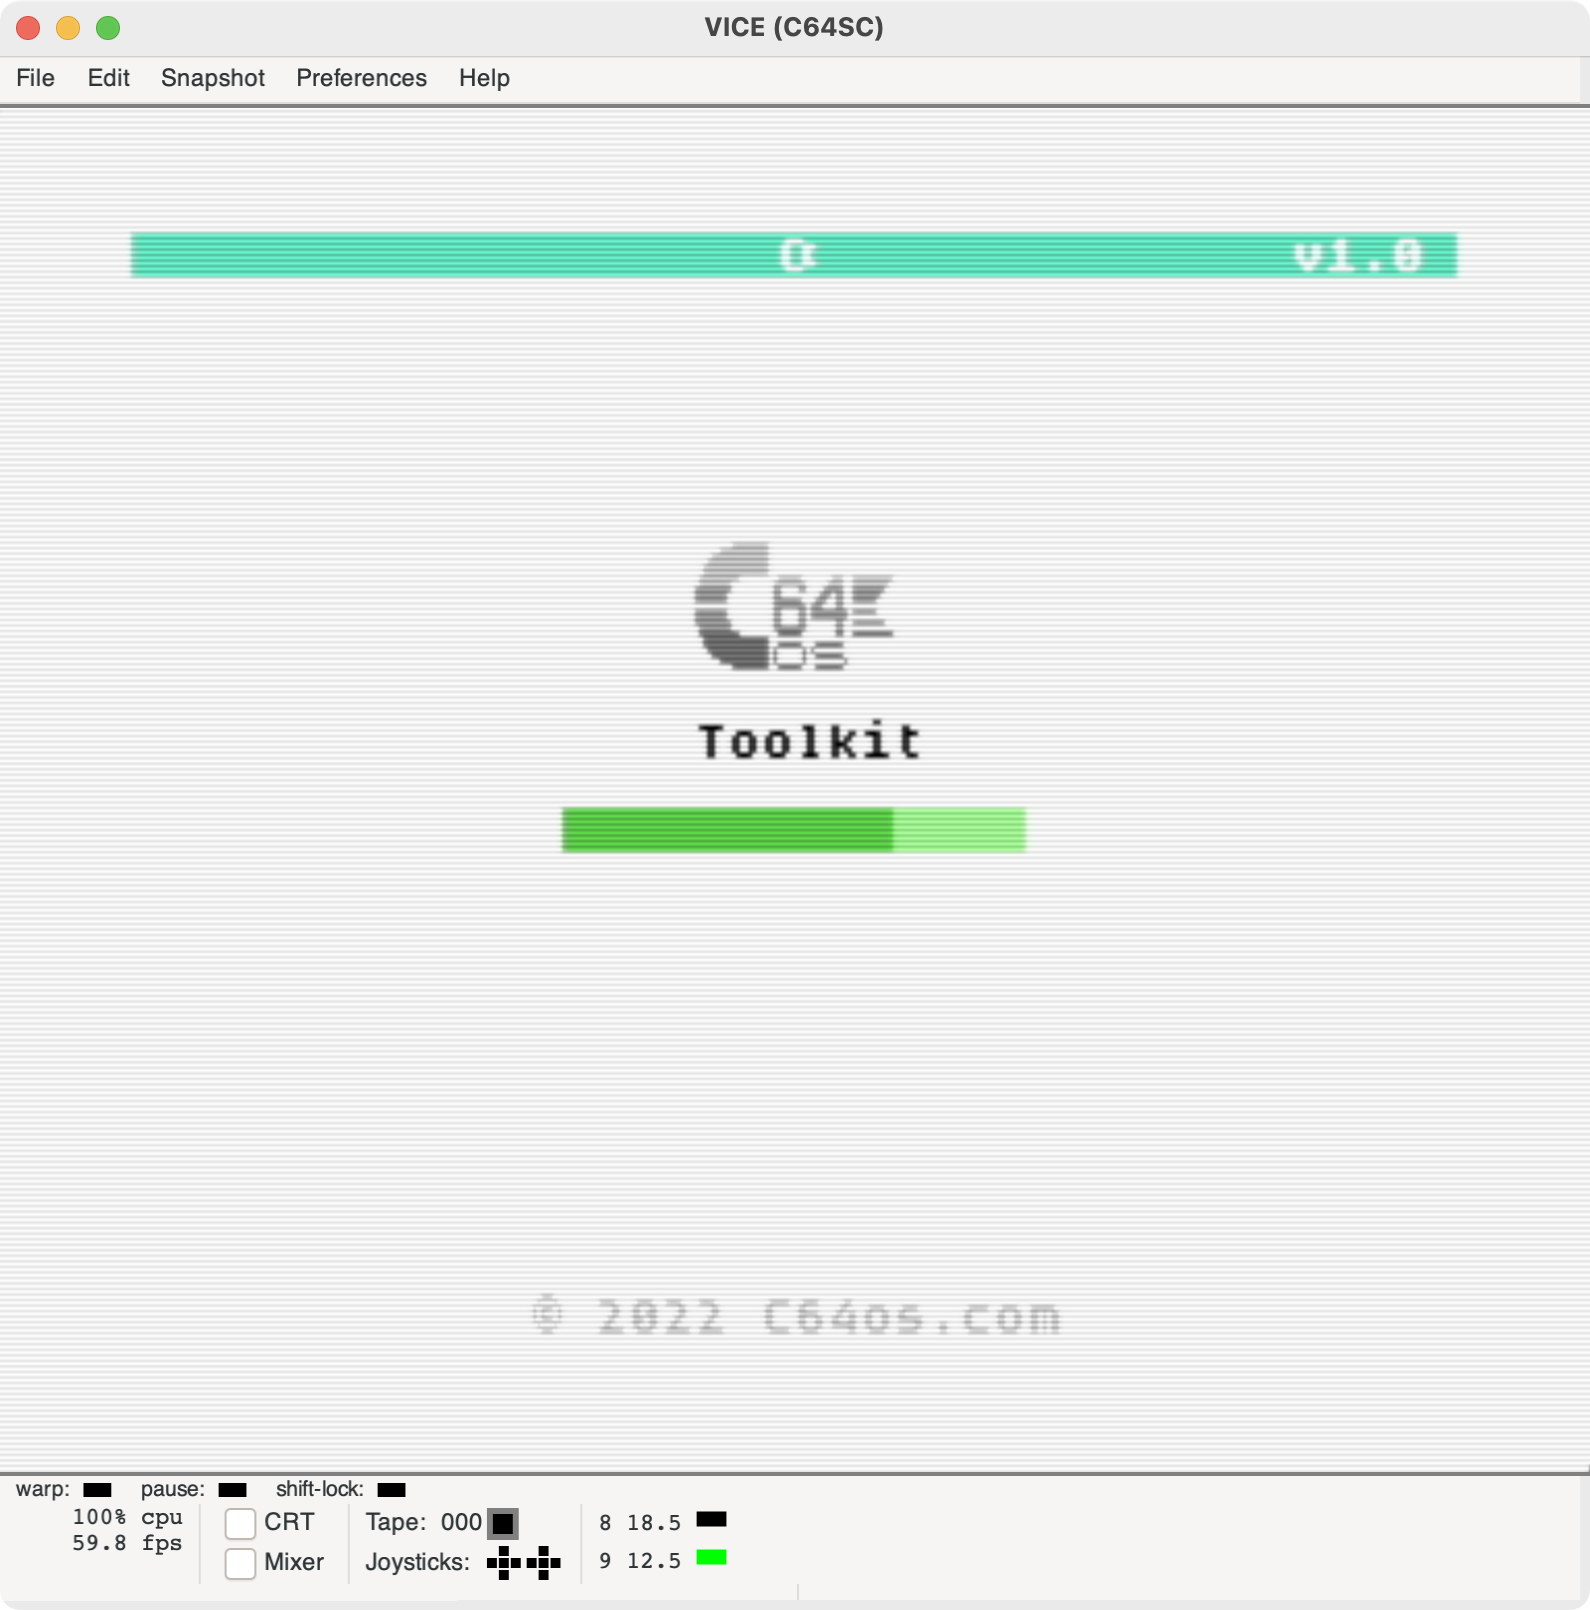
C64 OS startup will begin as shown in the image below:
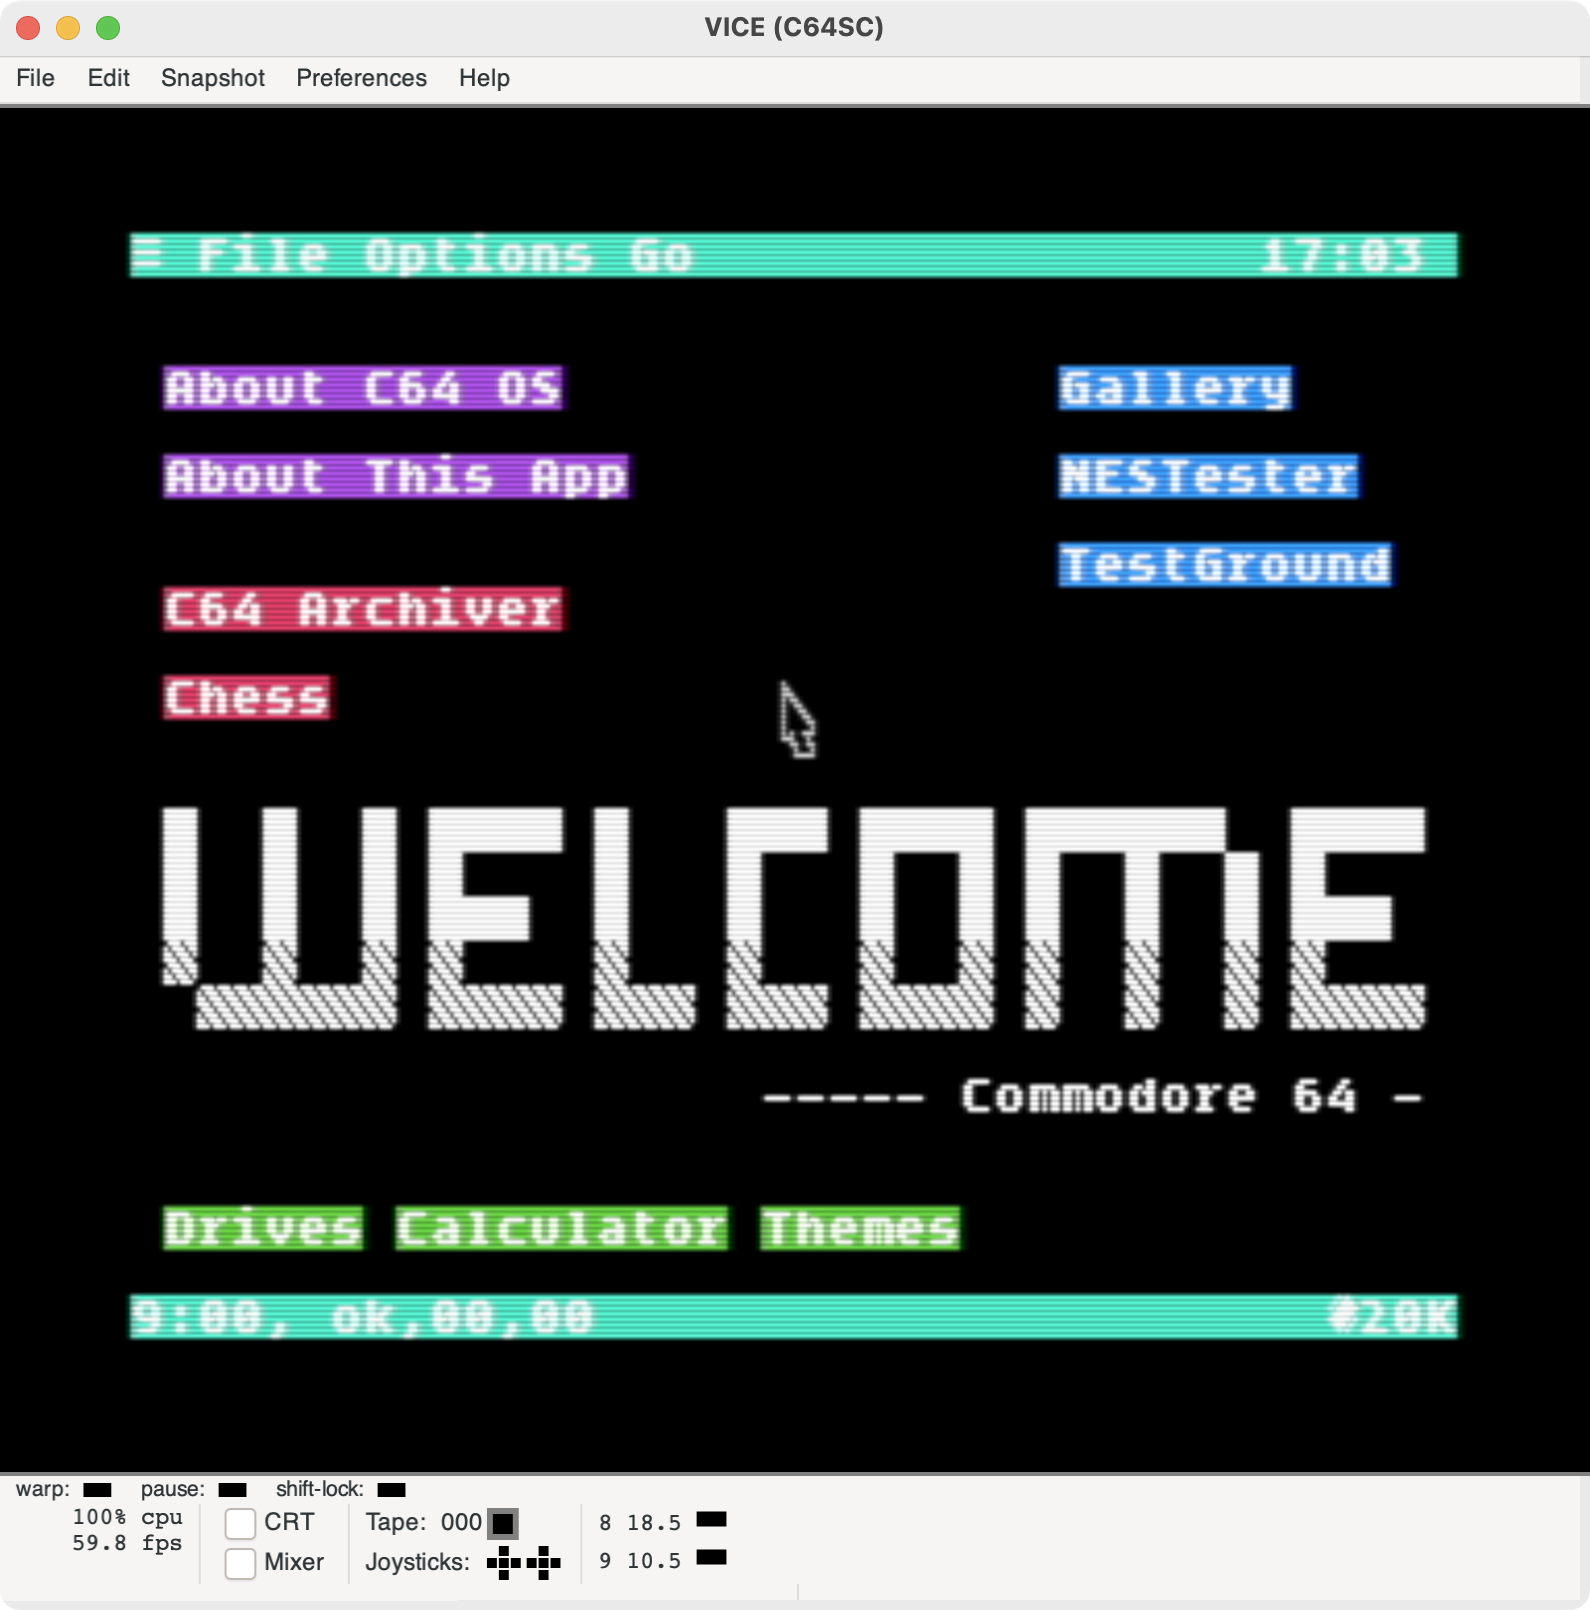
After the C64 OS setup screen appears, C64 OS is ready to use, as shown in the image below:
Using the Pointing Device
It may frustrate you, at this point, to use the mouse or trackpad. Never fear, use the ⌘ + M to “capture” the mouse movements in the C64 OS environment. Use the same keyboard combination to return the pointing device back to Mac OS.
Exit and Load C64 OS
I’m going to the use of C64 OS in this blog post. This is a software best left to the user. Dig in, click here, click there, and have a great time exploring. When you are done:
- Select Options | Exit to BASIC in the C64 OS pull-down menu.
- Select File | Exit emulator from the VICE pull-down menu.
To load C64 OS for future 8-bit mousing action, use the steps below:
- Load VICE
- Select File | Attach disk image | Drive #9 from the pull-down menu.
- Select the
c64os v1.0.dhdin thevice supportfolder. - Select Autostart.
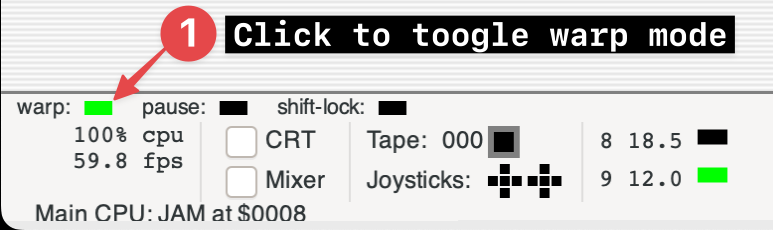
The dialog box will close. VICE will mount the C64 OS virtual image and auto-load the OS. If you want to speed up the loading process, you can use the VICE warp mode by clicking the warp indicator as shown in the image below; however, remember to turn off warp mode afterward or you will have issues using the UI.
Because we turned on the auto-save option, you will not need to go back and change any of the settings.
Homework
Want to dig in and have more fun? Try to determine how to do these things on your own:
- Use a virtual RAM expansion unit (REU).
- Use Wi-Fi to connect to a BBS.
- Display the fun image C64 OS includes.
- Play a game of chess.
- Change the C64 OS theme.
Conclusion
That concludes my quick installation of C64 OS in VICE. If you want to see more C64 OS content or have a question? Drop a comment below. I’d also love to read your tips and tricks to get the most out of C64 OS. That’s it for now…
… 🕹️ retroCombs OUT!