Retro computing with a touch of modern and the home for all things, retroCombs (aka Steven Combs).
Disclosure Statement: When you click on links to various merchants on this site and make a purchase, this can result in this site earning a commission. Affiliate programs and affiliations include, but are not limited to Amazon, the eBay Partner Network, and/or others.

HOWTO: Make a Mac to C.H.I.P. USB OTG serial connection
by Steven B. Combs, Ph.D.
A key feature of the C.H.I.P. is the 4Gb onboard flash memory. Unlike a Raspberry Pi, the C.H.I.P. does not require a microSD card (making the cost to operate a C.H.I.P. even less than a Raspberry Pi). You simply connect the C.H.I.P. to your computer and “flash” the C.H.I.P. operating system. Once flashed, you don’t even need a monitor or keyboard to begin using thanks to Next Thing Co’s foresight to include a USB On-The-Go (OTG) connection.
USB OTG on a Windows box using Putty is documented online; however, I’ve yet to find specific details on how to make this connection on a Mac. After several failed attempts, I was able to make a USB OTG connection using my Mac. This post documents my process.
Flash the C.H.I.P.
Before a C.H.I.P. will work out of the box with a USB OTG connection, you need to install the latest operating system (OS). Choose the latest version (as of this writing 4.4). You will use the Chrome browser and the C.H.I.P. Flasher application to do this:
- Load the Chrome browser.
- Navigate to the C.H.I.P. Flasher page at: http://flash.getchip.com/. Chrome will prompt you to install the Flasher application.
- Click through to install.
-
Once the Flasher is installed, the Flasher page will present several version of the C.H.I.P. OS as shown in the image below:

-
Before you flash the C.H.I.P., place a jumper between the C.H.I.P. FEL and GRND pins as shown in the image below:
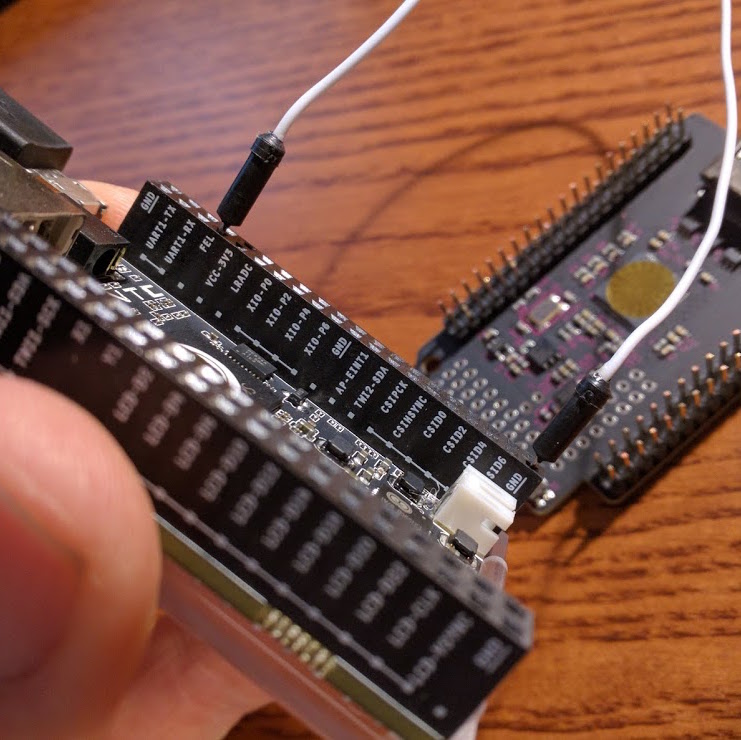 TIP: If you don’t have a jumper wire, you can use a paper clip or a pipe cleaner.
 - Use a microUSB cable and plug the micro connector into the C.H.I.P. and the standard USB connector into the Mac.
- On the Flasher web page, click the image to flash. The C.H.I.P. Flasher application will load and begin the flash process as shown in the image below:
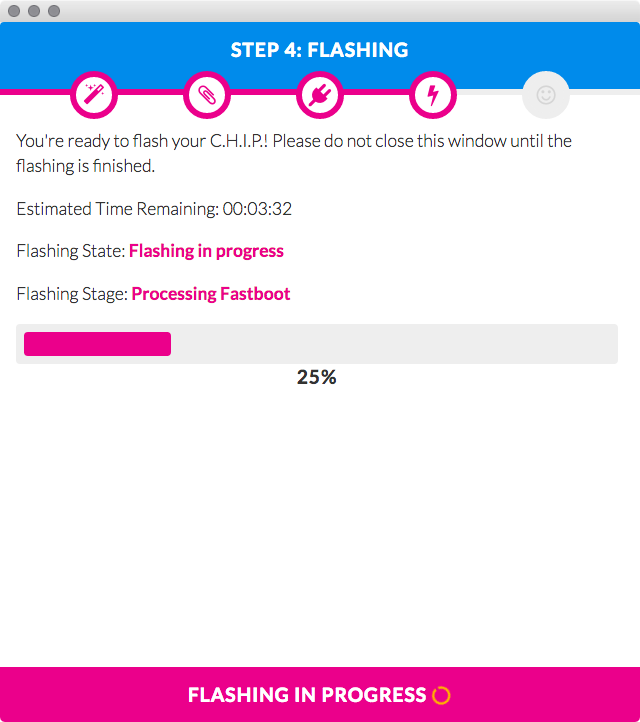 It will take awhile, so kick back and relax as you contemplate the wonderful things are are going to do with your $9 computer.
 -
Once flashing is complete, click the EXIT FLASHER area at the bottom of the dialog box and unplug the chip from the USB cable.
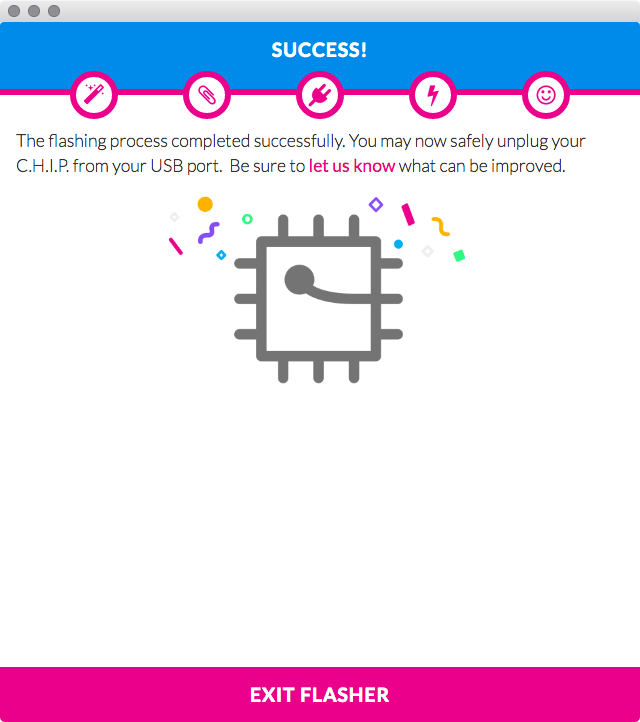
- Remove the jumper from pins REL and GND.
- Reconnect the C.H.I.P. to the Mac without the jumper. The C.H.I.P. will begin the boot process.
The use of a serial connection is baked in by the developers and is a very cool way to connect your C.H.I.P. to your home Wi-Fi and begin using your C.H.I.P. immediately. Let’s get to the fun stuff now.
Determine USB identification
This is a bit tricky, so follow closely. Load the Terminal application on the Mac and issue the command below.
ls /dev/tty*
You will see a long list of tty devices similar to the image below:
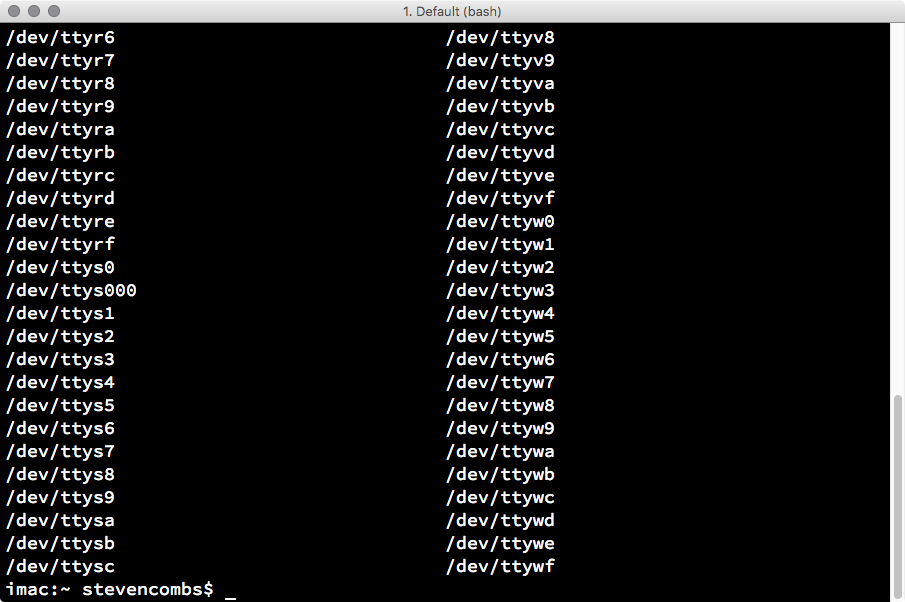
Most likely, the C.H.I.P. tty device is not on the current page. Use the arrow keys and scroll up. Look for a tty device with the following format:
/dev/tty.usbmodemXXXX where XXXX is a four digit number
Write down that four digit number, or better yet, write that entire line with the four digit numbers. In my case, I have the following serial device name:
`/dev/tty.usbmodem2623 `
Connect using a Serial Terminal
The Mac has a serial connection command built-in called screen and we will use the screen command to make a serial connection to the C.H.I.P. so we can issue commands on the C.H.I.P.
- Use the command below (remember to substitute XXXX for your four digit number) to establish a serial connection to the C.H.I.P.:
screen /dev/tty.usbmodemXXXX 115200The 115200 (115,200bps) at the end of the command is the connection speed between the Mac and the C.H.I.P.
If the connection is successful, the C.H.I.P. will promote you for a username and password. The defaults are below:
username: chip
password: chip
After the login process, you will see the prompt in the image below:

You can now issue commands to the C.H.I.P. I will not discuss the many possibilities; however, I do want to share two useful things we can do with the C.H.I.P. and this serial connection:
- Connect the C.H.I.P. to Wi-Fi
- Determine the C.H.I.P. IP address
Once you do these two things, you can untether your C.H.I.P. from your Mac and administer it remotely.
Connect C.H.I.P. to Wi-Fi
To connect your C.H.I.P. to your Wi-Fi network, first see that your C.H.I.P. can access your network. Scan the Wi-Fi spectrum with the command below:
nmcli device wifi list
You will see a listing similar to the one below:
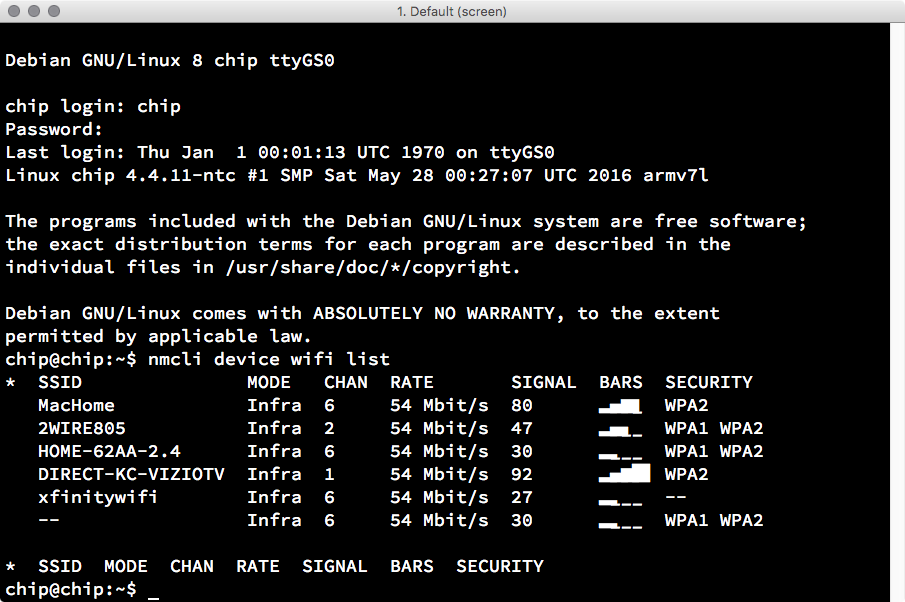
If you see the name of your Wi-Fi network (along with others depending on the proximity to your neighbors), you are ready to make a connection.
Use the command below:
sudo nmcli device wifi connect 'SSID' password 'password' ifname wlan0
Remember to make the substitutions to include your Wi-Fi SSID and password.
The C.H.I.P. will ask for a password. This is the C.H.I.P. user password, chip, not the Wi-Fi password. You will type blind and will not see the password or * placeholders.
Enter chip and hit the enter key. After a second or two, you will see a line similar to the following:
Connection with UUID '211yui4-d0fc-601c-4ddeb-3b4f5z690d0b' created and activated on device 'wlan0'
Success! The C.H.I.P. will remember the Wi-Fi connection even after a reboot.
Now determine the C.H.I.P. IP address so you can untether the C.H.I.P. from the Mac and make a remote connection via SSH.
TIP After I wrote this post, I discovered a visual way to configure the Wi-Fi network. Issue the
nmtuicommand and you will see a terminal “blue-box” that will guide you through this process using a terminal dialog box. Pretty slick.
Determine IP Address
To determine the C.H.I.P. IP address, use the command below:
ip add show
The C.H.I.P. will display IP information. Look for your local network IP range and write it down. At this point, I recommend you also write down the MAC address of the device.
The IP address will likely change if you reboot your device often. I recommend you configure your Wi-Fi router so it receives the same IP address each time the C.H.I.P. connects to the network.
You can also assign a hostname that assigns a name to the device such as:
chip.local
You should be able to find instructions for both of these tips with a quick Google search.
Use the C.H.I.P. untethered
You can now use the C.H.I.P. untethered. To close the serial connection, type:
exit
Leave the C.H.I.P. plugged into the Mac and connect via SSH. You can also plug the C.H.I.P. into a power source anywhere in your home and connect via SSH and allow your C.H.I.P. to become a server.
If you flash the C.H.I.P. with a GUI, you can control the C.H.I.P. using that GUI if you follow my x11vnc instructions.
Feedback
Let me know if there is an error in my write-up using the comments below. It’s a lengthy post and I may have fat-fingered a step. I hope Mac users with a new C.H.I.P. find this useful. It took me some time and troubleshooting to figure this out, but I learned a lot along the way.
What will you do with your untethered C.H.I.P.? I would love to read your ideas. Drop those in the comments as well.