Retro computing with a touch of modern and the home for all things, retroCombs (aka Steven Combs).
Disclosure Statement: When you click on links to various merchants on this site and make a purchase, this can result in this site earning a commission. Affiliate programs and affiliations include, but are not limited to Amazon, the eBay Partner Network, and/or others.

Run a MEGA65 on your Mac using Xemu
by Steven B. Combs, Ph.D.
As a MEGA65 Dev Kit owner, I’ve created several posts to share what’s coming when my favorite Commodore “what could have been” retro computer releases. I’m not going in depth about the MEGA65 in this post and companion video; instead, check out my new MEGA65 page. In this post, I will show you how to get started with the MEGA65, on your Apple Mac computer, while you wait for the hardware to arrive.
MEMBERSHIP: I now offer retroCombs memberships from $1 (PET level membership) to $20 (MEGA65 level membership) that include levels in between for all budgets (VIC-20, C64, Plus/4, and C128). If you’d like to support my content and get access to my Discord server along with other cool freebies, check out each level at https://www.buymeacoffee.com/retroCombs.
To do this, I share how to install the Xemu emulator, xmega65. What’s Xemu? Let’s go right to the source:
Xemu (full name: X-Emulators) is a collection of emulators running on Linux/Unix/Windows/Mac OS of various (mainly 8-Bit) machines, including - but not limited to - the Commodore LCD, Commodore 65 and MEGA65. And yes, that’s an “X” in the name, not “Z” :)
The MEGA65 part of that description is where our interest lies today. Let’s set up a complete MEGA65 emulation environment on a Mac. I’ll use a Mac mini (M1); however, I developed this process on my MacBook Pro (M1). Although the Xemu is native to Intel Macs, it does work on the new Apple M1 processor using Apple’s Rosetta. I’ve yet to find any issues. Side note: These new M1 Macs are amazing! I recommend if you are looking for a new computer or own an older Mac. These new models are affordable, powerful, and the perfect compliment to the MEGA65 as one of the few brands from the 1980s with us today.
NOTE: I share the installation of Xemu on a Mac. I do not own a Windows computer and cannot help with that install process. If Linux users want these same instructions, drop be a comment below. I have a Manjaro Linux distribution installed and ready to go.
Table of Contents
- Table of Contents
- YouTube Video: retroCombs: Starter Guide
- Video Errata
- Links Mentioned in this Episode:
- Download and Install Xemu
- Start Xemu
- Configure xmega65
- Access Configuration Files
- Usage
- Load Software
- Final Thoughts
- Join the Fun
YouTube Video: Install and run the MEGA65 emulator, Xemu, on Mac OS X
In the video below, I show how to install and use Xemu/xmega65 to emulate a MEGA65 on a Mac computer.
Video Errata
{UPDATE: 2021-09-01} LGB, the Xemu developer, watched the video and provided feedback and corrections to my content:
- The .ROM file does not need to be renamed. This is corrected in the instructions below.
- Caution: Using the “Update files on SD-cards” updates not only the ROM but all system files, including the default
.D81file! - The first lines of the
.cfgfiles provide instructions on how to properly create a user copy of the files to use, not the original as I demonstrate in the video.
Huge thanks, LGB and keep the comments coming.
Links Mentioned in this Episode:
Below are the links I mention in the video or helpful content. All Amazon links are affiliate links. Thank you my supports of the blog and the YouTube channel!
- MEGA65
- Xemu
- Dev Kit
- MEGA65 Discord Channel
- TheC64 Joystick
- Hyperkin Trooper II USB Joystick
- Mac mini (M1)
- MacBook Pro (M1)
- Create a Commodore Disk Image
Download and Install Xemu
Let’s begin by downloading Xemu using the steps below:
- Visit the Xemu page. On this blueish page, you will find two headings; Stable (“master” branch) releases and The ‘future next stable’ still unstable (“next” branch) builds.
- Scroll down to the The ‘future next stable’ still unstable (“next” branch) builds header.
-
Click the Mac OS DMG file option to download the
Xemu-Installer.dmgfile.M1 Mac users will note that the Mac Xemu build, as of this writing, is for Intel processors; however, Rosetta on the M1 will run Xemu and likely run it faster!
- Locate the download (likely in your Downloads folder).
- Double-click the
Xemu-Installer.dmgfile to mount the disk image and display the GNU GENERAL PUBLIC LICENSE window. -
Click the Agree button. The Mac will display the ‘Xemu-Installer’ window, as shown below:
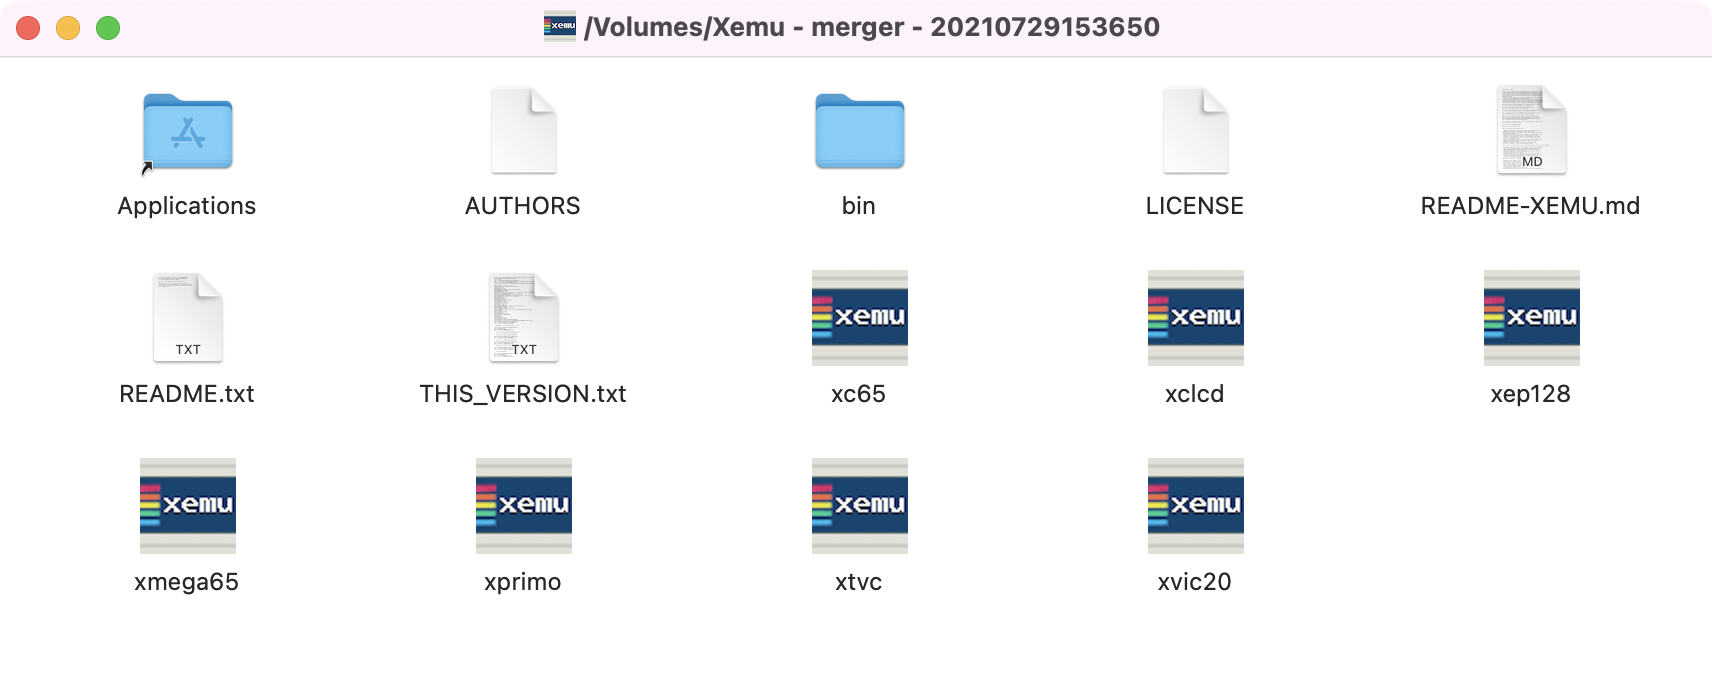
-
Locate the
xmega65.appfile and drag it to the Applications folder.NOTE: You can drag other Xemu emulators to the Applications folder, but I won’t discuss how to configure and use them in this post.
- Close the
Xemu-Install.dmgdisk image window and eject the disk image. Optionally, delete the file in the Downloads folder.
With Xemu installation complete, we can now run it for the first time; however, don’t get excited yet!
Start Xemu
Starting Xemu is as simple as:
- Double click the
xmega65.appin the Applications folder or optionally, use a launcher such as Alfred (my preferred) to start the application. A dialog box will appear to ask you if you are sure you want to open this app downloaded from the Internet. -
Select the Open button and another dialog box will display stating:
Cannot open file requested by @nvram.bin: No such file or directory Tried as: /Users/<user_name>/Library/Application Support/xemu-lgb/mega65/nvram.bin. Cannot load NVRAM state. Maybe first run of Xemu? On next Xemu run, it should have been corrected though automatically! So no need to worry. -
Click the OK button and another warning will display stating:
Cannot open SD-card image /Users/<user_name>/Library/Application Support/xemu-lgb/mega65/mega65.img, SD-card access won't work! ERROR: No such file or directory -
Click the OK button and one more dialog box will display stating:
Default SDCARD image does not exist. Would you like me to create one for you? Note: it will be a 4Gbytes long file, since this is the minimal size for an SDHC card, what MEGA65 needs. Do not worry, it's a 'sparse' file on most modern OSes which does not takes as much disk space as its displayed size suggests. This is unavoidable to emulate something uses an SDHC-card. -
Click the Yes button to create the SDCARD image and Xemu will display the following:
Your just created SD-card image file has been auto-fdisk/format'ed by Xemu. Great :). -
Click the OK button and Xemu will display the following:
Cannot find Xemu's signature on the SD-card image. Please use UI menu: SD-card -> Update files ... UI can be accessed with right mouse click into the emulator window. - Click the OK button and the MEGA65 emulator will try and boot; however, the boot cycle will not complete because no
MEGA65.ROMfile is available.
We’ll configure Xemu, now xmega65, to operate in the next section; however, congratulations! MEGA65 emulation is now running on your Mac.
Configure xmega65
With xmega65 running, configure the emulator with all the items we need to have an operational MEGA65 emulator running on our Mac. Read number 6 in the previous section and follow the steps below:
- Right-click in the xmega65 window and a menu will appear.
-
From the menu, use the mouse/trackpad to select SD-card | Update files on SD image. The select your ROM image file window will appear; however, we’ve not downloaded a
.ROMfile yet. Let’s do this next.NOTE: There are two
.ROMversions available for the MEGA65. The first is an closed.ROMthat is available with a MEGA65 Dev Kit, or later a MEGA65, purchase. The second is an in development community open.ROM. I will demonstrate how to install the Dev Kit.ROM; however, the process for the open ROM is the same. Visit Open ROMs for MEGA65 page on the MEGA65 Files Host to download the open ROM if you don’t have access to the closed ROM. {UPDATE: 2021-09-01} There is no need to change the name of the .ROM file as I state in the video.xmega65can detect the contents of the file. - Close the xmega65 app.
- Start the xmega65 application.
- Right-click in the xmega65 window and a menu will appear.
- From the menu, use the mouse/trackpad to select SD-card | Update files on SD image. The select your ROM image file window will appear.
- Navigate to the
MEGA65.ROMfile location. -
Select the file and click OK. The prompt below will display:
System files on your SD-card image seems to be updated successfully. Next time you may need this function, you can use MEGA65.ROM which is a backup copy of your selected ROM. MEGA65 emulation is about to RESET now! -
Click the OK button. You will receive the error below:
ROM version cannot be detected, and DMA revision auto-detection was requested. Defaulting to revision 1. Warning, this may cause incorrect behavior! -
Click the OK button and xmega65 will boot as shown in the image below:
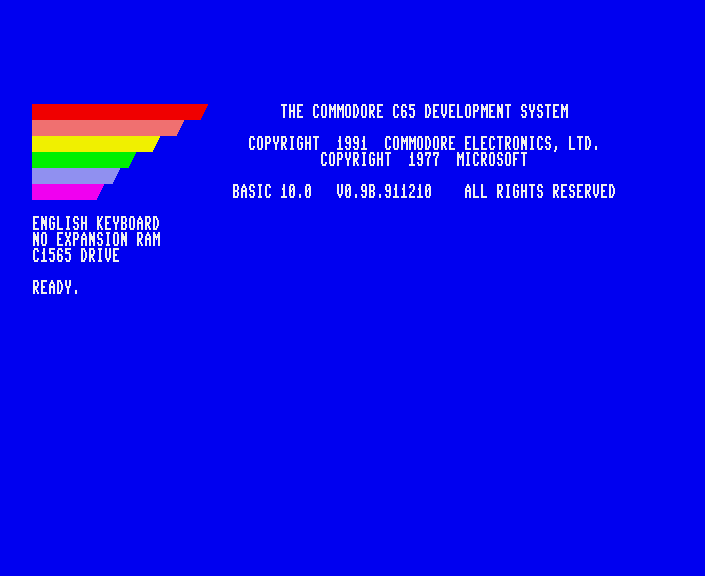
NOTE: If you use the Open ROM, the screen will look like the image below:
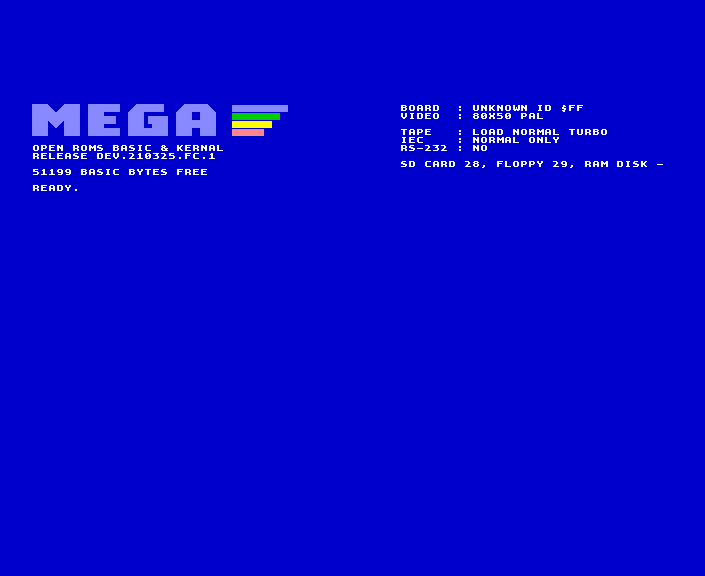
Congratulations! You now have a working version of xmega65 running a MEGA
.ROMfile. You are ready to explore the wonders of the MEGA65—if only you knew what to do next! Let’s cover that in the next section.
Access Configuration Files
You will want quick access to configuration files. I recommend you create a desktop (or other accessible location) symbolic link or alias to:
~/Users/{user_name}/Library/Application Support/xemu-lgb/mega65
In the folder are the following items:
├── CHARROM.ROM
├── MEGA65.ROM
├── 📁 default-files
├── keymap-default.cfg
├── mega65-template.cfg
├── mega65.img
├── nvram.bin
├── 📁 screenshots
└── uuid.bin
The two folders, default-files and screenshots are empty. When you take a screenshot in xmega65, it appears here; which is why I recommend a symbolic link for quick access.
The two .cfg files, keymap-default.cfg and mega65-template.cfg are user definable. I recommend no edits to the mega65-template.cfg until you have comfort with the settings and understand how a MEGA65 works.
I use a MacBook Pro and not all keys mapped to a 104 PC keyboard in the keymap-default.cfg file is available. I plan to create my own MacBook specific key configuration file. When/If I do, I’ll share on this blog and include on GitHub.
Below is the default keyboard-default.cfg:
# default settings for keyboard mapping
# copy this file to filename 'keymap.cfg' in the same directory, and customize (this file is OVERWRITTEN every time, you must copy and customize that one!)
# you can also use the -keymap option of the emulator to specify a keymap file to load (if the specific Xemu emulator supports, use -h to get help)
# Syntax is: EMU-KEY-NAME PC-KEY-NAME
# one assignment per line (EMU-KEY-NAME is always uppercase and one word, while PC-KEY-NAME is case/space/etc sensitive, must be put as is!)
# EMU-KEY-NAME ends in '*' means that it's a virtual key, it is emulated by emulating pressed shift key at the same time
# special line CLEARALLMAPPING can be put to clear all existing mappings, it make sense only as the first statement
# without CLEARALLMAPPING, only maps are modified which are part of the keymap config file, the rest is left at their default state
# PC-KEY-NAME Unknown means that the certain feature for the emulated keyboard is not mapped to a PC key
# EMU-KEY-NAME strings starting with XEMU- are special Xemu related 'hot keys'

# MEGA | MAC

DEL Backspace
RETURN Return
RIGHT Right
LEFT* Left
F7 F7
F8* F8
F1 F1
F2* F2
F3 F3
F4* F4
F5 F5
F6* F6
DOWN Down
UP* Up
3 3
W W
A A
4 4
Z Z
S S
E E
LSHIFT Left Shift
5 5
R R
D D
6 6
C C
F F
T T
X X
7 7
Y Y
G G
8 8
B B
H H
U U
V V
9 9
I I
J J
0 0
M M
K K
O O
N N
PLUS Insert
P P
L L
MINUS -
PERIOD .
COLON '
AT [
COMMA ,
POUND Delete
ASTERISK ]
SEMICOLON ;
CLR Home
RSHIFT Right Shift
EQUALS =
UARROW \
SLASH /
1 1
LARROW `
CTRL Left Ctrl
2 2
SPACE Space
COMMODORE Left Option
Q Q
RUNSTOP End
RESTORE Page Down
CAPSLOCK Unknown
NOSCROLL Unknown
TAB Tab
ALT Right Option
HELP PageUp
F9 Unknown
F11 Unknown
F13 Unknown
ESC Escape
XEMU-EXIT F9
XEMU-FULLSCREEN F11
XEMU-JOY-FIRE Keypad 5
XEMU-JOY-FIRE Keypad 0
XEMU-JOY-FIRE Right Ctrl
XEMU-JOY-UP Keypad 8
XEMU-JOY-DOWN Keypad 2
XEMU-JOY-LEFT Keypad 4
XEMU-JOY-RIGHT Keypad 6
Usage
Once xmega65 starts, you are ready to begin your journey into the world of the MEGA65. If you are familiar with 1980s 8-bit computers, and especially the Commodore varieties, you will feel at home with a simple program like the one below:
10 ? "RETROCOMBS ";
20 FOR X = 1 to 100 : NEXT
30 GOTO 10
Go ahead, give it a try. I’ll wait. Now that I have xmega65 locked up in a continual self-promoting loop, you probably want to know where the RUN/STOP key is. That key didn’t find its way into modern computers; however, if you look at the keyboard configuration file in the previous section, we learn the END key is mapped to the RUN/STOP key. Wait a minute! If you are on a MacBook Pro, there’s no END key either! Never fear. FN + → is the equivalent of the END key and therefore mapped to RUN/STOP on xmega65.
Another Commodore key not available on the MacBook Pro is HOME. Similar to END; use FN + ←.
These two keys are the most useful and confusing, unless you know the “secret sauce.” With those two keys, new and seasoned Commodore users can begin their journey into BASIC on the MEGA65 with xmega65 on their Mac.
If you want a more familiar Commodore 8-Bit experience, press F1 to switch between 40 and 80 columns (default) mode. Remember, on the Mac you need to hold down the fn key and then tap the corresponding top row key.
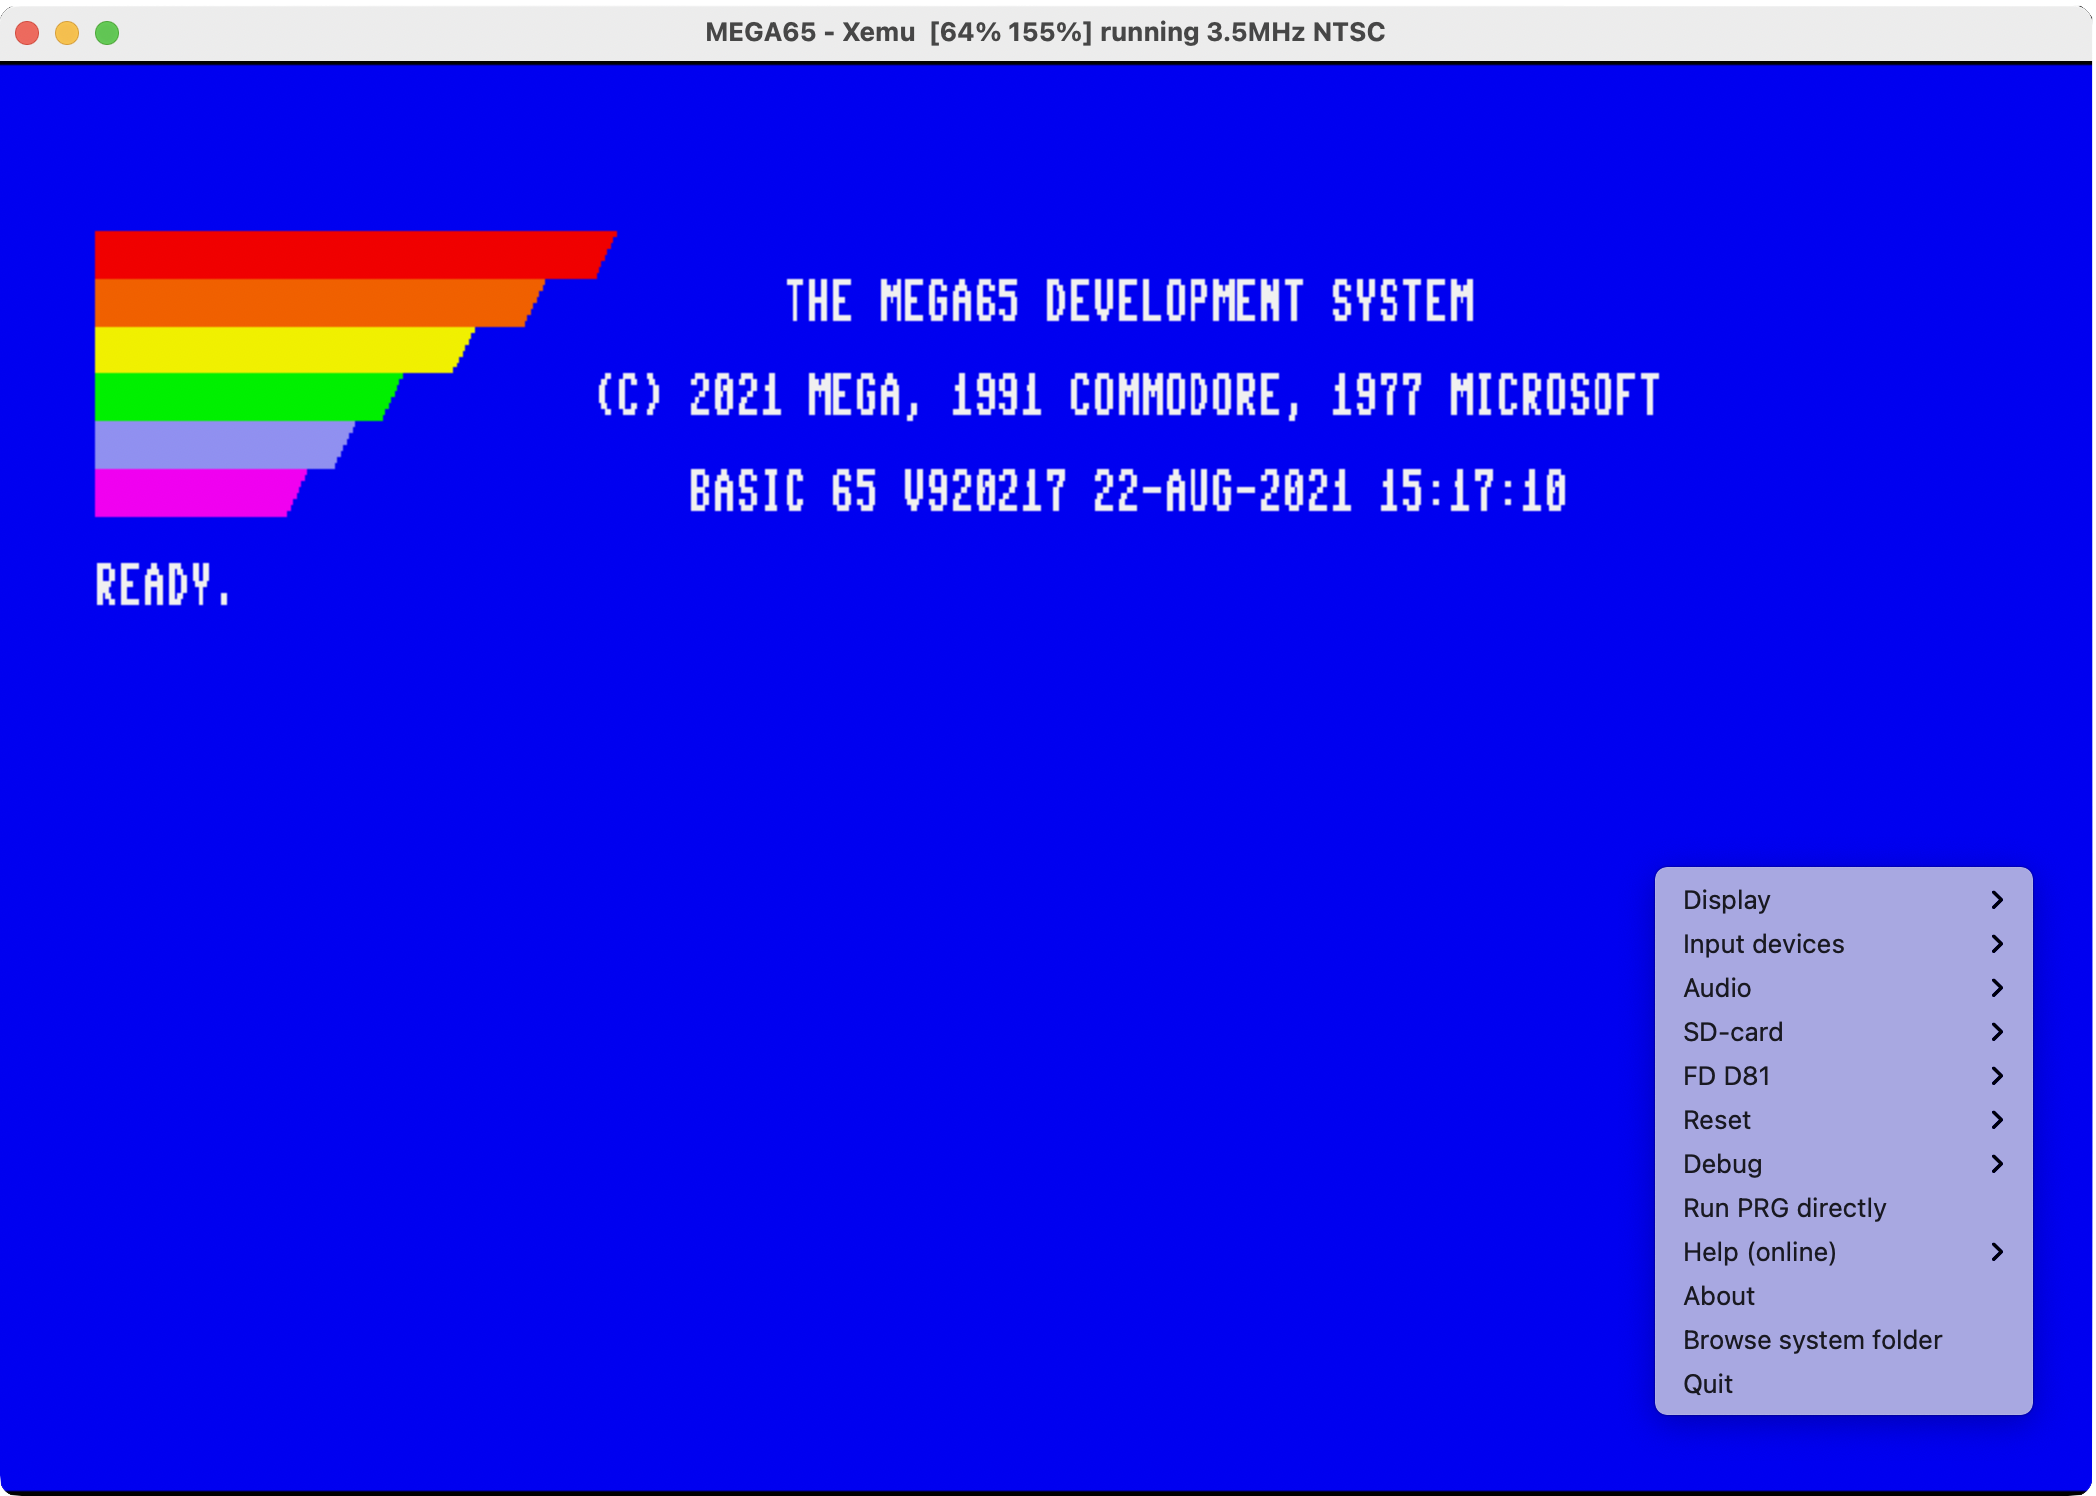
xmega65 Menus
On the Mac, xmega65 does not place options on the Apple menu bar. Instead, you access menus with a right-click of a mouse or two-finger tap on a trackpad as shown in the image below:
Commodore 64 Mode
While MEGA65 mode may be what you see first, lurking in the code is a full function Commodore 64 emulator. Use the steps below to access C64 mode:
- Type
GO64. xmega65 will display the prompt,ARE YOU SURE? - Type
Yand hit ⏎. xmega65 will enter C64 mode.
The C64 emulation for the MEGA65 and, subsequently, xmega65 is not fully baked. This mode is good for BASIC; however, you will run into compatibility issues with games and software. This will get better with time.
Function Keys
The xmega65 function keys perform the functions shown in the table below:
| F-Key | Function |
|---|---|
F1 |
Switch between 40/80 Column mode |
F2 |
N/A |
F3 |
List the DIRECTORY of disk |
F4 |
DIR "*=PRJ" lists .PRJ files on disk |
F5 |
Move left one word |
F6 |
KEY6 |
F7 |
Move right one word |
F8 |
Enter the machine language MONITOR |
F9 |
Exits xmega65 |
F10 |
Reset xmega65 |
F11 |
Full-screen mode |
F12 |
N/A |
I use F1 and F3 the most. I find I like the original 40 character screen width and F3 is in my muscle memory from my Commodore Plus/4 series.
Load Software
There are several ways you can load and run software. This section will cover the most common methods.
Use the default .d81 disk image
By default, a blank .d81 file is mounted to xmega65. You can mount others and we will do this later; however, let’s play with the default.
- Type
DIRand⏎. The empty default directory will display and the disk image as the name “????”. - Type
HEADER "RETROCOMBS",I65" and⏎to reformat the default image with the nameRETROCOMBS` or change this to what you would like the name to be. The screen will blank as it formats the virtual disk image. The screen returns when the format is complete. - Type
DIRand⏎. The directory will display the disk image with the new name. You can now use theDSAVEandDLOADcommands to store BASIC programs.
You may wonder where this .d81 disk image is stored? This is helpful information if you decide to use this image for development and want to transfer the contents to the SD card of a physical MEGA65. You can mount another .d81 for this same scenario and we will cover that next; however, identifying this .d81 image location will help your understanding of how xmega65 works.
Remember the symbolic link we created earlier? Double-click it and you will see the directory listing again. In that listing is a file with the name mega65.img. Because the Mac can mount .img files, double-click it. It will mount and locate the image on the desktop. Double-click and you will see the files shown in the image below:
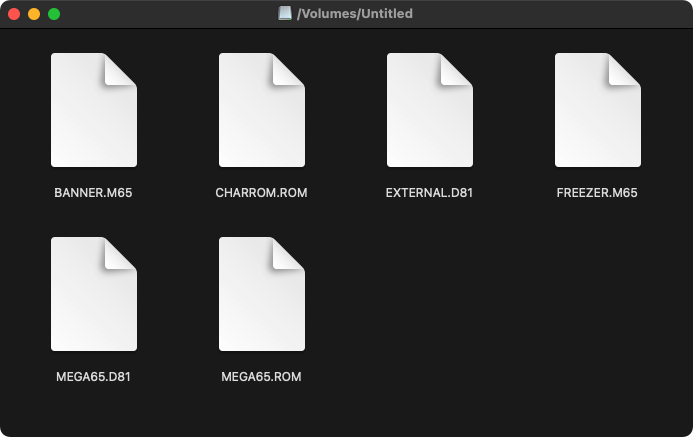
The content of this disk image mirrors what you find on the SD card for a physical MEGA65. With the image mounted, you can change the contents. I do not recommend this until you know what you are doing. It is easier to manage .d81 images external to the image file. So which .d81 files is the default for xmega65?
In the image above, the default .d81 file is named; MEGA65.D81. Were you expecting it to be named RETROCOMBS? Remember, the format name stored inside the emulated file. The Mac (or Linux/Windows) OS side is unique. Don’t rename the OS side file name (MEGA65.D81) or xmega65 will not find it. This is the required default name (and the same holds true for the physical MEGA65).
After you’ve explored, and not changed, the disk image; eject it from the Mac. Until you have more familiarity with this disk image, I recommend you forget all about it. Noodling around with it will corrupt your installation, causing you to be MEGA65-less. And who wants that?
Mount a .d81 disk image
You can use other disk images and easily mounting. You can use the menus or you can drag-and-drop the image onto the xmega65 window.
When you drag a disk image on the xmega65 window, you will see the dialog box below. For a disk image, select the MOUNT as D81 option.

After you make a selection, use the DIR command to view the contents of the image. If you want two disk images mounted in devices 8 and 9, use the menus to select both disk images using the Finder.
NOTE: The drag-and-drop function works for both MEGA65 and C64 modes. This is a feature of xmega65 and not the emulated device ROMs.
Drag and drop .PRG files
Sometimes you locate a program file not on a disk image but in a .PRG file. You do not need to create a disk image, move this file to the image, and then mount the image. Running a .PRG file is as simple as drag-and-drop the file onto the xmega65 window. The xmega65 dialog box below will appear:
For a .PRG file, select the RUN/inject as PRG option. The program will load and run.
Final Thoughts
This is a great way to take the MEGA65 environment with you on the road. The keyboard mapping confuses things. After time, the muscle memory will kick in. There’s not an easy way to sync disk images and move them back and forth between xmega65 and a MEGA65. I hope that once the Ethernet port on the MEGA65 sees wide use, someone will develop a way to drop a disk image onto a cloud synced folder (such as Google Drive our Dropbox) for easy access.
Now that I know how to use xmega65, I have this nagging feeling that I should try to install this on a Linux device or Raspberry Pi. Something similar to my Combian pi/400 would be of interest as a portable device. My ultimate dream would be a bare-metal version for the Raspberry Pi 400!
The emulator is a work in progress and while you can use either an closed ROM or an open ROM, the open ROM needs much more work and the closed ROM is not yet available unless you own a Dev Kit. Please don’t ask me to share it. I enjoy being a part of the MEGA65 development community and would hate to be thrown out!
Join the Fun
You won’t want to miss that fun, so make sure you SUBSCRIBE to my YouTube channel.
Help make this series better! Post your feedback, questions, and ideas. Let’s make this a community project. For now, leave your comments and thoughts below or in the comments under the YouTube video.
Thanks for watching and please let other Commodore fans know about my MEGA65 series of posts by sharing on social media using #retroCombs.
🕹️ retroCombs, OUT!